
 To access secondary windows in the Vision 2.0 App. Click menu icon in top left corner of the app.

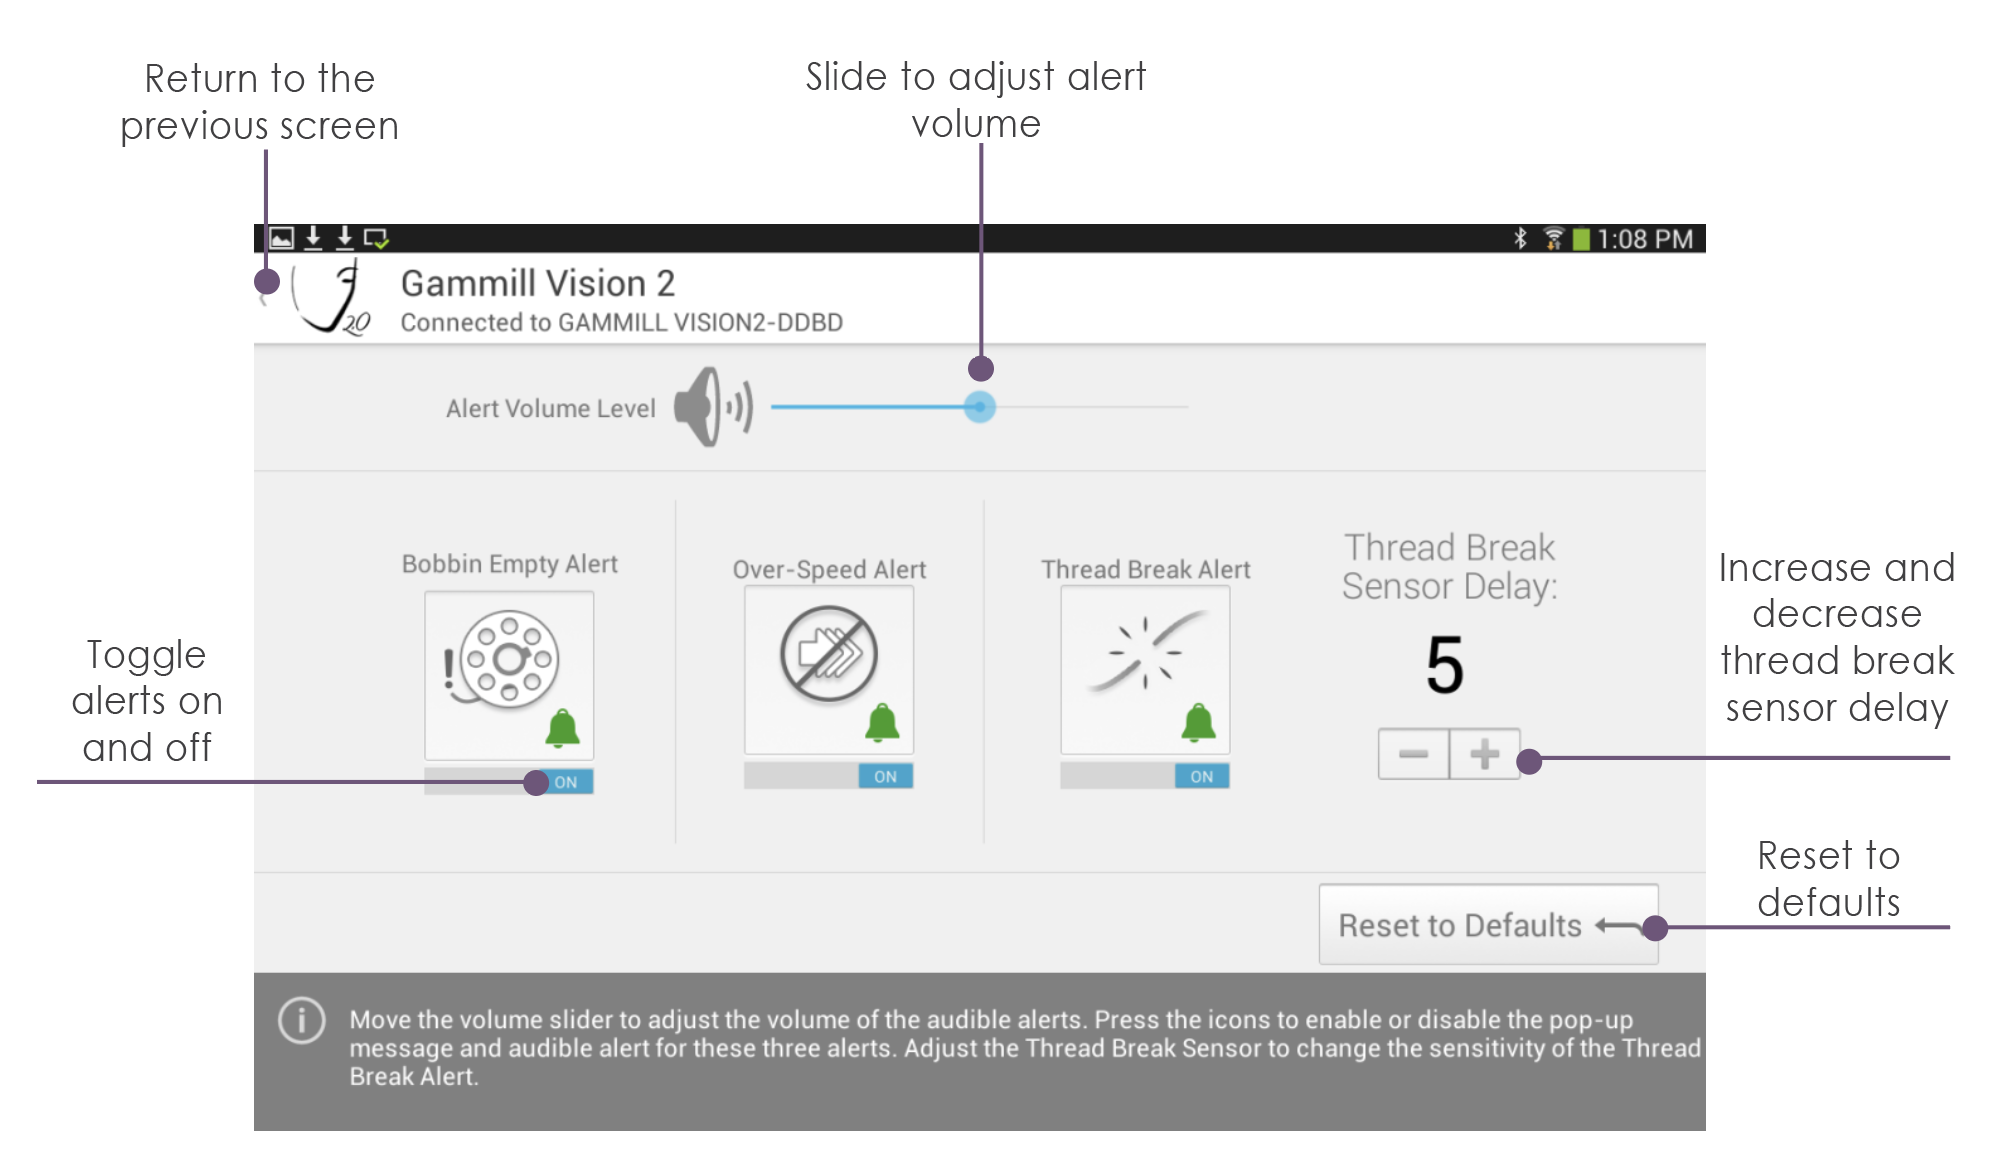
Alerts
All alerts can be adjusted or disabled according to your needs.
Alert Volume Level
To adjust the volume of alerts, drag the bubble on the slider. Dragging the slider to the left will lower the volume and dragging the slider to the right will increase the volume.
To disable an alert:
Touch an alert icon.
With each press, the alarm will toggle between on and off.
Notice the indicator below the alarm icon indicates whether it is on or off.
To adjust the Thread Break Sensor Delay:
Press the – (minus) button to decrease the delay making the sensor more sensitive.
Press the + (plus) button to increase the delay making the sensor less sensitive.
To generate a thread break alarm, the system looks at the number of stitches versus the movement of the thread break sensor. If you have false alerts when making lots of small, fast stitches or when using very fine thread, increasing this value should help alleviate these false alerts. Press the Reset to Defaults button to reset all settings on this screen to the factory defaults. To exit the screen when you are finished making changes, press the left arrow at the top left of the screen.
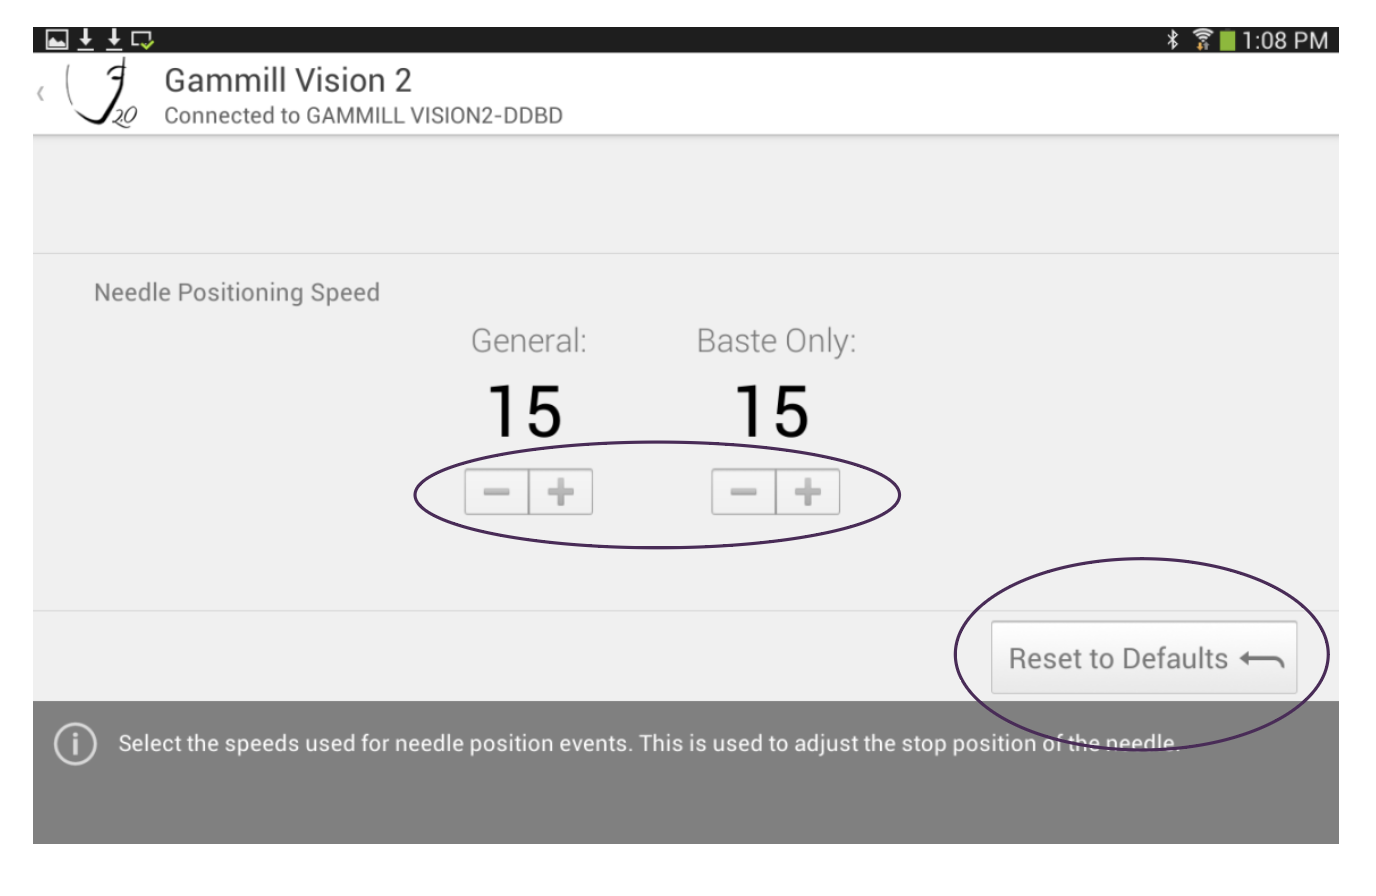
Needle Settings
Customize various aspects of the needle movement and functions by accessing the Needle Settings screen.
Adjust Needle Position Speed:
Press the + (plus) button to increase the needle to position faster.
Press the – (minus) button to adjust the needle to position slower.
Note: The General setting controls all stitching modes except basting. The Baste setting controls only the basting mode.
This is an advanced setting, and the value is normally reduced to account for wear within a machine as the machine ages. It is not recommended that you change this setting, unless directed by a Gammill technician.
Reset Defaults:
Press the Reset to Defaults button to reset all settings on this screen to the factory defaults.
To exit the screen when you are finished making changes, press the left arrow at the top left of the screen.
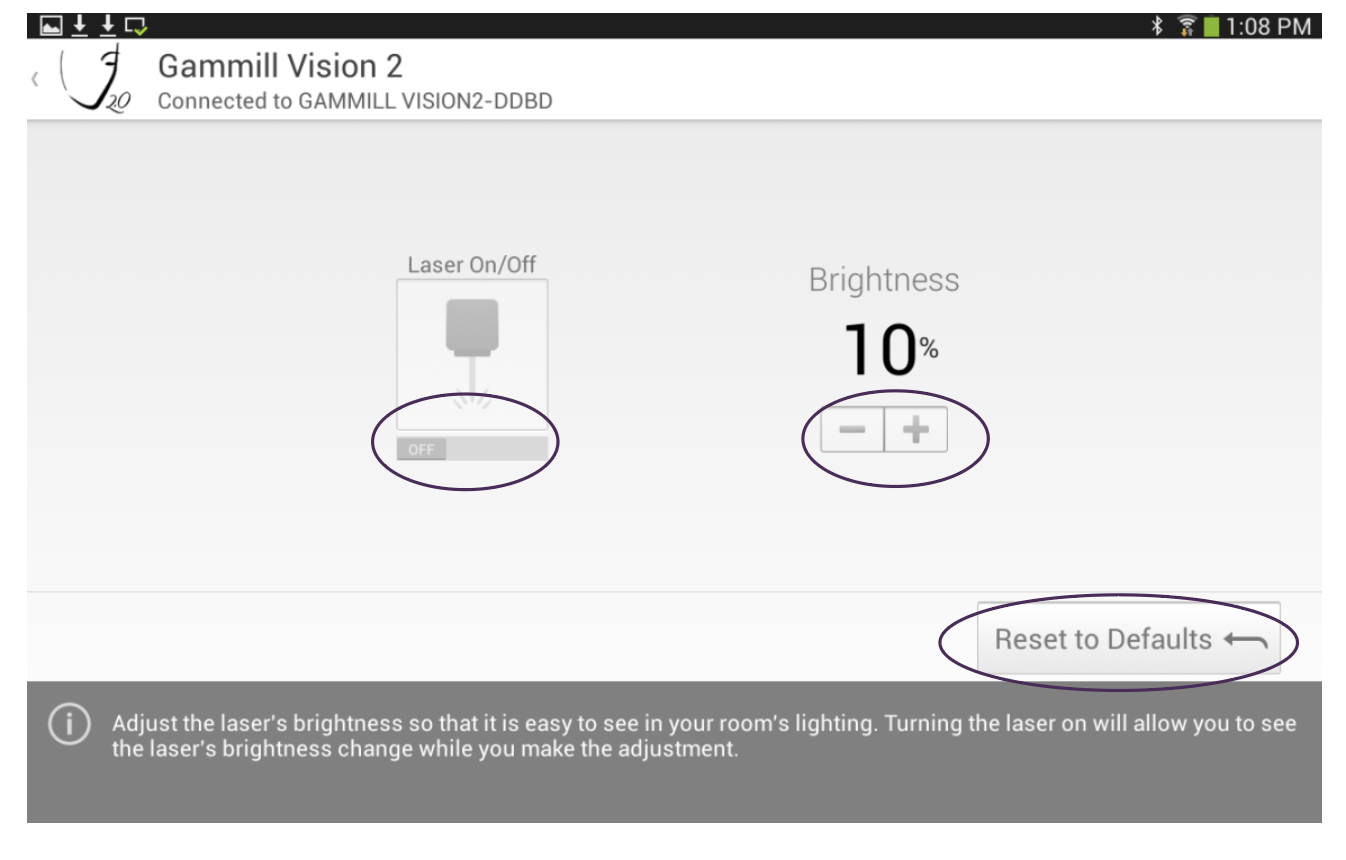
Laser Settings
Adjust the intensity of the laser to compensate for your room’s brightness as well as to change the size of the laser dot.
To turn the laser on or off:
Press the Laser On/Off button to turn the laser on.
Notice the indicator below the laser icon indicates whether it is on or off.
Press the Laser On/Off button to turn the laser off.
To adjust the laser brightness:
Press the + (plus) to increase brightness and increase the size of the laser point.
Press the – (minus) to decrease brightness and decrease the size of the laser point.
To reset defaults touch the Reset to Defaults button to reset all settings on this screen to the factory defaults.
To exit the screen when you are finished making changes, press the left arrow at the top left of the screen.
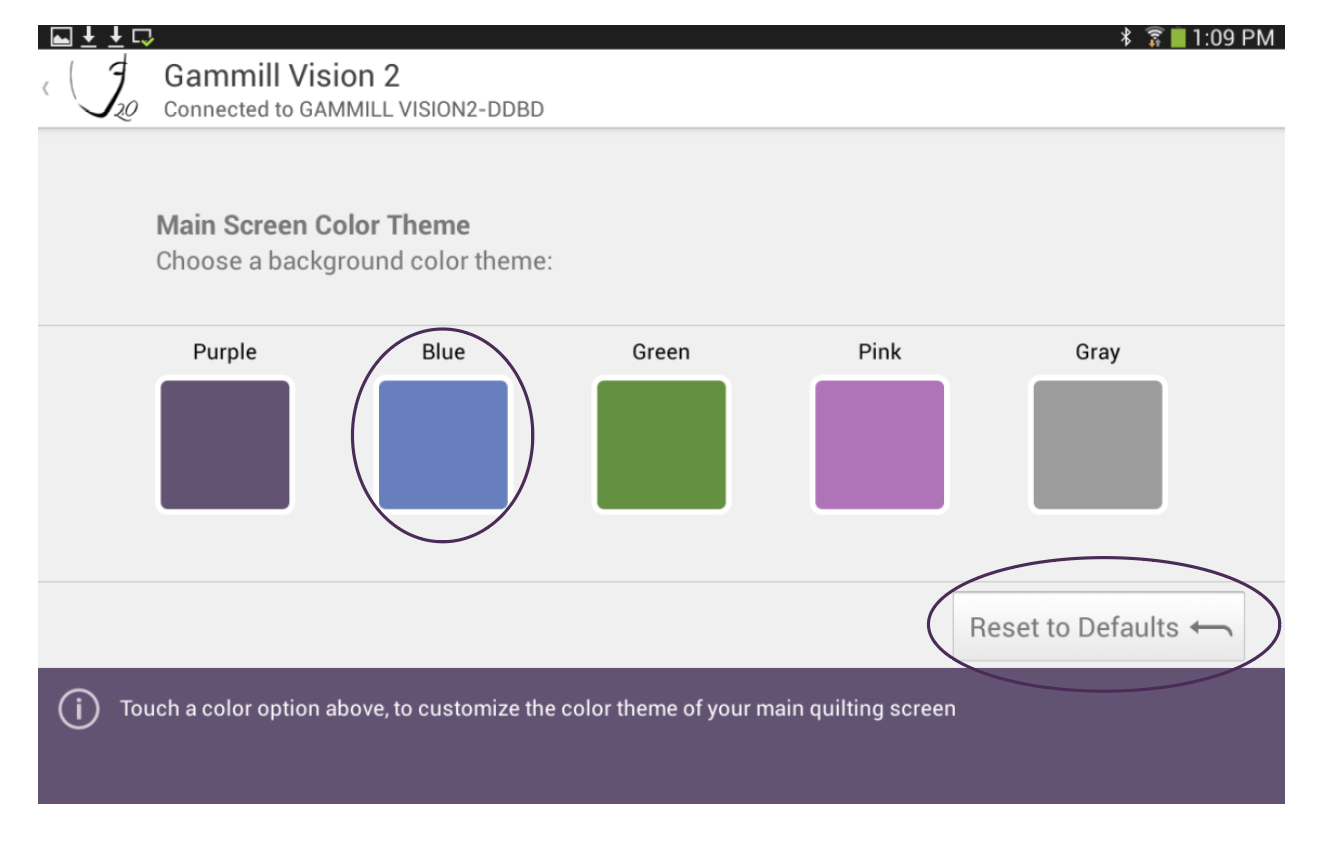
Display Settings
Select the color used on the colored bars of the main screen in the Display Settings screen.
To select a color, touch a colored box.
Touch the Reset to Defaults button to reset the main screen color to purple.
To exit the screen, press the left arrow at the top left of the screen.
Bluetooth Setup 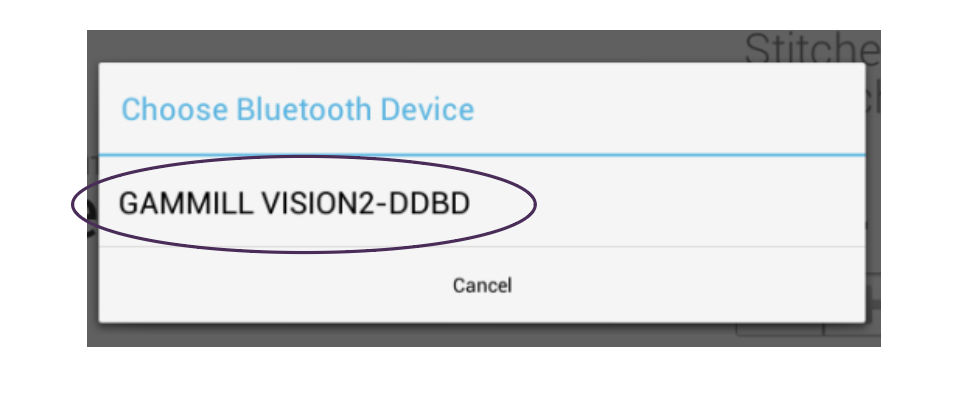
The Bluetooth Setup allows the user to connect the tablet user interface to a machine. When chosen, a popup window will appear. This popup window will display all the available machines identified by the software.
Touch the listing for the machine you want to connect to. If you have multiple machines that you could connect to, consult the address printed on the machine decal at the rear of the head to determine which address you want to connect to.
The popup window will disappear, and the user interface will be connected to the machine. When this is complete, the user interface will show the connection in the upper left corner of the screen under the machine name.