Bobbins and Bobbin Cases
Every good stitch begins with a well-wound bobbin.
Bobbin
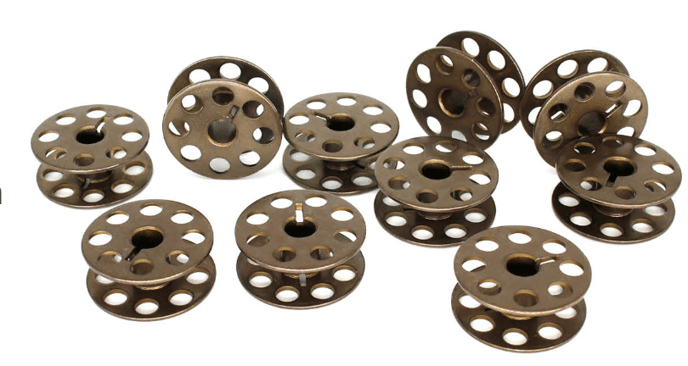
The bobbin supplies the bottom sewing thread. All Gammill quilting machines manufactured today use size “M”, the large size bobbins. Metal bobbins are filled with thread by using either the built-on bobbin winder or the Professional Bobbin Winder.
Bobbin Case 
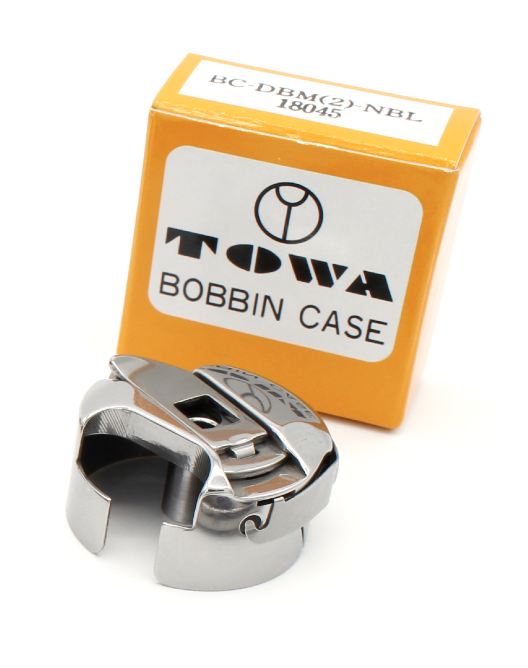
The bobbin case is removed from its shaft and the loaded bobbin is inserted inside it. The thread goes from the bobbin, through the tension slot in the bobbin case, and is caught in the top thread loop to form the stitch.
Insert the bobbin case into the hook assembly. You should hear and feel the click that indicates proper engaging of the case in the assembly. If the click is not heard, remove the bobbin case and reinsert it. An improperly inserted bobbin case can lead to broken needles, timing issues, and damaged bobbins and bobbin cases.
Bobbin Threading Order
Bobbin Case: Insert the wound bobbin into the Bobbin Case with the thread unwinding clockwise.
Slot: Slide the thread into the slot in the bobbin case.
Tension Spring & Thread Guide: Slip the thread behind the Tension Spring and out the thread guide.
Latch: Open the latch to secure the bobbin while inserting it into the hook assembly.
Hook Assembly: Place the bobbin case into the hook assembly, release the latch, and rotate to fit the hook latch tab into the notch in the hook.
Click it: Push the bobbin case into the hook assembly until it clicks.
Inserting the Bobbin Case
To Insert the Bobbin Case into the Machine:
- Use the spring-loaded handle to hold the bobbin in the case when inserting or removing the bobbin.
- Place the bobbin case into the hook assembly so the handle points in a 4:00 direction.
- Release the handle once the bobbin case is inserted into the hook assembly so you can hear it click when it is inserted fully. This guarantees you will not damage the machine by running it with the bobbin case partially inserted.
- Push the bobbin in fully so it clicks.
Video | Pulling up the Bobbin Thread
To prevent the bobbin thread from forming “rats nest” each time the stitching starts, you should bring the bobbin thread up to the top and secure it in place. Two ways to bring up the bobbin thread are described here.
At the Start of Stitching
At the beginning of the stitching both threads are loose and this is a quick way to use the top thread to bring up the bobbin thread. At the end of stitching, the threads are attached to the quilt and this method does not work.
While holding the top thread take a single stitch where you want the stitching to start.
Continue to hold the top thread and move machine 2-3 inches away then pull the top thread up which will pull the bobbin thread to the top.
Move the machine back to start position.
Grasp both threads and hold them to the side while making 4 or 5 securing stitches.
Hint: Move the head slightly when making the securing stitches to ensure you don’t stitch in the same location.
At the End of Stitching
When you reach the end of stitching and after the stitching is secured, use this method to bring up the bobbin thread to cut it.
Move the sewing head a few inches away from the stitching.
Grasp and hold the top thread then move the sewing head back to the last stitch. It isn’t necessary to go back to the precise location of the last stitch but the closer you get, the smaller the thread tail will be after it is cut.
While still holding the top thread, take a single stitch then move the sewing head a few inches away.
As you pull on the top thread the bobbin thread is pulled up as well. Cut both the top and bobbin threads at the surface of the quilt.
Bobbin Case Damage
Sometimes a bobbin case can get damaged slightly if it is dropped. If a bobbin does not rotate smoothly within the bobbin case while dispensing thread, it is most likely because the bobbin case has been bent slightly inward, restricting the bobbin’s rotation. Place a bobbin in the case and determine where the contact is causing the restriction.
Video | Cleaning the Bobbin Case

