
Before starting the assembly, lay out all of the hardware and make sure nothing is missing. If anything is missing, contact us at 417-256-5919 for assistance.
Unpack and lay out the following components:

Tool Note: A 7/16” wrench or a 7/16” socket with ratchet is required for assembly.
|
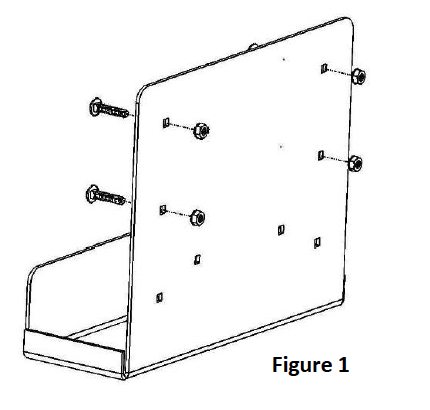
STEP 1: Secure the carriage bolts to the computer mount using the Keps nuts. (See Figure 1) Note: The carriage bolts can be attached in different places to accommodate different tables or locations. |
 |
|
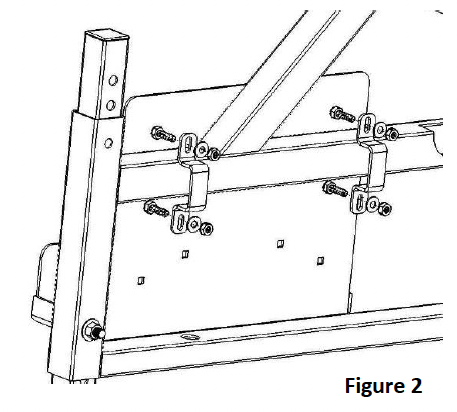
STEP 2: Attach the computer mount to the table using the clamp brackets, flat washers and Keps nuts. (See Figure 2) |
 |