
Pattern Handles Defined
Pattern handles are the boxes and wedge shapes that appear on the edges of your selected pattern. These handles can be used to move and resize your pattern.
VIDEO | Pattern Handles
Pattern Resizing
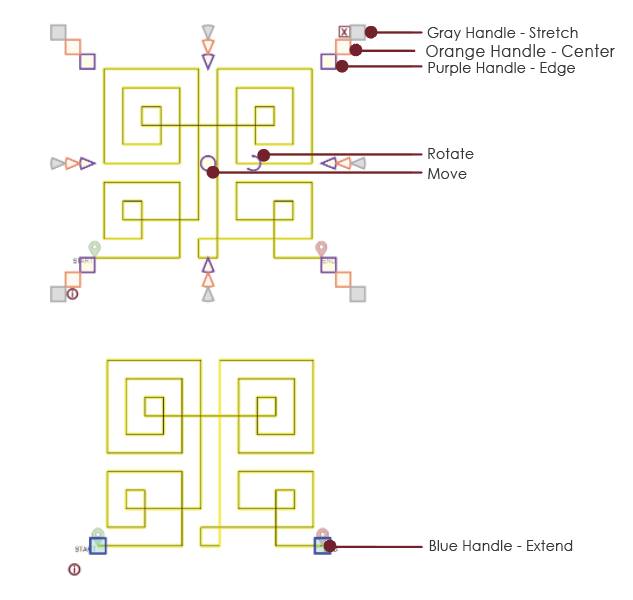
Resizing is often done with the handles. The type of handle used will determine how the pattern will change when it is resized. Once a pattern is selected, it can be made wider (using the wedge shaped handles on the sides), made taller (by using the wedge shaped handles on the top/bottom), moved (by dragging the center circle with the mouse), rotated (by moving the curved arrow near the center), deleted (by clicking on the “X” in the upper right corner) or enlarged or shrunk with a maintained aspect (by using the corner square handles). Most pattern selection handles have anchors, which hold the pattern in place at one point, while allowing the pattern to be changed elsewhere. It is a good idea to become comfortable with the visual method of pattern manipulation.
Accessing Handles
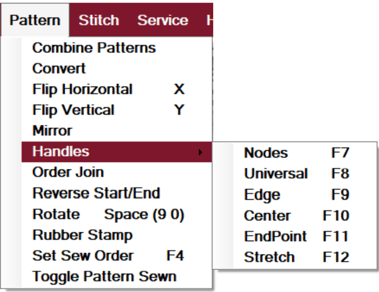
Select a pattern by clicking or tapping it. Selected patterns will be highlighted in yellow on the CAD screen and will have handles around them. To change the handle type, double-click. Continue cycling through the handles until you reach the handle you wish to use. Or, you can also click the Cycle Handles icon to cycle through the types, until you find the pattern anchor you need. There are also keyboard shortcuts assigned to each handle type.
- F7 -- Nodes
- F8 -- Universal handle (purple, grey and orange)
- F9 -- Edge anchor/ Purple handle
- F10 -- Center anchor/Orange handle
- F11 -- Endpoint anchor/Blue handle
| F7 | Node View |
A selected pattern is shown with nodes, allowing the nodes to be modified with the mouse. |
| F8 |
Universal Pattern Anchor |
Changes the Pattern Selection Handles to Universal. |
| F9 |
Edge Pattern Anchor |
Changes the Pattern Selection Handles to Edge. |
| F10 |
Center Pattern Anchor |
Change Pattern Selection Handles to Center. |
| F11 |
Endpoint Pattern Anchor |
Change Pattern Selection Handles to Endpoint |
| F12 |
Stretch Pattern Anchor |
Change Pattern Selection Handles to Stretch. |
Handle Types
- Nodes are not handles but are a method for adjusting patterns so this option is listed with the handle types. Nodes are covered in detail below.
- Edge Handles are purple. When the these are used, the opposite edge will stayed anchored.
- Center Handles are orange. When the these are used, the center will stay anchored.
- Stretch handles are gray and will stretch the pattern as you drag the handle.
- Endpoint or Extend Handles are the blue squares at the start point and endpoint of a pattern.
Hold down the control key (Ctrl) to make the handles disappear temporarily.
Nodes
VIDEO | Nodes Preview
Nodes Defined
Nodes are an integral part of every pattern and can be displayed when needed. Nodes allow us to adjust small segments of a pattern design.
How to View Nodes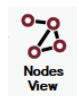
View Nodes by selecting a pattern and doing one of the following:
- Choose the Nodes View icon
- Cycle through the handles by double clicking
- Use the Cycle Handles Icon
- Use the shortcut key F7
- Choose Nodes from the Handle Selection options in the Pattern dropdown menu
Pink (Endpoint) Nodes
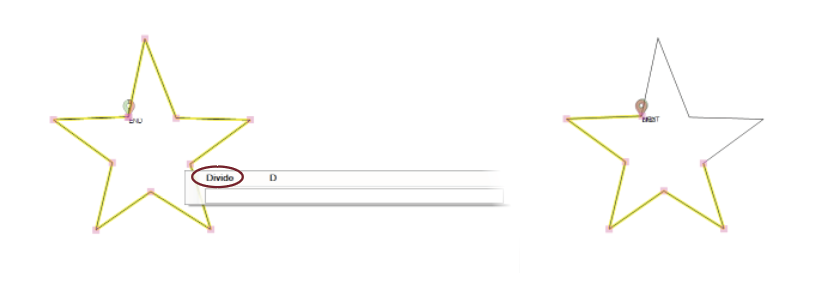
Endpoint Nodes are pink squares. The beginning and ending of each pattern segment is an endpoint node. Two contiguous segments share a node. The ending node of the first segment is the beginning node of the next segment. When a pattern is divided, it is at a pink node. To adjust a pattern using the nodes, click the node and drag it to the desired location. This can be helpful for making small adjustments to patterns to fill a boundary.

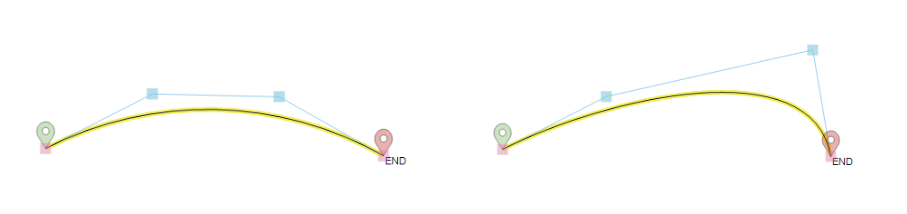
Blue (Arc) Nodes
Arc Nodes are blue squares. When an arc node is moved, the curvature between the pink squares changes. Straight line segments may not have blue nodes.
Dividing a Pattern Using Nodes
To divide the pattern, right-click on the node and click divide.
Designer Nodes
VIDEO | Designer Nodes
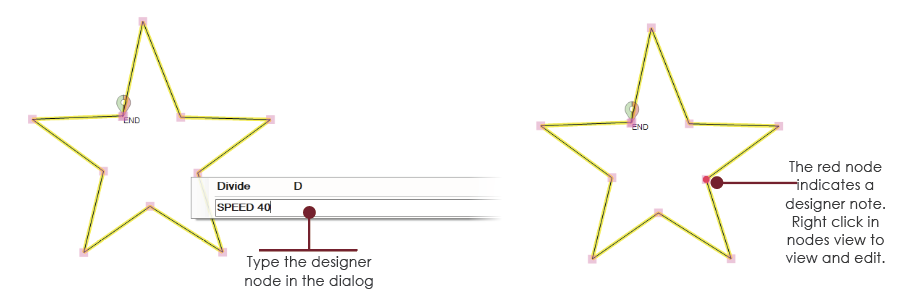
Designer Nodes are a special type of node that allows changes to the stitching settings of the pattern. They can be used to change the stitch length (SPI), the stitching speed, or can force a pause in the stitching process, perhaps to allow a thread color change. To create a designer node, right-click a pink node, as above, and type one of the keywords below.
There are three keywords and they must be typed in CAPITAL letters. The keywords are PAUSE, SPEED, and SPI. Right-click a pink node to see the dialog box. Enter the designer node and then press enter. A red dot indicates a designer node exists.
nnn = a percentage of the original setting
- PAUSE will force a pause in the stitching, and can display a message on the screen.
- SPEED nnn will change the stitching speed by a percentage (nnn <100 slows the speed, nnn =100 resets the speed to the original number, nnn > 100 increases the speed).
- SPI nnn will change the stitches per inch, by a percentage. (nnn <100 makes smaller stitches, nnn >100 makes larger stitches.
Dividing a pattern that has Designer Nodes will remove those nodes, so be careful to do all the structural pattern changes first, and add the designer nodes last.