
VIDEO | Draw Pattern
Draw Pattern will move one or more patterns to the screen, placing them precisely, based on click points the quilter chooses, using the mouse or the stitcher. You must use a Point to Point (P2P) Pattern with the Draw Pattern feature.
What is a Point to Point (P2P) Pattern?
VIDEO | Draw Pattern P2P Preview
A Point to Point or P2P pattern is a pattern with a start point on the left and an end point on the right. Both points are on the same horizontal line or plane. If you try to use Draw Pattern with a design that is not a P2P you will receive an error message. In the example on the right, the maroon circles indicate the start on the left and the end on the right. The maroon line represents the horizontal plane that the two points share.
Draw Pattern will create a series or line of continuously stitching designs.
How to Draw Pattern
| Select a P2P pattern in the Project Tab. If you wish, resize the pattern in Pattern Properties. You can also change the Aspect Ratio to OFF in order to control the height of the patterns placed on the screen. With Aspect Ration ON, the pattern ratio will remain as designed when patterns are placed despite the height you assign the pattern. | 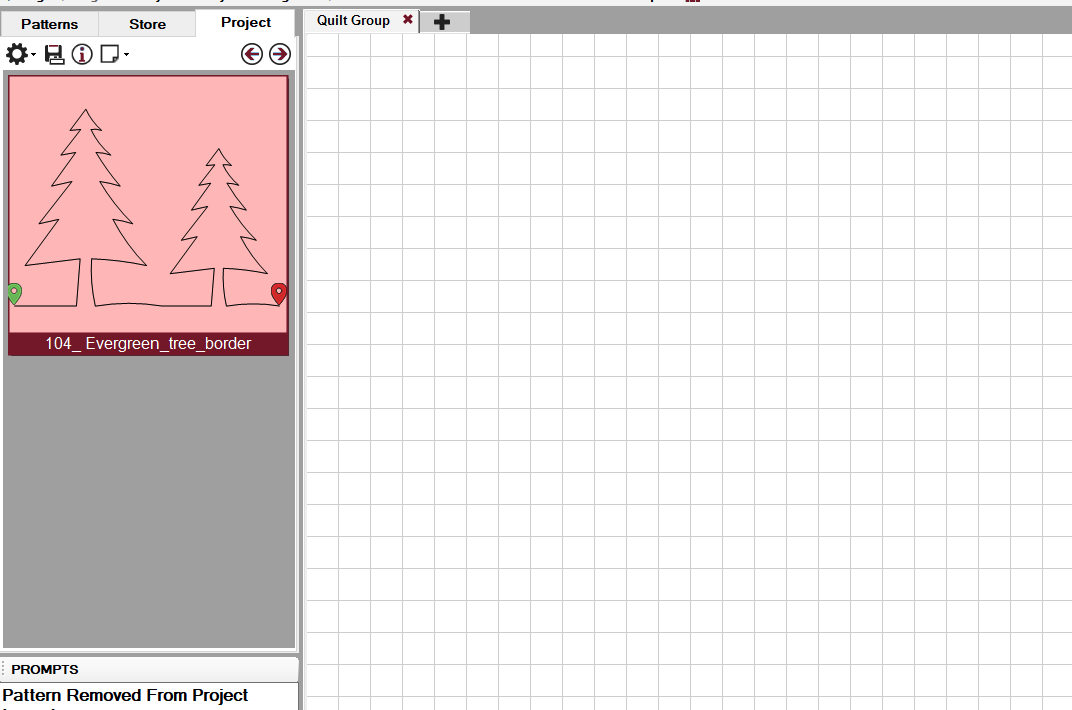 |
|
Initiate Draw Pattern by using one of the following:
|
 . .  |
|
Identify 2 points that define the start point and end point of the first pattern using the stitcher or the mouse. This is a sewable pattern that appears on the Preview Area. Using Grid Snap can aid in placing patterns with the mouse on screen. |
 |
| Continue using as many click points as needed to create the series of continuous designs. The end of one pattern automatically becomes the start of the next pattern. | 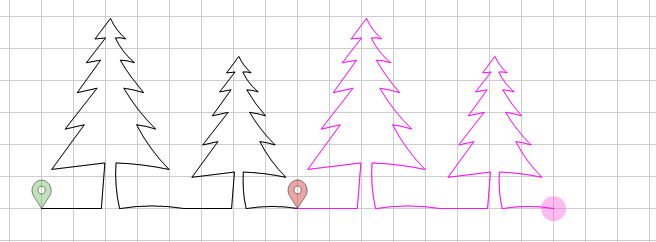 |
|
The size of the pattern will depend on your click points. Complete the current drawing by doing one of these:
Continue to make as many drawings as needed. Exit Draw Line by using one of the following:
|
 |
Concatenating Using Draw Pattern
It is possible to concatenate P2P patterns for this draw process. Be sure the P2P patterns are included in the project, and their aspect ratio is set (on or off). Select the first pattern, then hold down the Ctrl key while selecting additional patterns. They will stitch out in the same sequence used to select them.

Draw Pattern Examples |
|
|
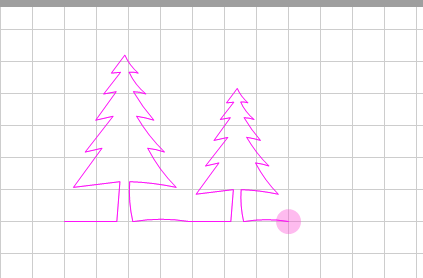
The amount of space you put between clicks will determine the size of your pattern. A preview appears in pink allowing you to adjust the pattern size and space before clicking. |
 |
|
Use the grid and the snaps to evenly place patterns in uniform designs when placing pattern with the mouse. |
 |
|
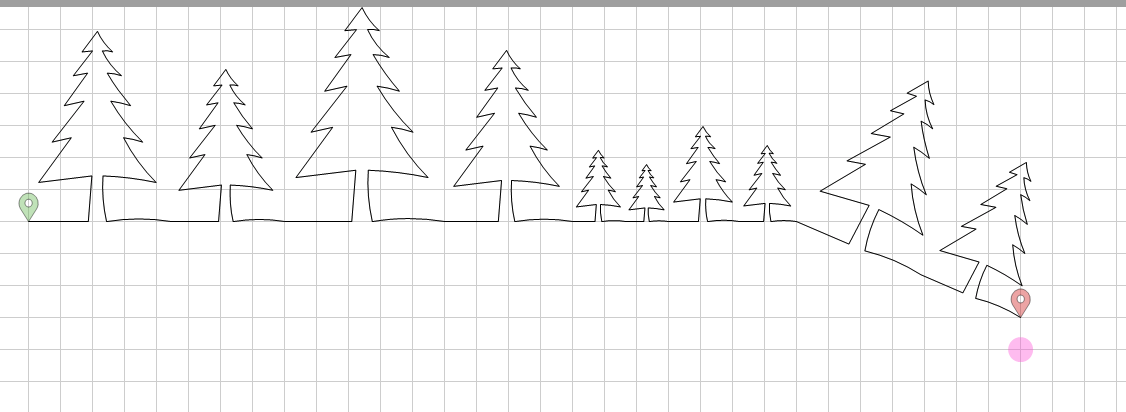
Continue clicking in a row or change direction. The end of one pattern automatically becomes the start of the next pattern. |
 |
|
In this example, we clicked an exterior frame and then clicked in reverse in the interior to make an interesting design that will stitch continuously. |
 |