
Trim defines a space and masks it. If Trim Inside has been selected, the pattern does not stitch in the masked area. If Trim Outside has been selected, the pattern only stitches inside the masked area.
 |
 |
For example, using an inside trim can prevent the top row of patterns from stitching past the top edge of the quilt or to protect an appliqué shape.
There will be tieoffs or jump stitches every place the pattern meets the trim outline.
You can create a trim on the screen with the mouse or on the quilt using the machine head.
VIDEO | Draw Trim
Trim vs Fill
With Trim, there will be tieoffs or jump stitches every place the pattern meets the trim outline.
Fill modifies the underlying pattern so that the pattern will continue to stitch along the edge of the boundary rather than have a jump stitch.
Trim Inside and Trim Outside
C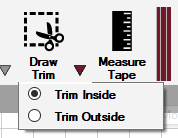 lick the carat (little triangle) next to Draw Trim icon to select from Trim Inside or Trim Outside.
- If Trim Inside has been selected, the pattern does not stitch in the masked area.
- If Trim Outside has been selected, the pattern only stitches in the masked area.
There will be tieoffs or jump stitches every place the pattern meets the trim outline. Trims don’t alter the original patterns, they just prevent the pattern from stitching. For example, using an inside trim can prevent the top row of patterns from stitching past the top edge of the quilt or to protect an appliqué shape.
How to Draw a Trim
When you are ready to draw your trim, initiate Draw Trim by selecting the icon, selecting Draw Trim from the CAD right-click menu, from the drop-down Draw menu, or by using the machine head keypad to mode to Draw Trim.
- Using the mouse, click the left mouse button to identify a series of at least three points and then right-click the last point to complete the trim outline. Right-click a second time to exit Draw mode.
- Using the machine head, move the stitcher to the initial point and press the Select button on the keypad (either one will work). Continue to move the machine and press Select until the boundary is defined. Press Close Drawing button to finish the boundary. Continue to define more boundaries if needed. Press Exit Drawing to stop the process.
Convert to Trim
A Trim Outline can start as a pattern or boundary and then be converted to a Trim. The benefit is being able to audition the pattern placement so it fits the space. To convert a pattern or boundary to trim, right-click on the pattern, click Convert and then select Pattern to Trim or Boundary to Trim.

Trim Examples and Uses |
|
|
Trim Inside can be used at the bottom of an edge to edge setup to prevent the pattern from stitching past the end of the quilt. A trim could also be placed at the top of a nested pattern to prevent stitches from going above the fabric onto the leader if needed. |
 |
|
Trim inside can be used to prevent a background pattern from stitching over the applique. Use the machine head to mark points around the applique. Keep click points close together to simulate curves. |
 |
|
Trim Inside with the stitcher to click the points along the appliqué. When done, look closely at the remaining pattern to see if little bits can be removed by adding additional trims. |
 |
|
A Trim Outside can be used to quilt in one specific area of your quilt. In this Trim Outside example, only the design contained inside the Trim outline will stitch. No other patterns are allowed on the CAD for this quilt group. Only one Trim Outside is allowed in any quilt group. |
 |