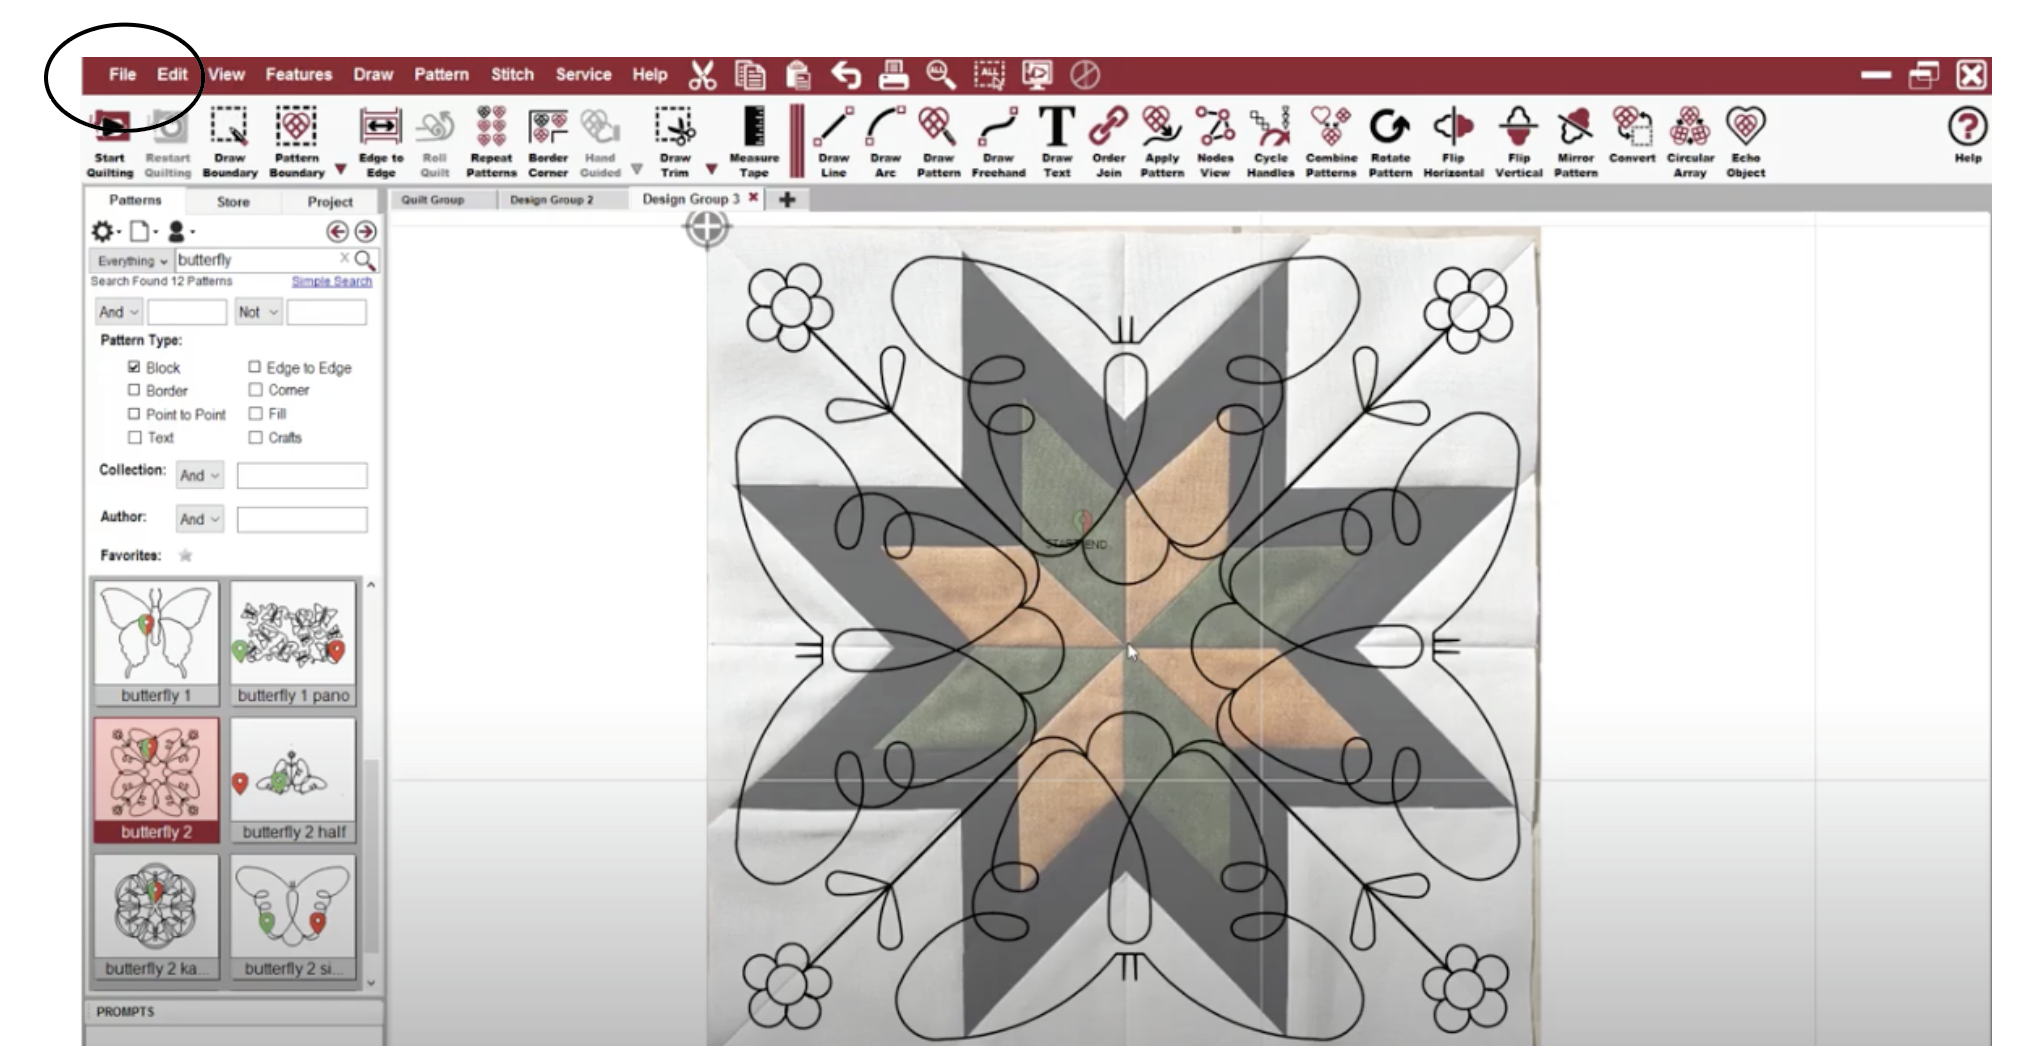
Import Image
Import image allows you to audition patterns and projects on a photo of your quilt or a similar quilt. CS only allows one image on the design group at a time, so choose several patterns to audition them one at a time.
VIDEO | Import Image
VIDEO | Design Group Preview
To import, click or tap on the command File, and choose Import Image. CS provides some images in a designated folder on the computer (C:\StatlerStitcher\Images). This file contains images of numerous quilt blocks for you to use. However, you may also import any jpeg image on the computer. This means you can take a photo of your quilt block, transfer it to the computer and import it to CreativeStudio.
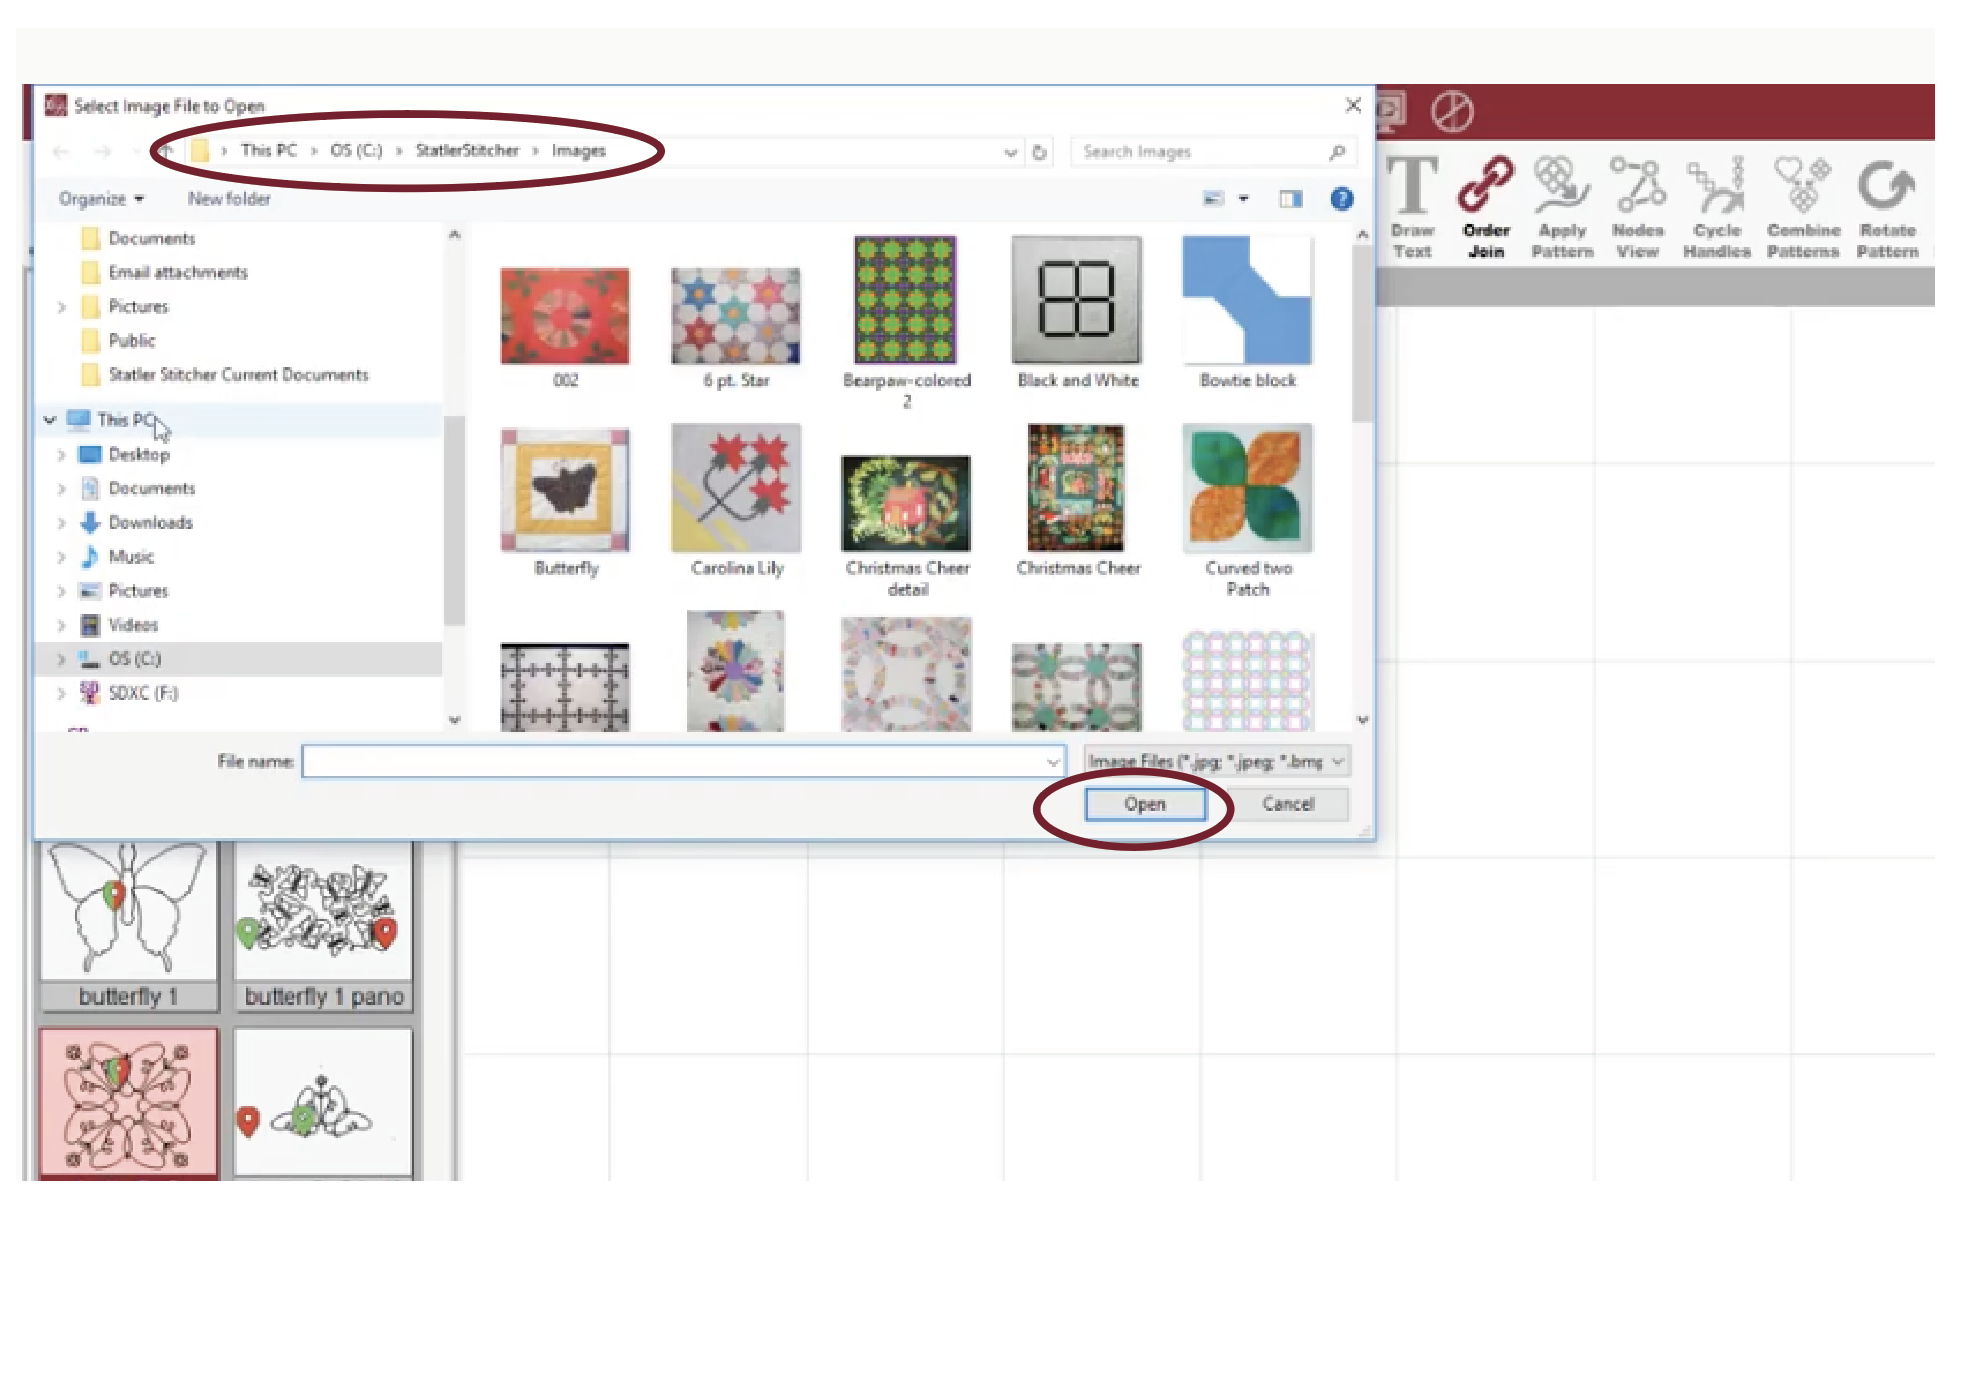
Select an image by double-clicking it, or clicking the Open button. CS creates a Design Group (a special type of quilt group, for auditioning images) for each imported image. Photos can’t be resized after importing them but the image characteristics (color filters and opacity) can be modified enough to allow patterns to be auditioned easily.
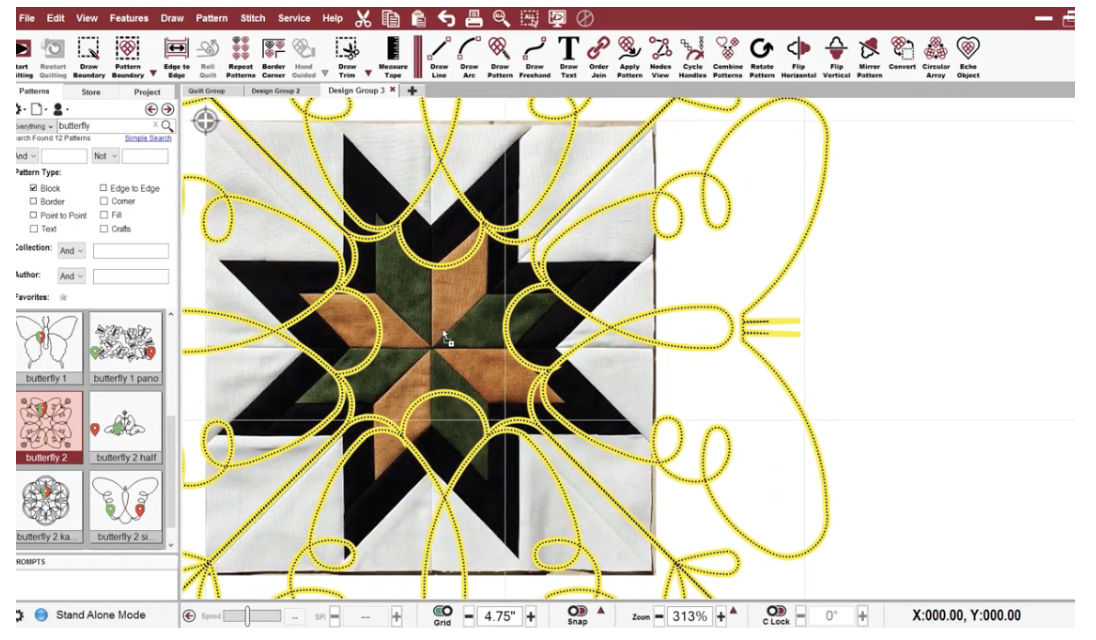
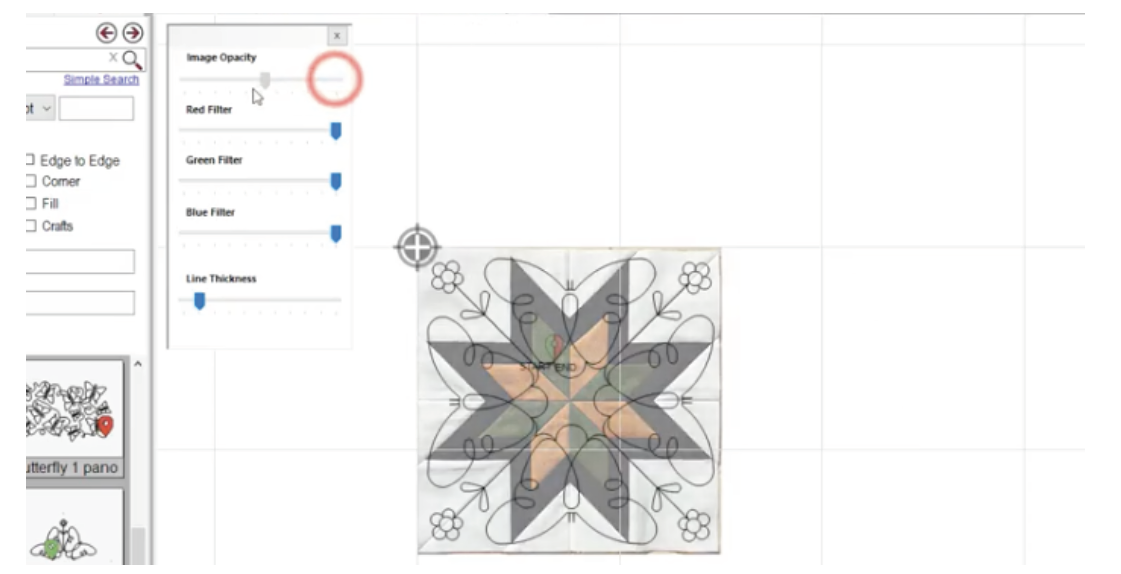
A Design Group is created for every imported image. Patterns can be resized to fit on the photo. To adjust the attributes of the image in order to view the pattern more easily, right-click in an open space in the CAD screen and select Image Attributes feature. Only 1 image can be present in any design group.
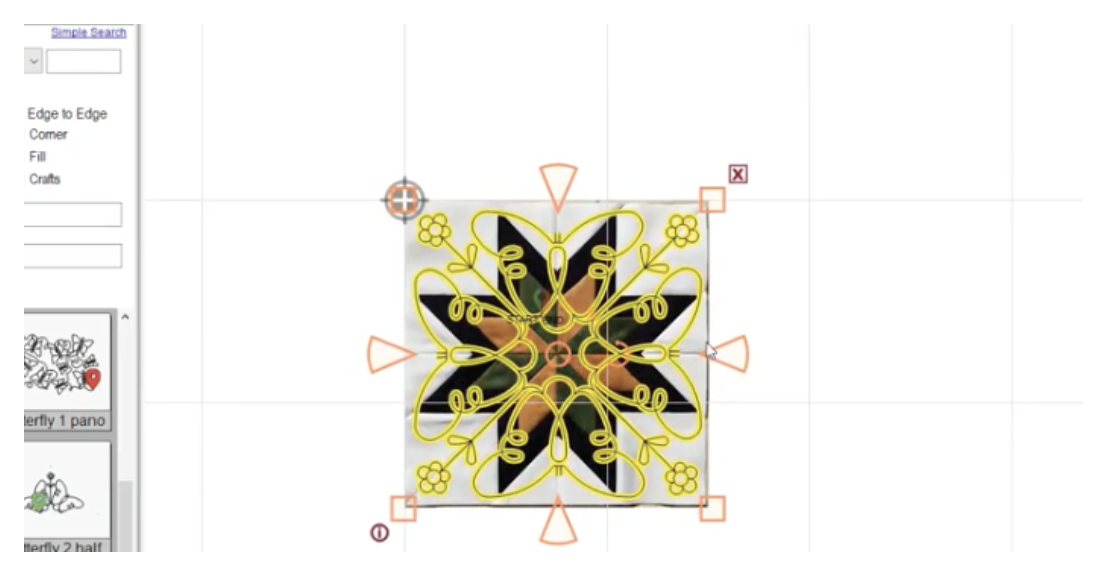
Image Attributes
- Image Opacity will tone down bright, high contrast fabrics.
- Red, Green and Blue color filters will reduce the intensity of that color.
- Line Thickness refers to the patterns or boundaries, not the image, and sometimes needs to be increased so the block and design can be matched more easily. Both boundary lines and pattern lines will become thicker as the Line Thickness slider is moved farther to the right.
Export Image
VIDEO | Export Image
When an image is exported, a screen print of the CAD area is taken, so adjust the zoom perspective to fill the space first. This allows you to see the details and not include empty white space. When you have the right perspective, it is possible to print immediately using the print command, or export the image to get a digital copy of it.
To export an image, click or tap on the command File, and then choose Export Image. Navigate to the desired file destination and choose Save.
When a hard copy is needed instead of a .jpg file, use the Print Command under the File menu.