
Hand Guided
VIDEO | Hand Guided
Hand Guided Modes
Hand guided sewing does not follow an automated pattern. The stitch path is determined by the quilter’s motion, and the stitching attributes are based on the style chosen. There are three hand guided modes in CreativeStudio:
- Regulated
- Constant
- Baste
|
Regulated means the stitch regulator is engaged, so the SPI (stitches per inch) is precise. While in Regulated mode, you will use the SPI setting on the CAD screen to change the stitch length. |
 |
|
Constant means the stitch regulator is not engaged and the stitch length is controlled entirely by the speed of the movement of the sewing head. Constant speed is often used for microstitching when tiny stitches are desirable. While in Constant mode, you will use the Speed setting on the CAD screen to change the speed setting at which the needle moves. |
 |
|
Baste is a special type of regulated stitch that produces very large stitches. The stitch size is measured in inches-per-stitch in stead of stitches-per-inch and is commonly used when squaring and stabilizing a quilt. When in Baste mode, you will use the SPI setting on the CAD screen to change the stitch length. More information about Baste is below. |
 |
Initiating Hand Guided Quilting
| Select Regulated, Constant or Baste from the dropdown Stitch commands menu. | 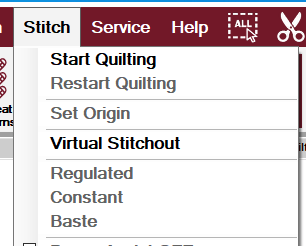 |
| Use the Hand Guided icon and select Regulated, Constant or Baste. | 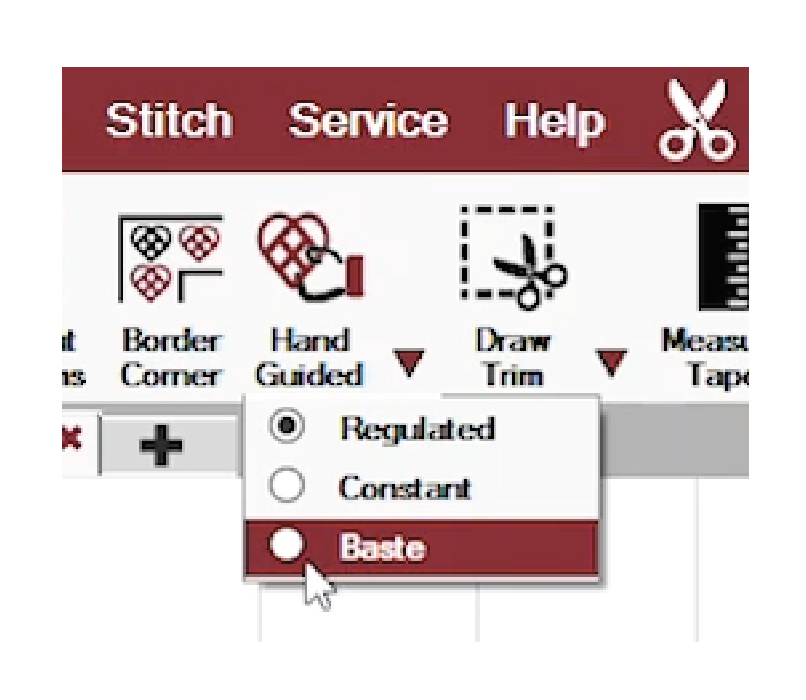 |
| Choose the toolstrip icon for Regulated Sewing, Constant Speed or Baste Sewing. |
|

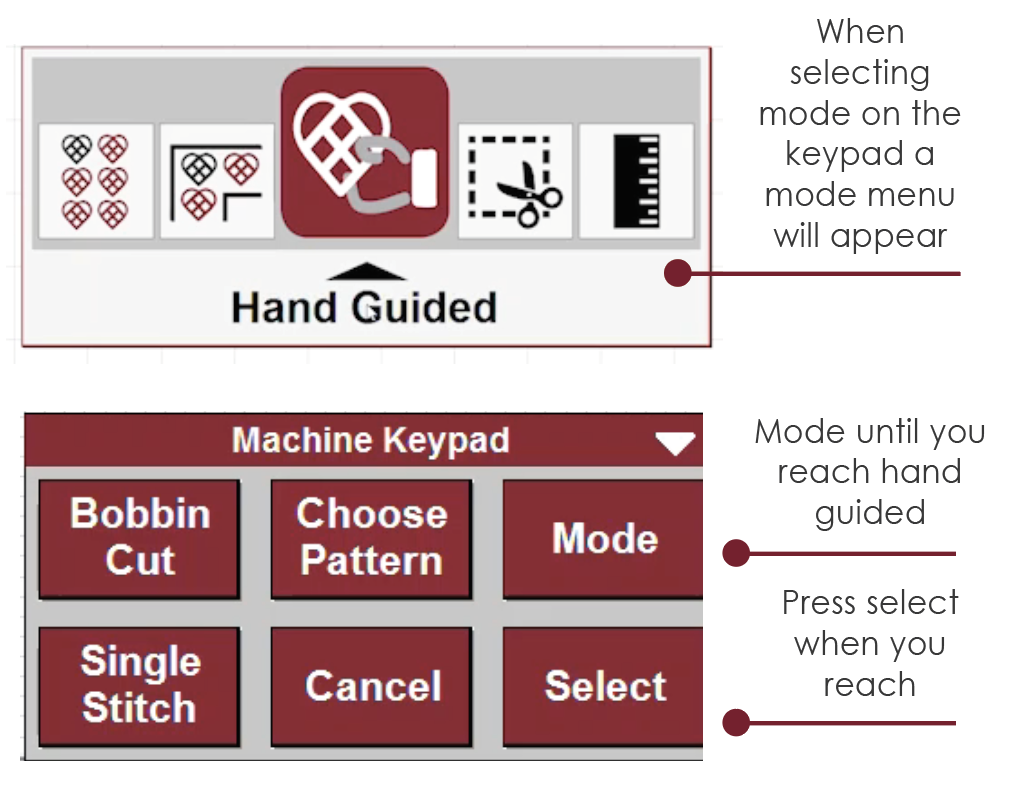
You can use the six-button keypad on the machine head to mode to the hand guided icon of your choice. Tap the Mode button to mode until you reach your selection and then press Select. The keypad will change to reflect the hand guided quilting tools.
Introduction to Hand Guided Settings and Options
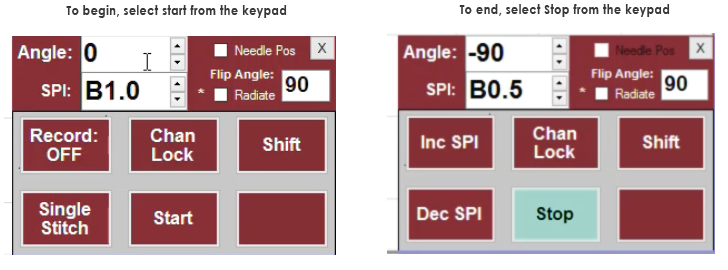
Once a hand guided mode has been initiated the keypad will display options and be used throughout the stitching process.

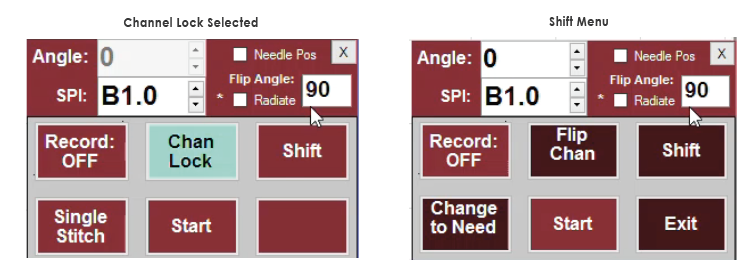
- Chan Lock engages channel lock. More information about using Channel Lock is below.
- Angle is used with channel lock and determines the angle of the stitching path and can be changed using the up/down arrows or by entering a numeric value. Channel lock angle can be flipped using the Shift > Flip Chan option seen below.
- Needle Pos is the needle positioner. Normally the needle is in the 'up' position and a using the Single Stitch button initiates one complete single stitch. When the needle positioner is engaged, the Single Stitch button takes a half stitch, allowing the needle to stop in the 'Down' position. Any time the needle is in the down position when a line of stitching starts, the needle will return to the down position when the stitching stops.
- Flip Angle is used to change the Channel Lock angle to the number shown. It works by holding the Shift key down first, then pressing Flip Chan. This is most useful when changing the angle to or from Horizontal (0 degrees) and Vertical (90 degrees).
- Radiate is used to change the Channel Lock angle. It adds to the Angle, rather than replacing it. If Radiate were checked, and the Flip angle was 10, each time the Flip Chan was pressed (using the Shift key first), the Channel lock angle would be increased by 10 degrees, not changed to 10 degrees. This makes stitching radiating lines very easy and accurate.
- Record will initiate recording of the movement of the head. Record can be done with the belts engaged or disengaged, while stitching or without and with power assist on or off. Recording begins as soon as the Record button is pressed, and ends when it is turned off (or times out). A red dot appears in the dialog box when recording is in progress. Recording is possible even if there is no stitching being done. This recording is automatically saved as a pattern file, in a default file folder: C:\StatlerStitcher\RecordedPatterns\. The filename uses the current date & time as a way to guarantee a unique filename.
- SPI or Speed adjusts the stitches per inch in Regulated or Baste modes and the Speed in Constant mode. There is a button to increase speed (or SPI)--Inc Speed--and one to decrease speed (or SPI)--Dec Speed.
- Single Stitch will cause the machine to take a single stitch
- Start begins the quilting process
- Shift allows the settings to change using the keypad versus the screen. Hold down shift and the alternate purposes of the keypad will appear briefly.

Dropping the Belts
When the drive belts are disengaged, the machine will move easily and lightly. If the channel locks are needed, the belts must remain attached.
Drop the belts by unscrewing the wing nut where the belt attaches to the machine carriage
Power Assist
Power Assist is like an adjustable power steering option for your sewing head. There is a calibration process that customizes the power settings for each quilter, making the machine move more easily when doing hand-guided sewing with the belts still engaged.
VIDEO | Power Assist
Power Assist is often used when the belts are still attached, which makes the machine easier to maneuver.
Power Assist can be turned on or off under the Stitch dropdown menu or  using the Power Assist icon on the menustrip.
Power assist can be calibrated manually or automatically under Service > Calibrate All > Calibrate Power Assist.
Using Channel Lock
You may wish to use Channel Lock to baste your quilt or to stitch a straight line across the batting against which you can orient your quilt top. Your belts must be engaged to use the channel locks.
The channel lock feature will lock the machine across a plane. Channel lock angle determines what plane the machine will be locked in. A channel lock angle of 0 (zero) will keep the machine parallel to the bars along the machine. 90 degrees will be perpendicular to the bars. Flip Angle will change the angle by the degree entered. This may be helpful when switching from basting along the top to down the sides.
Shift will change the labels and functions of the keypad. Holding down shift and selecting Flip Chan will flip the angle of the channel lock by the Flip Angle without the need to return to the computer and mouse.
Regulated Sewing
In Regulated mode the stitch regulator is engaged, so the SPI (stitches per inch) is precise. While in Regulated mode, you will use the SPI setting on the CAD screen to change the stitch length.
There are three regulated mode types. These are rarely changed but can be if desired. Each type of regulated may have a slightly different 'feel' when hand guiding. It can be useful to try each one to determine a favorite.
- Original
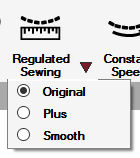
- Plus
- Smooth
The type can be changed using the carat (small triangle) next to the Regulate icon or under Service > Technical Support > Controller Definitions.
Constant Speed
Constant means the stitch regulator is not engaged and the stitch length is controlled entirely by the speed of the movement of the sewing head. Constant speed is often used for microstitching when tiny stitches are desirable.
While in Constant mode, you will use the Speed setting on the CAD screen to change the speed setting at which the needle moves.
Baste Sewing
Baste is a special type of regulated stitch that produces very large stitches. The stitch size is measured in inches-per-stitch instead of stitches-per-inch. Basting is commonly used when squaring and stabilizing a quilt in preparation for quilting.
Select Baste Mode to begin. Choose the Baste Sewing icon, choosing Baste from the Stitch dropdown menu or choosing the Baste option and then selecting the Hand Guided icon from the toolstrip.

After initiating Baste mode, take a single stitch using the keypad and pull up the bobbin thread. Select the Start button and move the machine head to begin creating stitches. Select Stop to stop the machine from quilting. If using channel locks, you may need to change your angle to move down the sides of the quilt.
To exit Baste Mode:
- From the computer: click the 'x' in the upper right of the Keypad window
- From the machine head: Shift + Exit (Hold the keypad Shift button down and press the Exit button)