
Loading Methods
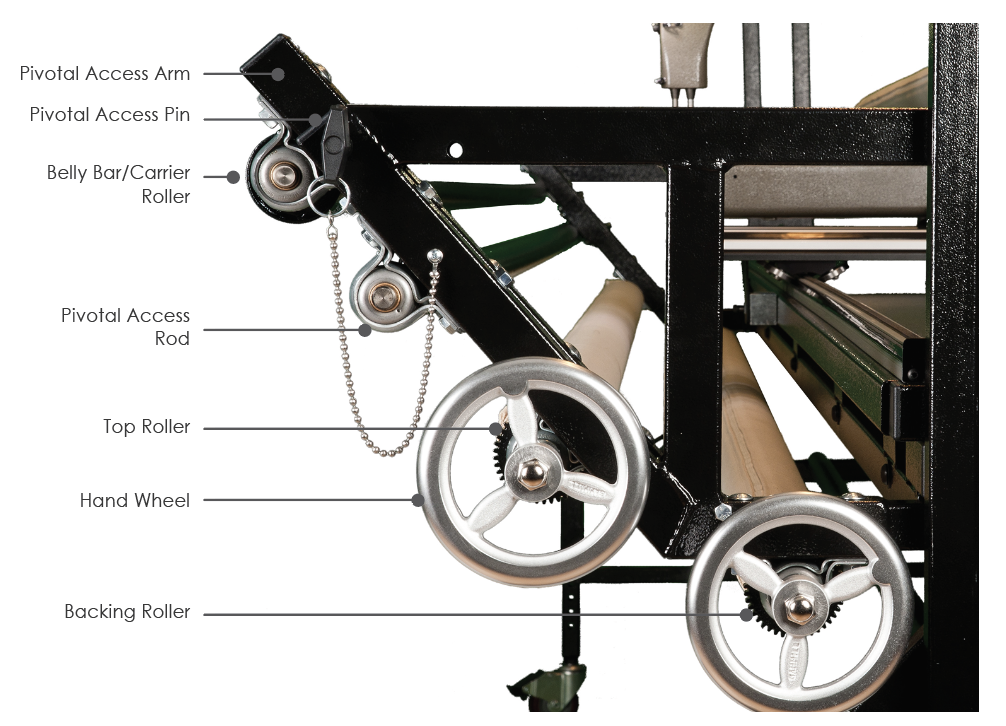
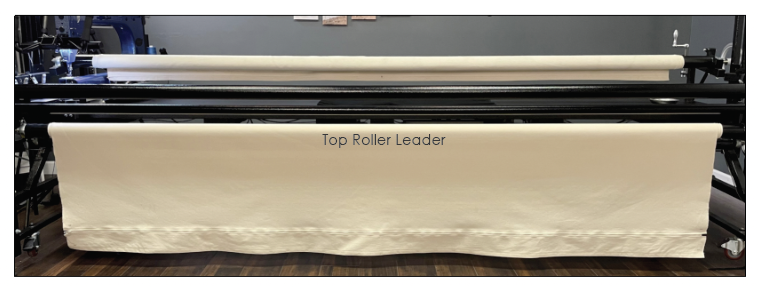
There are many ways to load your quilt pieces (backing, batting, and top). In this article we will cover two methods – full attachment and floating. Before we get started on each method let's cover the name of the rollers:
Full Attachment Method
Handout
Click here to download a handout
Written Instructions
The full attachment method involves attaching the backing fabric to the pickup roller as well as to the backing roller. The batting is then draped over the backing fabric. The top of the quilt top is pinned/basted to the backing fabric. The bottom edge of the quilt top is pinned to the top roller. This allows the top and backing fabric to be adjusted (somewhat) independently from each other. You can tighten one more than the other (if necessary).
Step 1
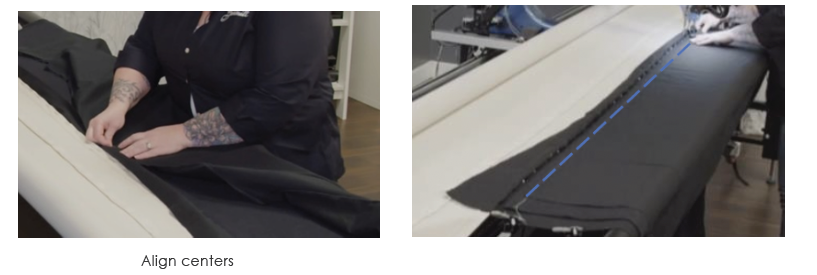
Measure the quilt length. Mark the center of the top and bottom of the quilt with a pin. Lay the quilt top, right side up, over the pickup bar. 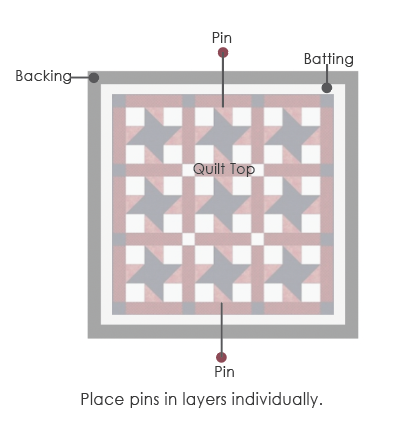
Also, mark the center of the bottom of the backing fabric as well as the center of the top of the batting with a pin. Ensure the batting is at least 2 inches larger and the backing is at least 8 inches larger, than the quilt overall.
Example: Quilt Top: 80” x 80”
Batting: 84” x 84”
Backing: 88” x 88”
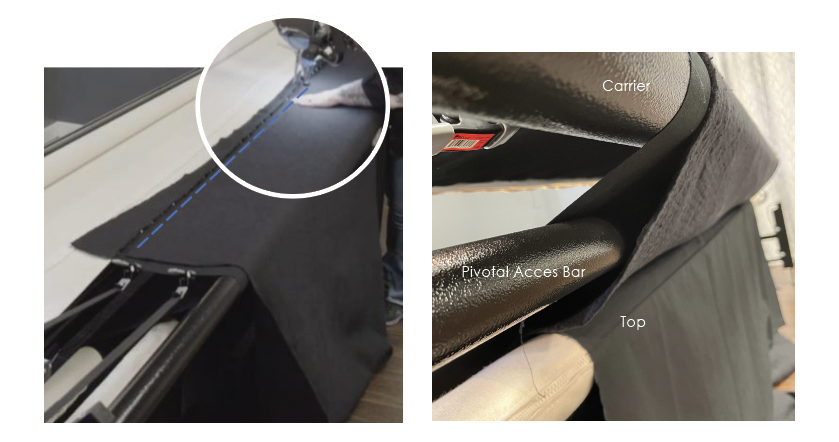
Pivotal Access System
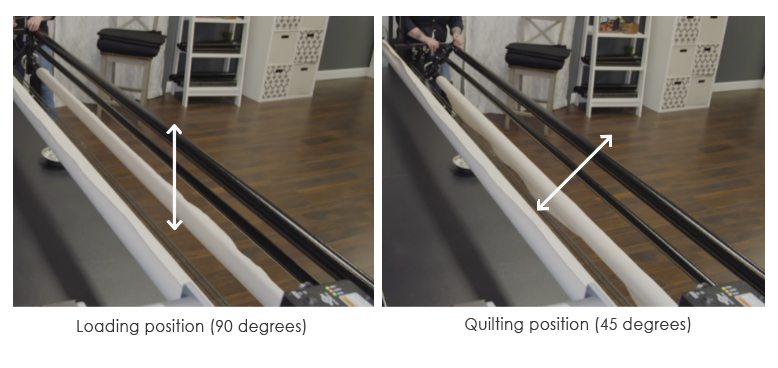
You may want to place your Pivotal Access from the quilting position (45 degrees) to the loading position (90 degrees). It is not necessary to use the loading position at all times, however, it may be helpful at different times in the loading and advancing processes.
Step 2
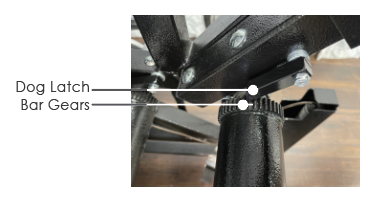 We begin the load by attaching the quilt top to the top roller leader. Release the dog latch on the top roller bar and unroll to allow the leader to almost touch the floor. Re-engage the dog latch to the gear so it stays in place.
Step 3
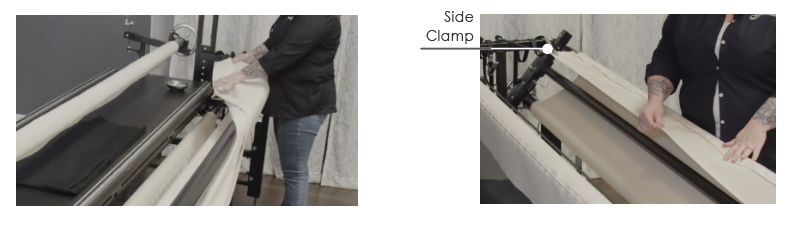
Bring the leader up over the carrier bar (belly bar). Roll the leader until it is resting over the top of the carrier bar by a few inches. Use a side clamp to hold the leader in place on each end.
Step 4
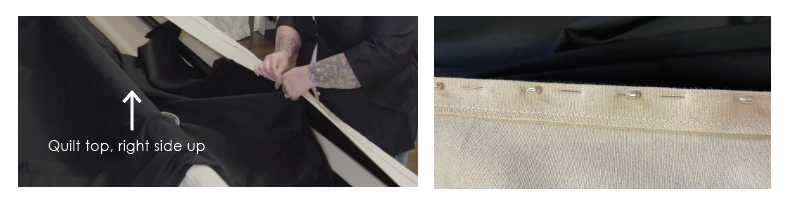
Drape the quilt top over the back of the table with the right side facing up. Line up the center pin of the quilt top with the marked center of the top leader. Align the bottom edge of the quilt top with the edge of the leader. Secure both layers by placing a pin no more than a quarter inch from the edge of the leader. Continue pinning the top to the leader from center out so the entire bottom edge of the top is secured.
Step 5
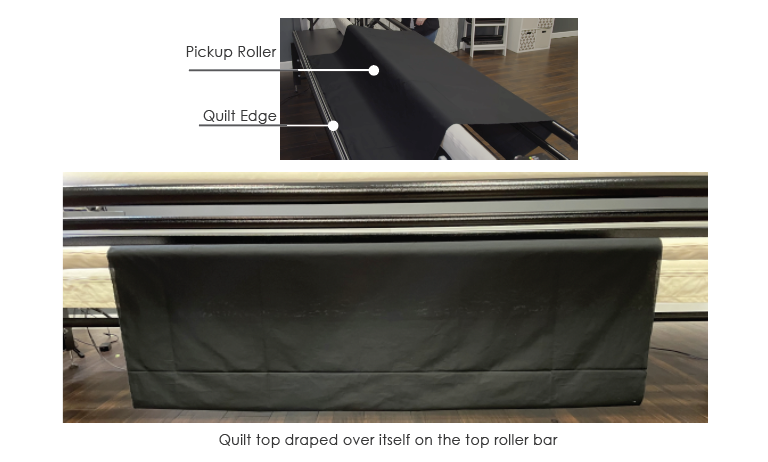
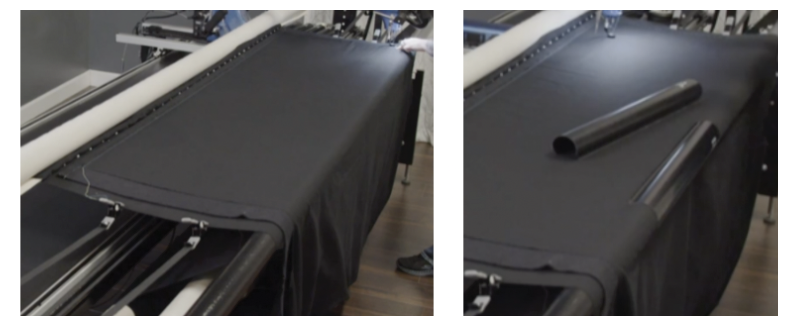
Evenly drape the quilt top over the pickup roller bar and slowly roll the quilt top onto the top leader bar until the edge of the top is resting on the table.
Flip this edge of the quilt top to the front of the table and drape it over itself on the top roller bar.
Step 6
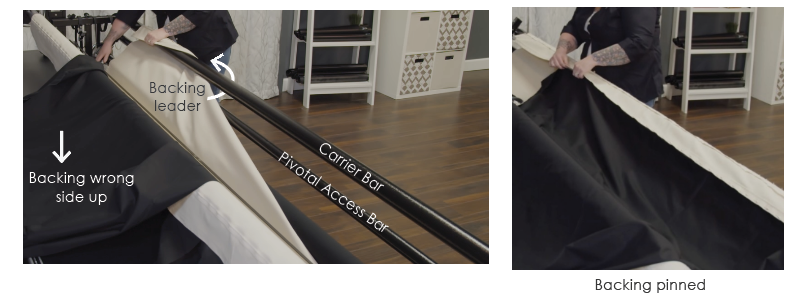
Release the pawl on the backing roller bar and bring the backing leader between the pivotal access bar and carrier bar. Attach side clamps and re-engage the pawl. Roll the backing leader bar until the leader is resting over the top of the carrier bar by a few inches. Use a side clamp to hold the leader in place on each end. Drape the backing over the table with the wrong side facing up. Align the center of the backing with the marked center of the backing leader and pin from the center out on both sides so the entire backing edge is attached.
Step 7
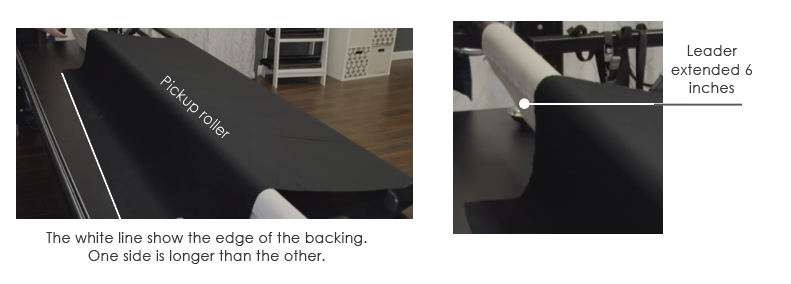
Extend the pickup leader approximately 6 inches from the pickup roller bar. Evenly drape the backing over the pickup roller bar, remove side clamps and slowly roll it onto the backing roller bar until the backing fabric is resting on the table. This allows the backing to square itself as it is rolled. Smooth from center out, as needed. Without disturbing the edge of the quilt, notice how the backing is laying on the table (it is crooked in the photo below).
Step 8
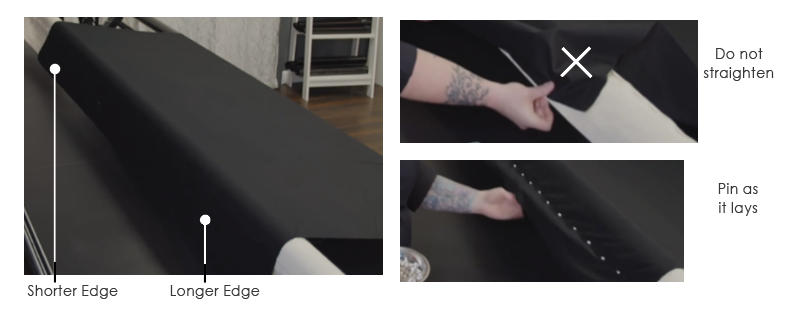
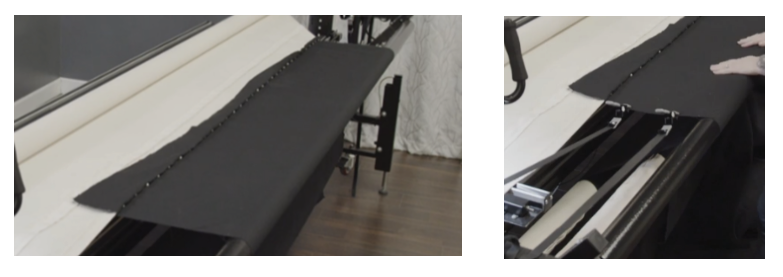
Continue rolling the backing fabric until the shortest edge aligns with the edge of the leader. If the backing is even with the leader, pin working from the center out on both sides. If the backing is uneven with the leader then pin with the shortest edge aligned with the leader, and do not straighten. Continue pinning from the center out.
Step 9
Tighten the slack in the backing by rolling the pickup roller bar forward and then tighten the backing roller bar. The backing should be taut and flat with no sags. You can roll the backing into the middle of the frame for ease of reach while loading the batting and the top. Attach the side clamps onto the sides of the backing fabric The backing should be taut but not tight and there should be no distortion from the side clamps.
Step 10
Lay the batting onto the backing and use the horizontal channel locks to baste the batting to the backing. This line of stitching will hold your batting in place as well as set a straight reference line for your quilt top. Tuck the batting behind the top roller.
Step 11
Bring the top fabric up from where it is draped. Align the center mark on the quilt top with the center mark on the backing leader. Align the quilt top with the basting stitches on the batting. Attach the side clamps to the backing. Baste along the top edge of the quilt top with the horizontal channel lock. Basting stitches should be no more than a quarter inch away from the edge of the quilt top.
Step 12
Release the side clamps and roll the quilt so that the pinned edge is just in front of the pickup roller bar. Reattach side clamps. Baste each side of the quilt. Now you are ready to begin quilting.
Float Method
The float method means you do not attach the top to a leader. Attach the backing and batting following Steps 6 to 10. Place the quilt top on the batting, right side up, then baste the top edge and sides. The quilt will lay over the carrier bar. You may wish to use Gammill Quilt Clips to stabilize the quilt during quilting.
You can also attach the backing to the pickup roller and top roller, since it is not being used by the quilt top. The batting is then draped over the loaded backing fabric. The quilt top is then draped over the batting/backing hanging freely (floating).
Step 1
Measure and mark the center of the backing top and bottom edges using a pin. From the back of the machine, lay the backing fabric, wrong side up over the pickup roller, with the pinned center edge facing the front of the machine. Smooth out the backing along the pick-up roller and let it drape over the table and onto the floor.
Step 2
At the front of the machine, pull the leader from the top roller over the carrier roller/belly bar and hold it in place with the side clamps. Pin the bottom edge of the backing fabric to the top leader by lining up your pinned center with the center mark on the leader. Pin from center out on both sides of center mark. Remove the side clamps, set the backing roller pawl and begin rolling the backing onto the top roller (you’ll hear clicks as the pawl moves over the rollers gear teeth). Roll the backing onto the top roller until about 8” of the backing is hanging towards the back of the table, over the pickup roller.
Step 3
Place the top edge of the backing fabric along the edge of the pickup roller leader, lining up your pinned center with the marked leader. Again pin the fabric to the leader from center out. Once pinned, continue rolling the last 8” onto the backing roller.
Step 4
Place your batting over the loaded backing fabric. Use your horizontal channel locks to attach the batting to the backing. This line of stitching will hold your batting in place as well as set a straight reference line for your quilt top. Let the excess batting drop to the floor.
Step 5
Place the top edge of the quilt top along the stitched reference line with a pin. You can then baste the quilt top along the reference line. Then baste both sides of the quilt top down. The rest of the quilt top hangs over the carrier roller/belly bar along with the batting. You can use Gammill® Quilt Clips over the carrier roller/belly bar to stabilize the floated quilt top. You are now ready to quilt.