Navigating CS and the Machine Keypad
Explore the CreativeStudio menus and CAD screen and learn how the machine keypad can be used to initiate features
Machine Keypad
VIDEO | Machine Head Operations
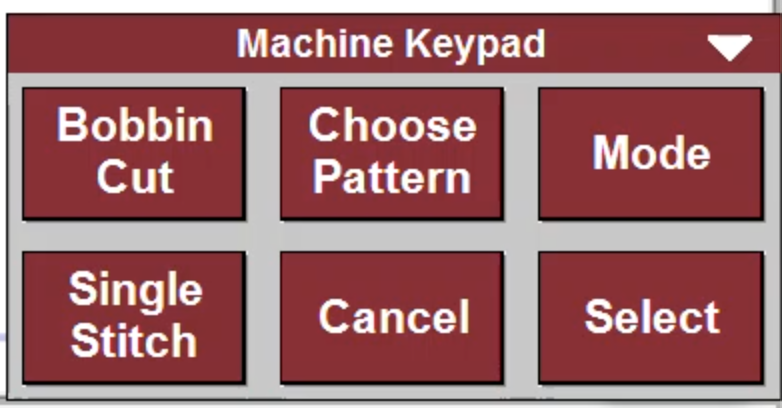
The stitcher features a six-button keypad on the front handles. Many of the features of CreativeStudio can be initiated from the stitcher instead of and/or in addition to using the screen. The function of each button changes by feature, but the labels are clearly displayed on the screen in the Keypad Window.
Some of the most common keypad tasks are:
- Bobbin Cut will initiate the bobbin pull-up sequence.
- Choose Pattern will scroll through the list of patterns.
- Mode will highlight each Stitching icon on the Tool Bar, moving forward sequentially. To go backward, press and hold the Cancel button, and then press the Mode button.
- Single Stitch will complete one stitch each time it is pressed, which is useful when basting or completing tieoffs.
- Cancel terminates the feature currently running
- Select initiates the feature represented by the icon that is currently highlighted
Which tool bar icons can be accessed using the mode button is determined by the location of the mode stop icon. This is the red bar icon toward the middle of the toolbar. The icons to the left of the mode stop can be initiated using the keypad by selecting the mode button on the keypad. The icons to the right cannot be accessed by using the keypad and have to be accessed by the mouse at the computer.

CreativeStudio Screen
VIDEO | Main Screen Overview
VIDEO | Screen Navigating Preview
Screen Navigation
It is important to note that your screen may look slightly different if you are using CreativeStudio in Stand Alone Mode vs. the computer on your Statler or Statler Ascend. In addition, there are ways to customize your system, such as changing the order of the screen icons and setting stitching defaults. Since your screen may not look exactly like the screens shown here, learn to watch the prompts box, which gives directions on what to do, and the machine keypad image, which gives directions on how to complete the process. Navigating options allow the quilting commands to be initiated using a mouse, stylus, touch, and even the keypad mounted to the sewing head. The term ‘click’ can refer to any of these methods. Therefore, step-by-step instructions are guidelines, not rigid processes.

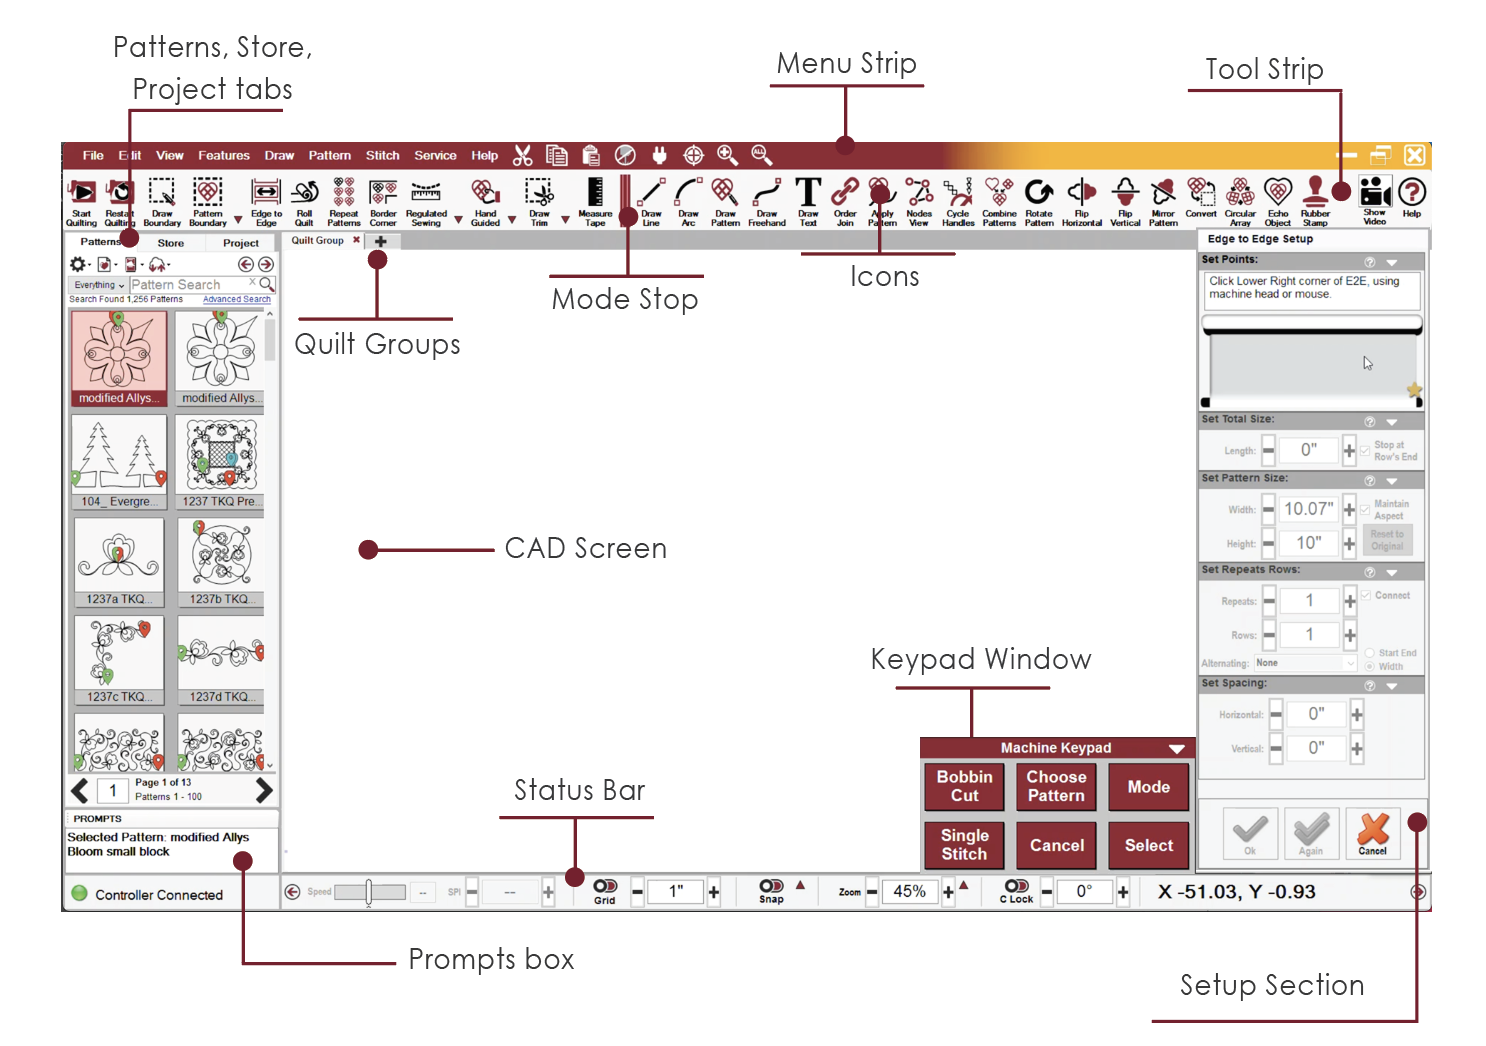
Patterns, Store, Project tabs allow you to browse through and learn more about patterns in your collection, patterns available for purchase in the PatternCloud Store, and patterns in your project.
Menu Strip contains dropdown menus for CS commands. In addition, there are icons such as copy and paste. The menu strip icons can be customized.
Tool Strip contains icons for quilting processes, commands, and tools. The tool strip icons can be customized.
Quilt Groups are the tabbed sections of the CAD (Computer Aided Drawing) screen that relate to different sections of the quilt.
Mode Stop divides the tool strip icons. Those to the left of the mode stop indicator can be initiated using the keypad.
Keypad Window displays the function of the buttons on the six-button machine head keypad.
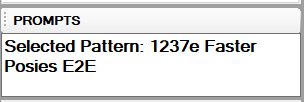
Prompts window displays most recent action or instructions.
Setup Section allows you to adjust quilt variables, such as the quilt dimensions. This window will appear when you initiate a feature that requires your input.
VIDEO | Quilt Group Preview
Prompts and Instructions within CreativeStudio
It is important to remember that instructions are always given on the screen. When completing a process in CreativeStudio, there are three places to look for cues about your next step.
 |
Prompts Box Located in the lower left corner under the pattern manager area. Watch the prompts box in the lower left corner for instructions and comments. |
 |
Setup Section Next, check the setup section. If your input is needed or you have options for the setup, they are listed along the right side of the CAD screen and can be changed in this window as needed. When you close a setup window using one of the three options at the bottom (OK, Again or Cancel) you cannot reopen that setup to make changes. Opening a new setup window will require starting the setup process over again. |
 |
Machine Keypad Refer to the on screen Keypad for response options. The six buttons are labeled with their purpose and may change based on the current task you are performing. |
CreativeStudio Status Bar
VIDEO | Stitcher Screen Operations Preview
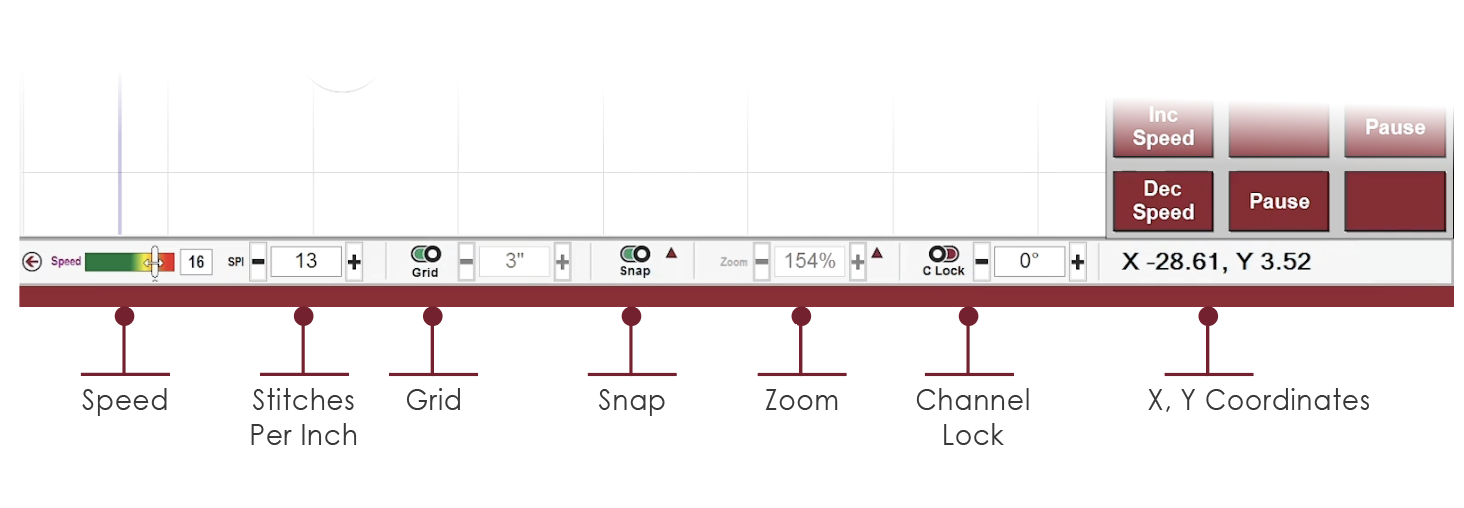
At the bottom of the screen is a status bar with controls that regulate the stitching process (like Speed and SPI) and affect how the quilt groups look or respond (Grid, Snap, Zoom).

Speed only shows while the machine is stitching. Speed numbers are based on a scale of 1 to 20. While stitching, the speed can be changed for the currently selected pattern only. Change by using the mouse to move the slider bar or by pressing “Inc Speed” or “Dec Speed” on the machine head keypad.
Stitches per Inch (SPI) is for the currently stitching pattern. Change the SPI while stitching using the plus and minus sign or change before sewing via properties.
Grid refers to faint gray background grid lines that appear when the grid button is ON (green). The size of the grid can be adjusted by using the plus and minus signs to the right of the button or by typing a number, measured in inches.
Snaps can be used with all the draw features, pattern nodes, or end points of selected patterns. When snap is ON (button is green), nodes or pattern end points will be fastened to grid intersections or endpoints of other patterns. Grid Snap and End Point Snap can be turned on and off independently of each other using the caret to the side of the snap on/off.
Zoom refers to the screen magnification.
C Lock (Channel Lock) toggle shows if the channel locks are on or off as well as the set channel lock angle.
Grid Coordinates refer to the current location of the machine head, specifically the needle position on the frame. As you move the machine head, the numbers change.

