Nodes
Learn about pattern nodes and designer nodes
Nodes
VIDEO | Nodes Preview
What are Nodes
Nodes are an integral part of every pattern and can be displayed when needed. Nodes allow us to adjust small segments of a pattern design.
How to View Nodes
View Nodes by selecting a pattern and doing one of the following:
- Choose the Nodes View icon
- Cycle through the handles by double clicking
- Use the Cycle Handles Icon
- Use the shortcut key F7
- Choose Nodes from the Handle Selection options in the Pattern dropdown menu
Endpoint Nodes
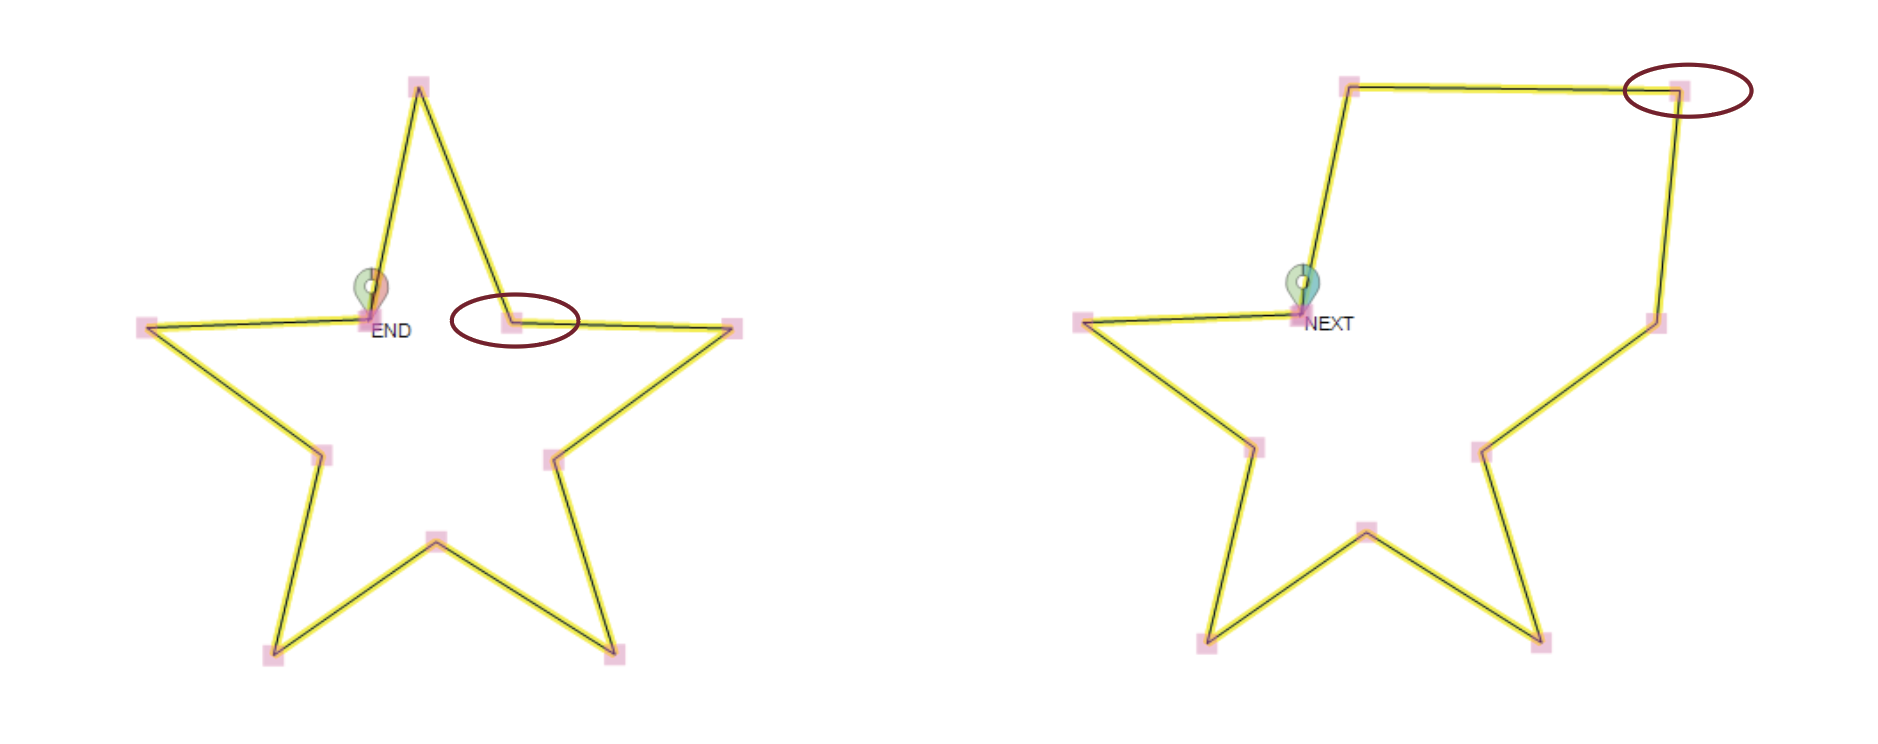
Endpoint Nodes are pink squares. The beginning and ending of each pattern segment is an endpoint node. Two contiguous segments share a node. The ending node of the first segment is the beginning node of the next segment. When a pattern is divided, it is at a pink node. To adjust a pattern using the nodes, click the node and drag it to the desired location. This can be helpful for making small adjustments to patterns to fill a boundary.

Arc Nodes
Arc Nodes are blue squares. When an arc node is moved, the curvature between the pink squares changes. Straight line segments may not have blue nodes.

Dividing a Pattern Using Nodes
To divide the pattern, right-click on the node and click divide.

Designer Nodes
VIDEO | Designer Nodes
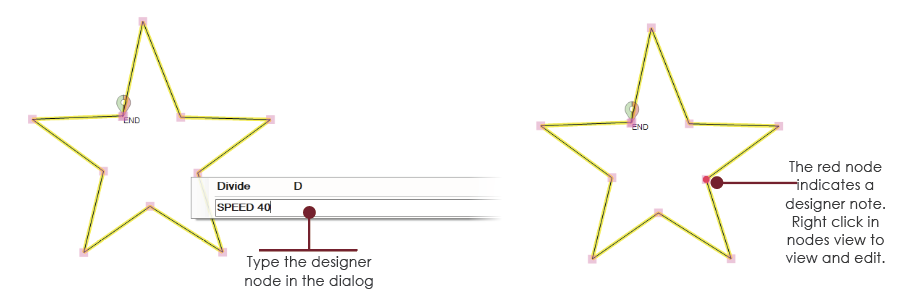
Designer nodes are a special type of node that allow changes to the stitching settings of the pattern. They can be used to change the stitch length (SPI), the stitching speed, or can force a pause in the stitching process, perhaps to allow a thread color change. To create a designer node, right-click a pink node, as above, and type one of the keywords below.
There are three keywords and they must be typed in CAPITAL letters. The keywords are PAUSE, SPEED, and SPI. Right-click a pink node to see the dialog box. Enter the designer node text as described below and then press enter. A red dot indicates a designer node exists.
nnn = a percentage of the original setting
- PAUSE will force a pause in the stitching, and can display a message on the screen. Example: PAUSE Change the thread color
- SPEED nnn will change the stitching speed by a percentage (nnn <100 slows the speed, nnn =100 resets the speed to the original number, nnn > 100 increases the speed). So typing SPEED 150 would increase the speed by 50%. Example: SPEED 150
- SPI nnn will change the stitches per inch, by a percentage. (nnn <100 makes smaller stitches, nnn >100 makes larger stitches. Example: SPI 80
Designer nodes are helpful if there is a portion of a pattern you would like to stitch more quickly or slowly or if you would like to pause at a certain point in the pattern to change thread, for example.

Dividing a pattern that has designer nodes will remove those nodes, so be careful to do all the structural pattern changes first, and add the designer nodes last.
