Repeat Patterns
Repeat Patterns will place a series of patterns (any type) into repeats and rows on the CAD screen
VIDEO | Repeat Patterns
Repeat Patterns Quick Start
Use repeat patterns to precisely place a pattern (or rows and repeats of a pattern) in a block or anywhere on the CAD screen. The process does not require a boundary but a boundary is helpful when placing multiple patterns. Or, you can use the crosshairs of your machine to orient your pattern. It is similar to the Edge to Edge feature but with more flexibility.
The process below shows a boundary to better visualize the process.
Repeat Patterns in a Boundary |
|
|
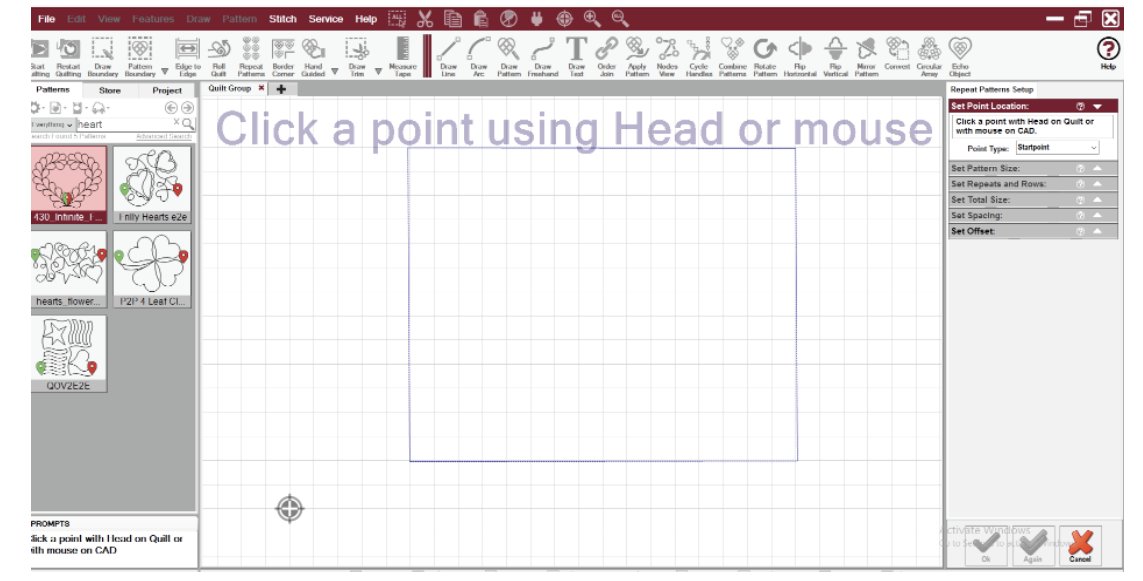
1. Select your pattern in the patterns tab. Multiple patterns can be chosen and concatenated (which will be covered in a later section). 2. Mode or click to select the Repeat Patterns icon. You will notice a setup box appears on the right. You will then be prompted to click a point using the head or mouse. |
 |
|
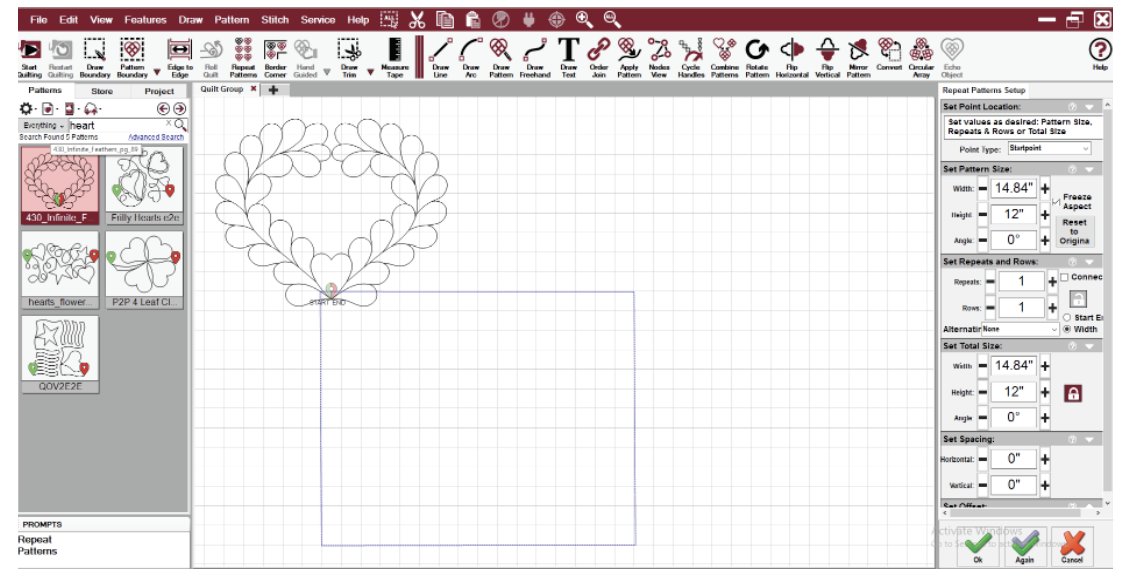
3. Click a point on your block and the pattern will be automatically placed. 4. Expand the settings boxes to see additional options by clicking the arrows by the dialog boxes. 5. Point Type is set to Start Point by default. That means the pattern oriented itself by placing the start point of the pattern in the location you selected with the machine keypad or mouse. |
 |
|
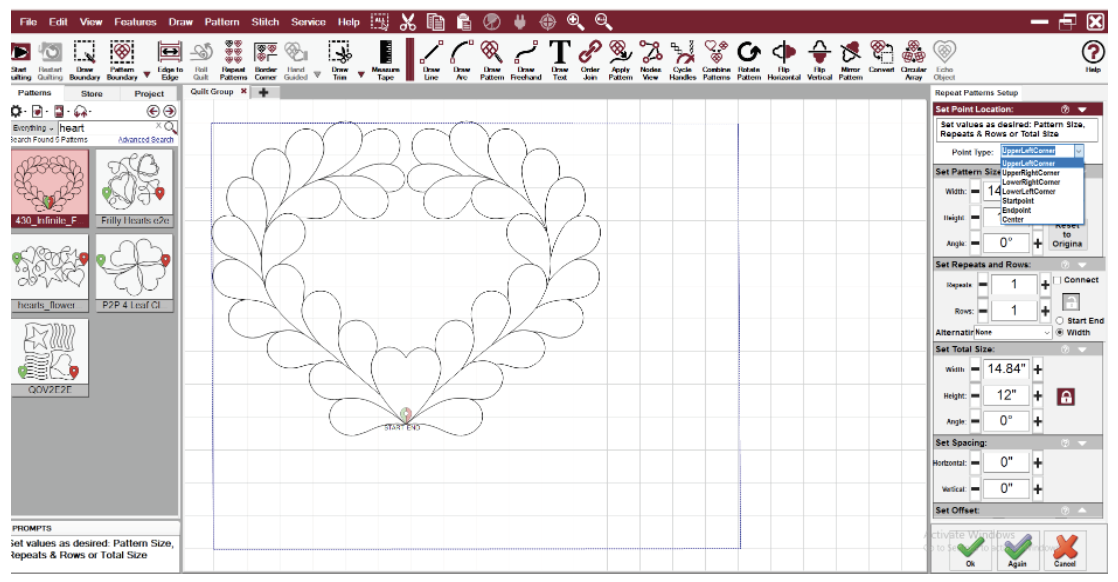
6. You can adjust the Point Type by clicking the down arrow and selecting the best option for your pattern and the point you selected. Selecting UpperLeftCorner placed this pattern in a more desirable location. |
 |
|
7. Next, use the Set Pattern Size and other setup options to adjust your pattern. 8. Once you have achieved the results you desire, select OK to accept the setup and place the pattern. 9. Select start quilting to begin stitching. |
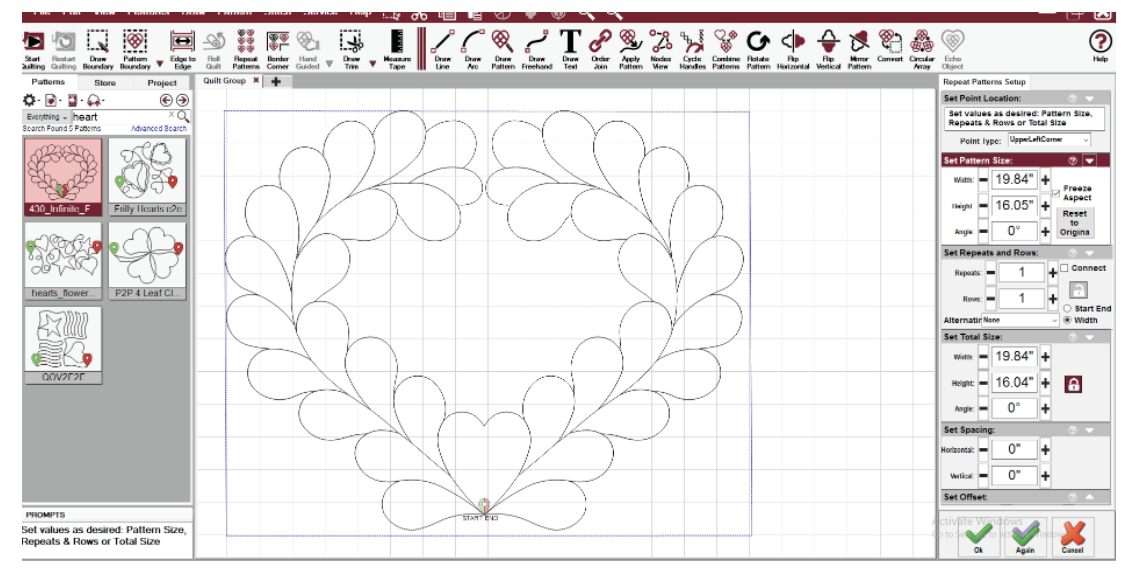 |
Repeat Patterns Setup
Below, we will look more closely at the options available in Repeat Patterns in the setup box.
Set Point Location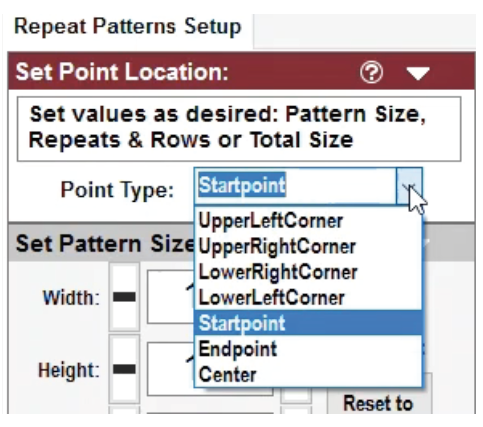
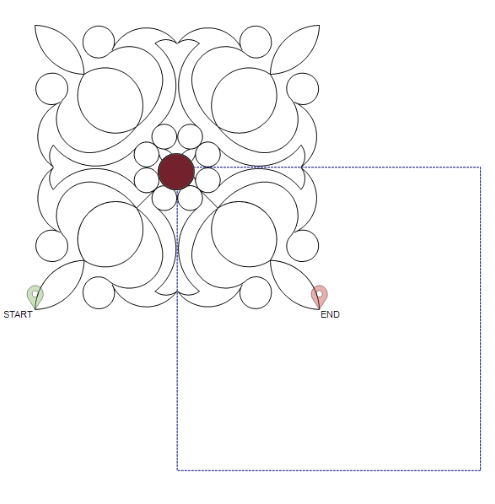
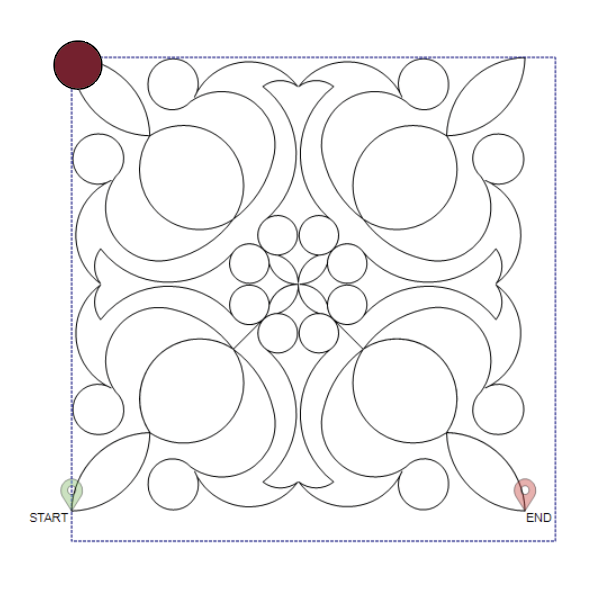
Set Point Location will determine the location of where the pattern is placed on the screen. First, CS will prompt you to pick a point on your screen. Now, your pattern will orient to that point depending on what Point type you pick. In this example, the chosen point is represented by the maroon circle.
 |
 |
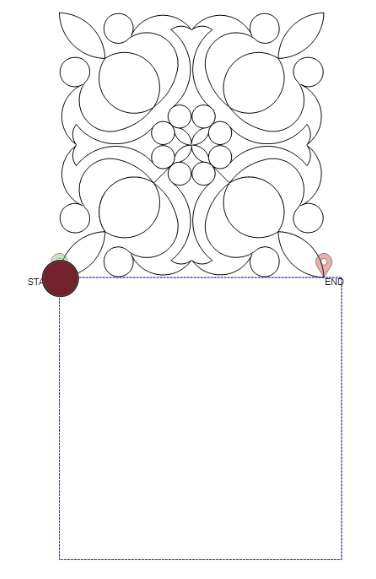 |
| Center | Upper Left Corner | Pattern Startpoint |
Set Pattern Size
Set Pattern Size refers to each individual pattern. Included are width, height, and angle (the number of degrees that each pattern is rotated). This applies to each pattern individually, not the group.
- Freeze Aspect will cause CS to automatically change the other values when one dimension changes in order to maintain the aspect ratio - or proportion.
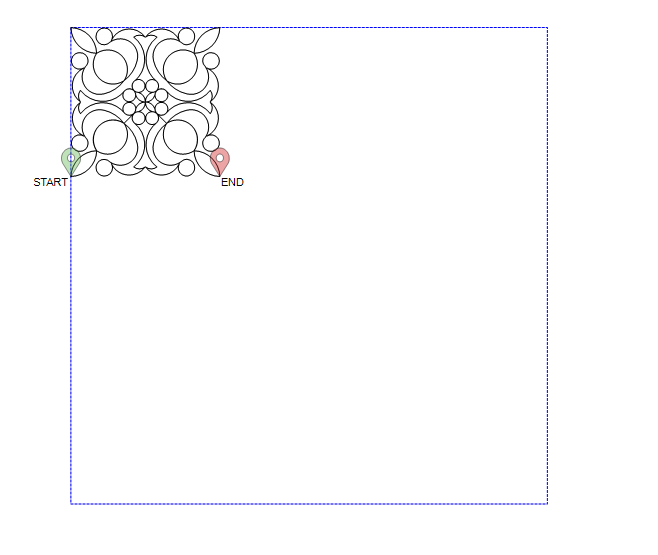
- Reset to Original ignores your changes and reverts back to the size of the pattern in the project list. In this example, we have reduced the size of the pattern to 5” instead of 15” to allow for more repeats.
 |
 |
Repeats and Rows
Repeats and Rows changes the number of times the pattern appears.
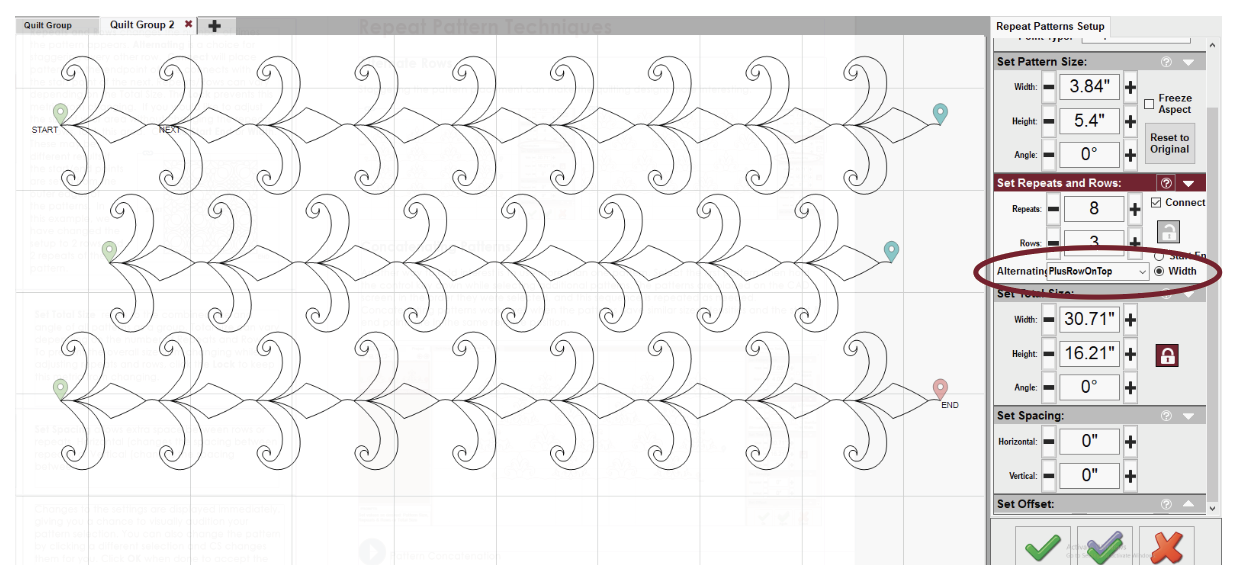
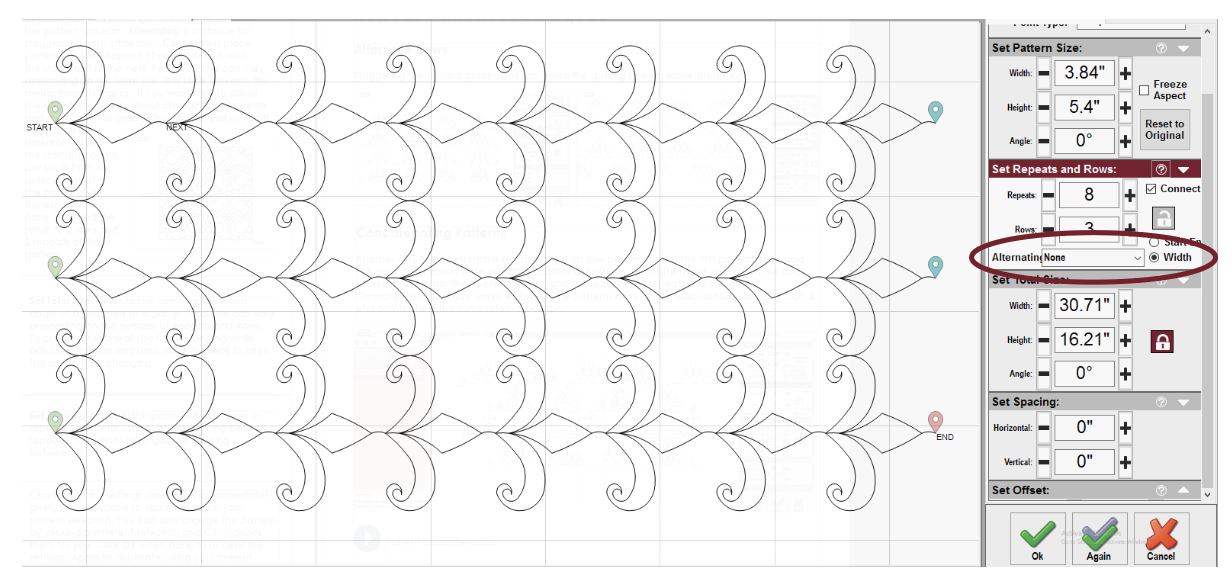
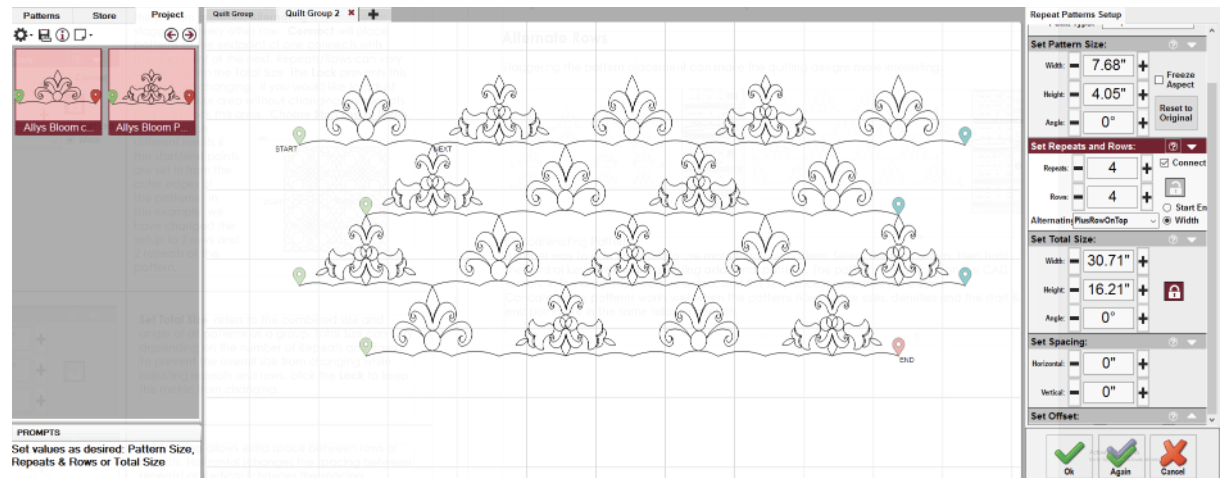
- Alternating is a choice for staggering every other row.
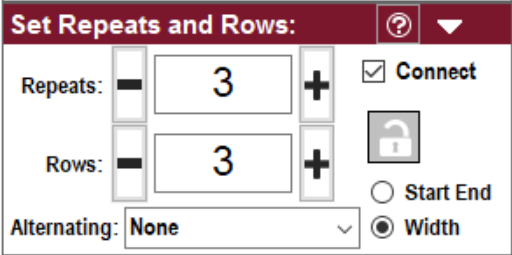
- Connect will place patterns so the endpoint of one connects with the start point of the next. Repeats/Rows can vary depending on the Total Size.
- The Lock prevents this metric from changing. If you would like to adjust the size of your area without changing the repeats and rows, lock this area.
- Choose Start End or Width. This option affects only alternating row setups. The results of alternating may be different depending on if the start and end points are set in from the outer edges of the pattern.
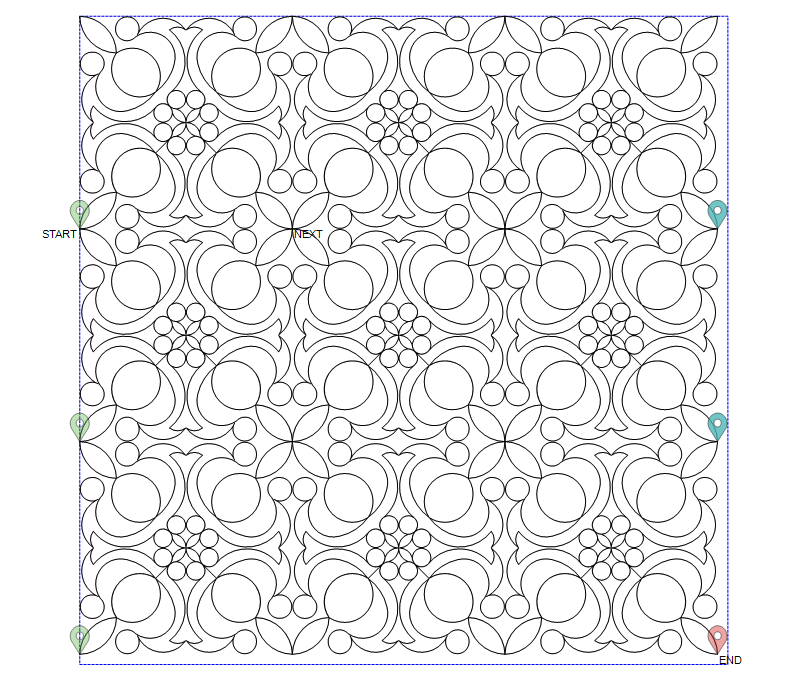
In this example, we have changed the setup to 3 rows and 3 repeats of the pattern.
 |
 |
Total Size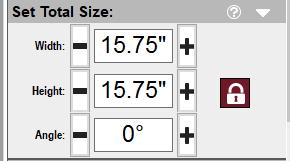
Set Total Size refers to the combined size and angle of all patterns as a group. Total Size
can vary depending on the number of Repeats and Rows. To prevent the overall size from changing while adjusting repeats and rows, click the Lock to keep this metric from changing.
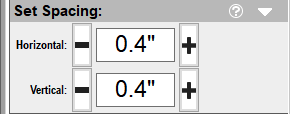
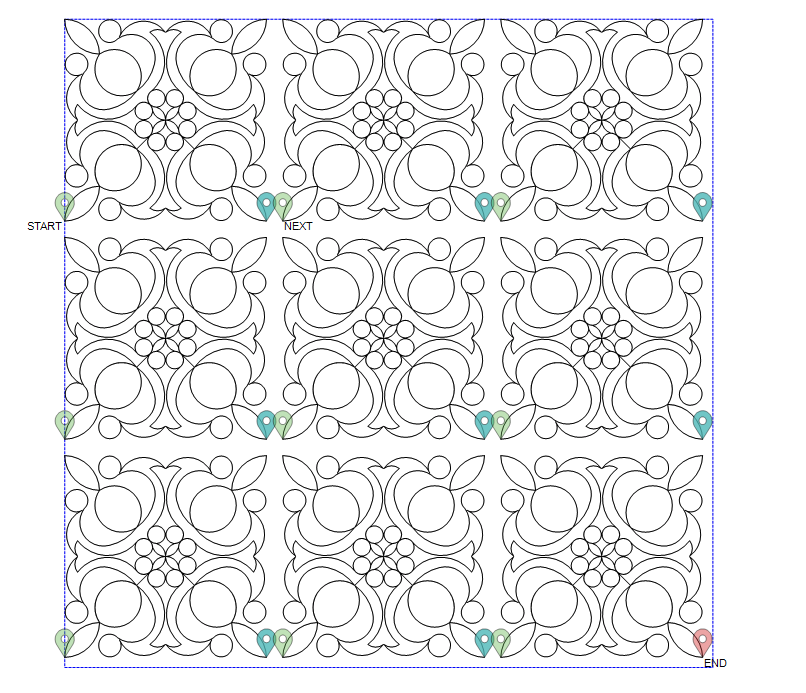
Set Spacing
Set Spacing allows extra space between rows or repeats.
- Horizontal changes the spacing between repeats.
- Vertical changes the spacing between the rows.
 |
 |
Accepting Changes
Changes to the settings are displayed im mediately, giving you a chance to visually audition your pattern selection. You can also change the pattern by clicking a different design while the setup window is open. CS changes the pattern for you.
- Click OK when done to accept the settings
- Again to duplicate, using your current settings,
- Cancel to stop and remove the patterns from the CAD
Repeat Pattern Techniques
VIDEO | Repeat Patterns - Alternating & Concatenating
Alternating Rows
Staggering the pattern placement can make the quilting designs more interesting.
Concatenating Patterns
Concatenating means to repeat two or more patterns so that they stitch continuously. This can add interest to your design. To concatenate using Repeat Patterns, select the first pattern, then hold the control key down while selecting additional patterns. The patterns are placed on the CAD screen in the order they were selected and this sequence is repeated as needed.
Concatenating patterns works well when the patterns have similar sizes, densities and the start and end points are in the same relative position.
Edge to Edge Using Repeat Patterns
Overall Quilting Setup Using Repeat Pattern
There are times when E2E automatic is too rigid, and you will want to plan and control an Edge-to-Edge process manually. The safest way to do this is to develop a master plan, which is a diagram showing the outline of the quilt, and showing the layout of the patterns.
Here is a suggestion for creating a master plan:
- Draw a square pattern using Draw Line, or choose the Geometric Square pattern.
- Change the square pattern's dimensions to match the quilt size.
- Position the Upper Left corner of the pattern to the Upper Left corner of the quilt.
- Convert the pattern to a boundary (represents the entire quilt).
- Draw a boundary around the quiltable space of the quilt.
When following these steps, turn on the Crosshairs, so you can be sure your diagram is aligned to the quilt. When identifying your quiltable space, use the upper left and upper right corners of your quilt top, and the lower left and lower right points along the belly bar.
Here is a suggestion for creating the pattern layout using Repeat Patterns.
- Choose the pattern and modify the pattern properties as needed.
- Click Repeat Patterns Icon.
- Set the (Repeat Pattern) Point Location to Type = Upper Left Corner.
- Click on the upper left corner of the quilt; one pattern is displayed.
- Change settings as needed to fill the space.
- Click OK when done.
The Repeat Pattern Settings display the changes dynamically so you can audition multiple patterns if needed. If you like what you see, click OK. To exit, click Cancel.
Unlike Edge to Edge mode, overall quilting with Repeat Patterns will not have teal patterns that are unstitchable below the belly bar boundary. Therefore, you, the quilter, are responsible for making sure the machine head does not move to try to stitch rows that are unreachable. For patterns outside the boundary, it is wise to select the group and “Toggle Group Sewn”. This helps prevent the machine from hitting the belly bar.
- Quilt one section at a time. Select all patterns that can’t be quilted in the first section. Toggle them sewn.
- Quilt as much as possible. Before rolling the quilt, toggle the next row of patterns as ‘unsewn.’ This will be your first row of the next section.
- When ready, roll the quilt.
Each time you roll the quilt, you will use Roll Quilt (End of Set) or Relocate again, to synchronize the screen with the quilt. You will also need to change the sewing status of the patterns in the boundary.
If using Relocate to synchronize the screen images to the new quilt position, here are some suggestions for realigning the quilt to the screen after rolling:
- Toggle the next row(s) as unsewn.
- Find an easily accessible spot in the last row quilted. Choose a spot that is pointed or where the pattern crosses over itself. Curves are not good choices.
- On the screen, Right Click any pattern. Choose Relocate. Choose Shift All to 1 Point. #4 With the mouse, Click on the (easily accessible) Known Point on CAD.
- Move the stitcher to this same point on the quilt. Click “YES”.
Continue to quilt, roll and relocate or Roll Quilt until the last section. Draw one more boundary along the bottom edge to check the alignment. Adjust the last rows if needed.

