Rotary Hook and Timing
The hook point of the rotary hook assembly rotates around the bobbin case and is timed to the movement of the needle bar to form a stitch.
Rotary Hook Assembly
The hook point of the rotary hook assembly rotates around the bobbin case and is timed to the movement of the needle bar to form a stitch. The “timing point” is defined as when the hook is positioned directly behind the needle. At the timing point, the hook should be close to the needle, but not touching it. The bobbin case houses the filled bobbin. The thread escapement is where movement of the rocking finger allows the thread to pass between the hook retainer bracket and the notch on the hook. The rocking finger is used to slightly tilt the bobbin case base so the top thread passes through the thread escapement without restriction. An acentric cam located on the shaft behind the rotary sewing hook controls the rocking finger.
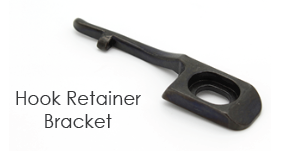 The close up picture shows the throat plate removed. The hook retainer bracket holds the bobbin case in position as the stitch is formed.
The rotary hook assembly consists of the hook race, bobbin case, and bobbin and it is secured to the rotary hook shaft with two set screws.
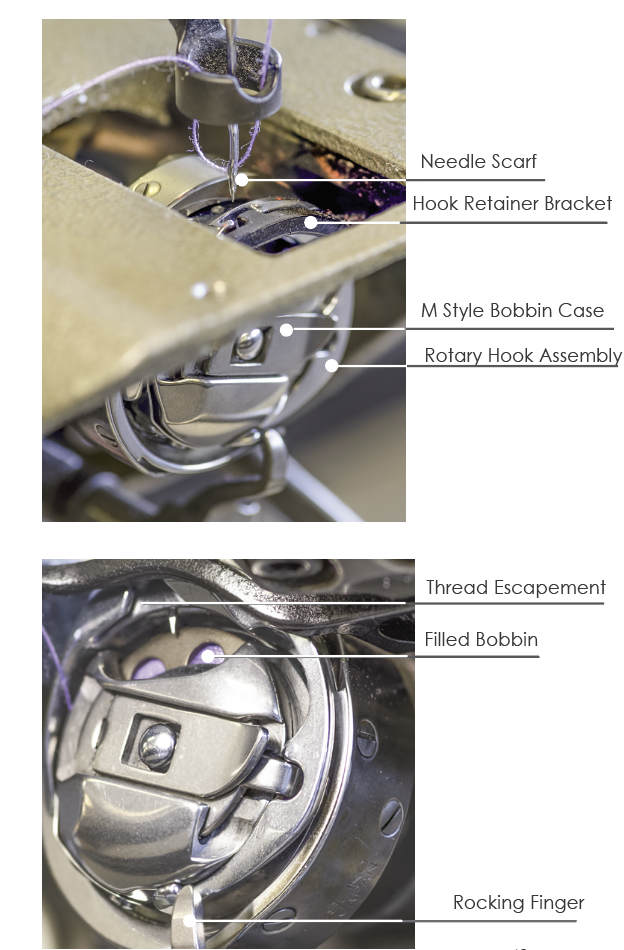
The rotary hook assembly consists of the hook race, bobbin case, and bobbin and it is secured to the rotary hook shaft with two set screws. The bobbin is inserted into the bobbin case that is inserted into the rotary hook assembly. The semi-circular hook race spins at high speeds around the bobbin case.
Some of the problems that can occur with the rotary hook assembly include:
- Lint and thread buildup around the hook race can cause the race to jam, which in turns jams the motor.
- The deflecting needle hitting the hook race causes burrs (little tiny scratches in the metal) that can cut the thread as it glides over these burrs.
Tip: Use a small paint brush to clean the hook area with the bobbin removed.
Note: Be sure to oil the assembly after each bobbin change.
Hook Timing and Clearance
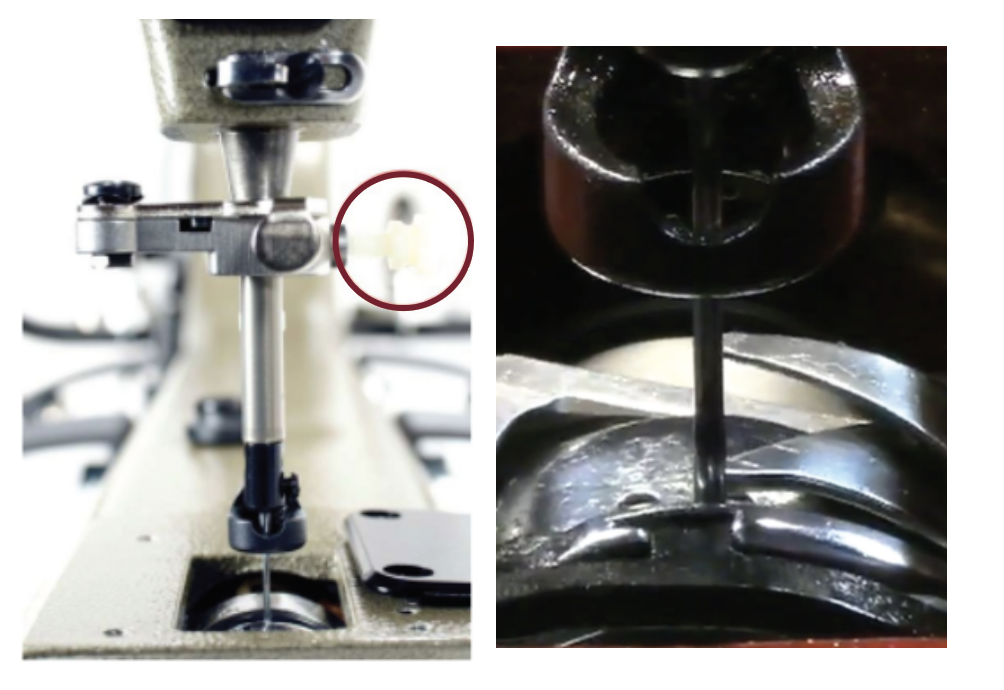
The “timing point” is defined as when the hook is positioned directly behind the needle. At the timing point, the hook should be close to the needle, but not touching it. To check the timing:
- Turn the handwheel forward until the needle is at its lowest point.
- Place the closed Timing Device on the needle bar as high as possible and tighten screw gently.
- Swing spacer out of the way.
- Turn the hand wheel counterclockwise. (so the hook turns counter-clockwise) until the clamp stops the machine. The needle has come up 3/32” (2.5mm) from the bottom.
- At this time the hook tip should be perfectly lined up with the left edge of the needle.
Check Hook Clearance to the Needle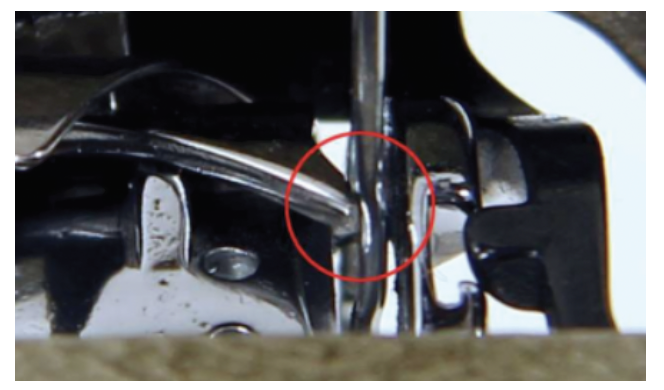
With a 110/18/4.0 needle, there should be virtually no space between the hook tip and the needle. The maximum gap is 0.05mm or .002, almost imperceptible. At no time should the needle ever touch the hook tip or the bobbin case. With the bobbin case out, you can push on the front of the needle with your finger. That way you can see how much deflection there is. There must be some deflection or else the needle is touching the hook.
Video | Checking the Timing
Hook Retainer Bracket Depth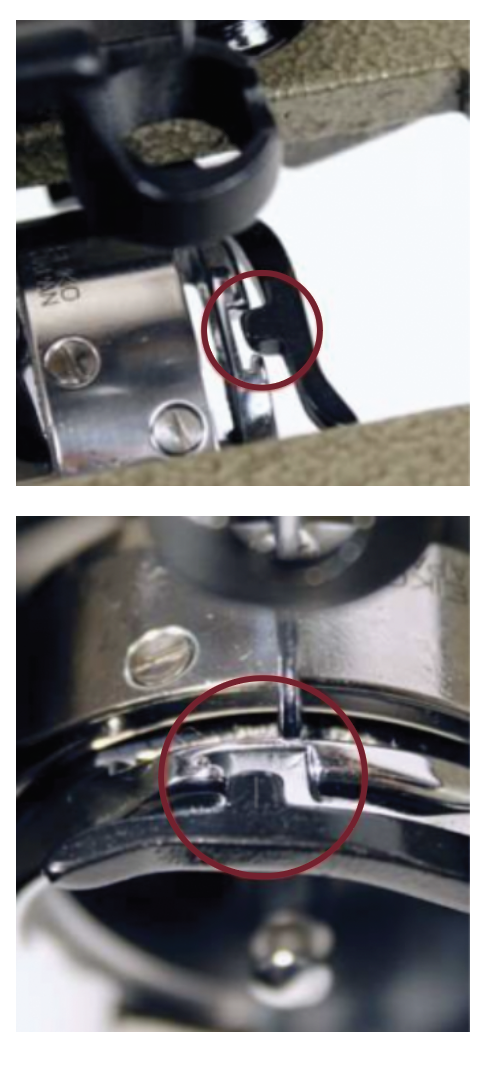
The hook retainer bracket prevents excessive movement of the bobbin case.
With the throat plate removed, rotate the hand wheel until the needle is low enough to view it and the notch in the bobbin case base.
The proper needle/notch relationship is when the center to the right edge of the notch aligns with the needle.
It is okay if the right edge of the notch aligns with the needle, but never the left edge.
To Adjust
1. Loosen the set screw that holds it (stationary finger) to the underside of the casting.
2. Move the bracket to the left or right to set the proper needle/notch alignment.
3. Ascertain that the hook retainer bracket protrudes 1/2 to 2/3 into the depth of the notch.
4. Tighten the hook retainer bracket set screw.
