
VIDEO | Rotate Pattern
RotatePattern rotates the selected pattern(s). When a pattern is moved into a boundary, it is moved at designed orientation. However, sometimes the pattern might look or fit better if it is rotated.
The default rotation is 90 degrees, however, this can be changed to any number.
Accessing Rotate Pattern
| Rotate Pattern can be found under the dropdown Pattern menu | 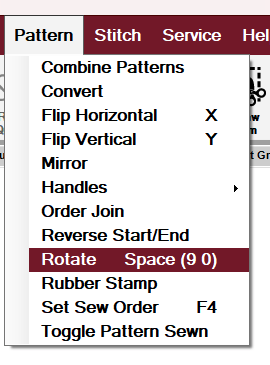 |
| The Rotate Pattern icon can be selected in the tool strip |  |
| Rotate Pattern can also be found by selecting the pattern (left click) and then right-clicking to select Rotate. | 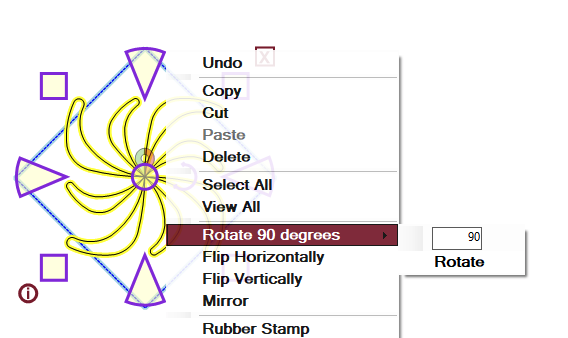 |
| Rotate Pattern can also be accessed through shortcut keys using your keyboard's space button or 9 (clockwise rotation) and 0 (counterclockwise rotation) keys. | 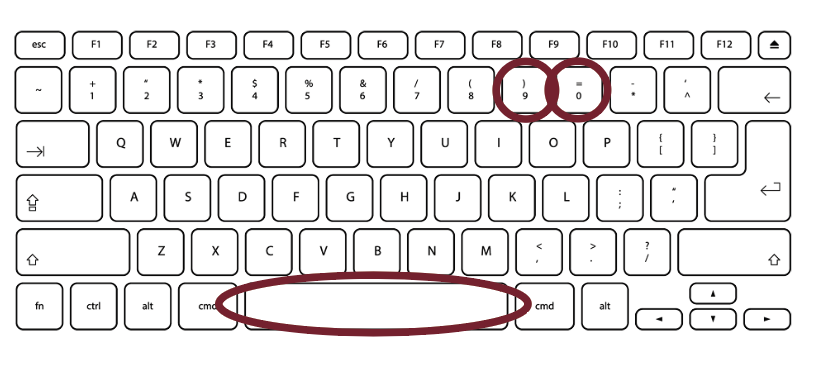 |
Changing the Degrees of Rotate
The default rotation is 90 degrees. Depending on the pattern you select, rotating the pattern by 90 degrees may not even make visible changes to your pattern.
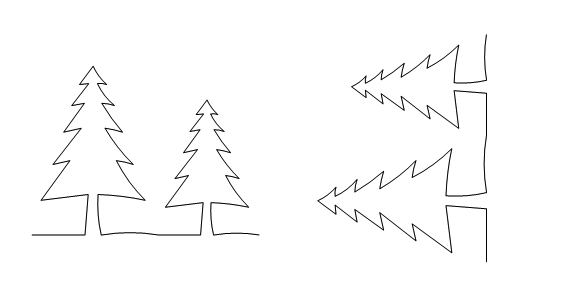
In the example below, the pattern on the right has been rotated 90 degrees from the pattern on the left.

In the example below, rotating the pattern by the same 90 degrees makes a visible difference.
Degree of Rotation
There are several ways to adjust the degree of rotation.
| In this example, we right-clicked on the pattern and hovered over Rotate 90 degrees. | 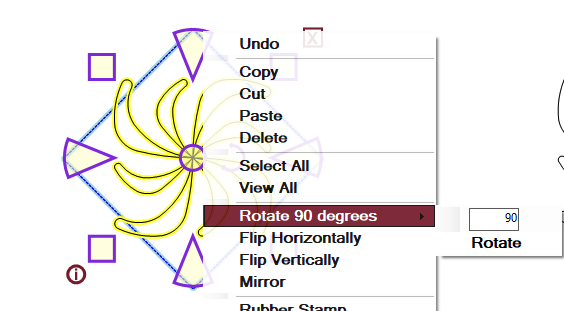 |
| We then highlighted the 90 text and changed it to 45. The result is the pattern rotates 45 degrees to fit in the boundary. This will reset the default to 45 degrees within this project until the degree is changed again. | 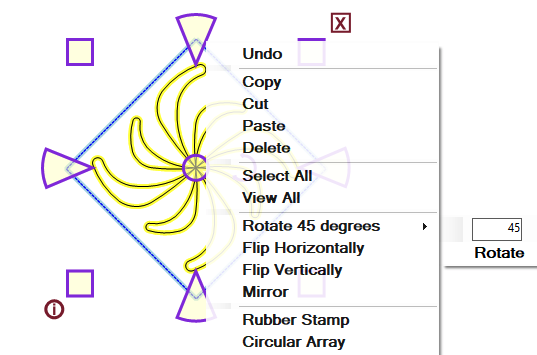 |
 |
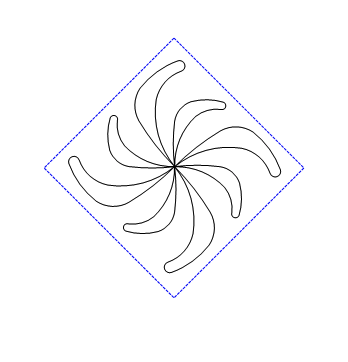 |
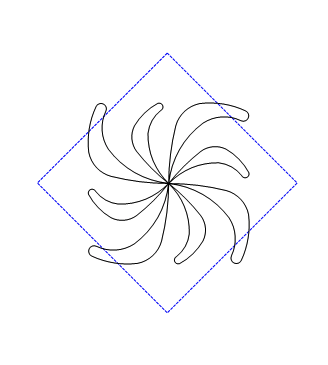
| Before | After rotating the pattern 45 degrees |
Additional Methods of Rotating Patterns
| You can also use the Pattern Properties or Pattern Sizing box at the bottom of the CAD screen to view the pattern angle or change the pattern angle by inserting a new number or using the plus and minus to change the angle incrementally. | 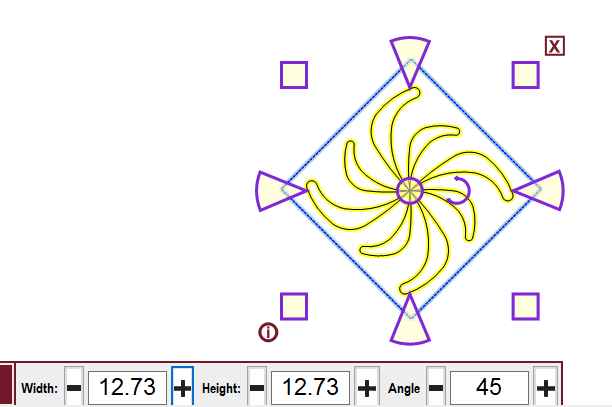 |
| Another way to rotate the pattern is to use the rotate handle located near the center of the pattern and click and hold and drag to the desired angle. |  |