
These screens are used when diagnosing possible issues with your Gammill Vision 2 machine. Normally, they are to be used under the direction of a technician. If selecting to view the screens without a technician, please be sure to follow the directions.
Accessing the Screens
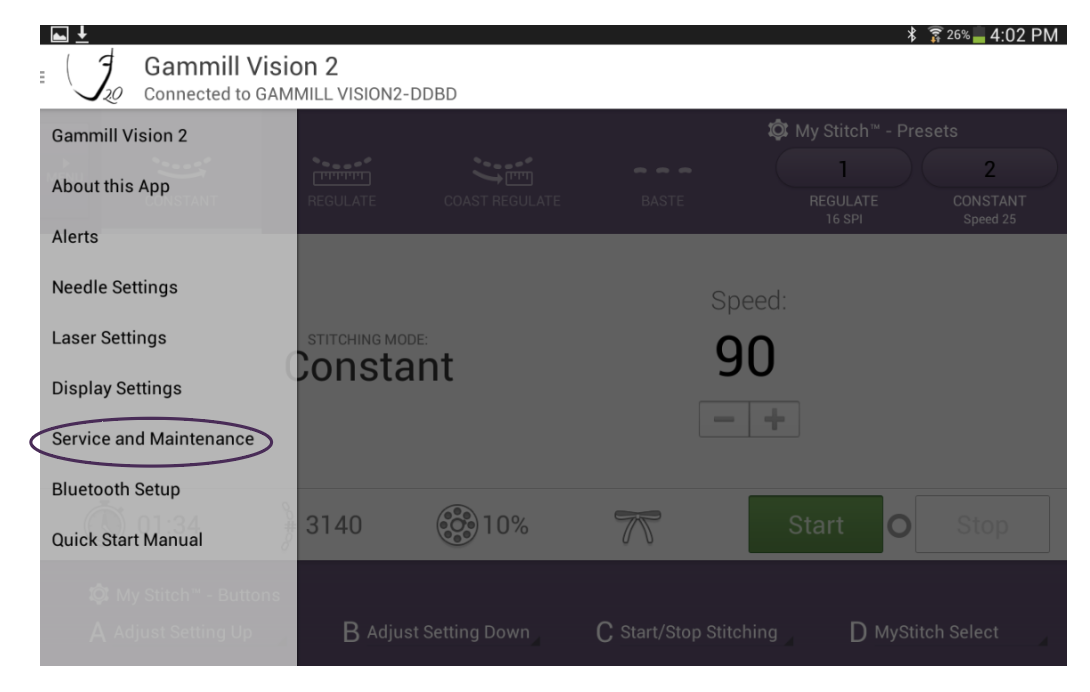
Buttons and Sensors
|
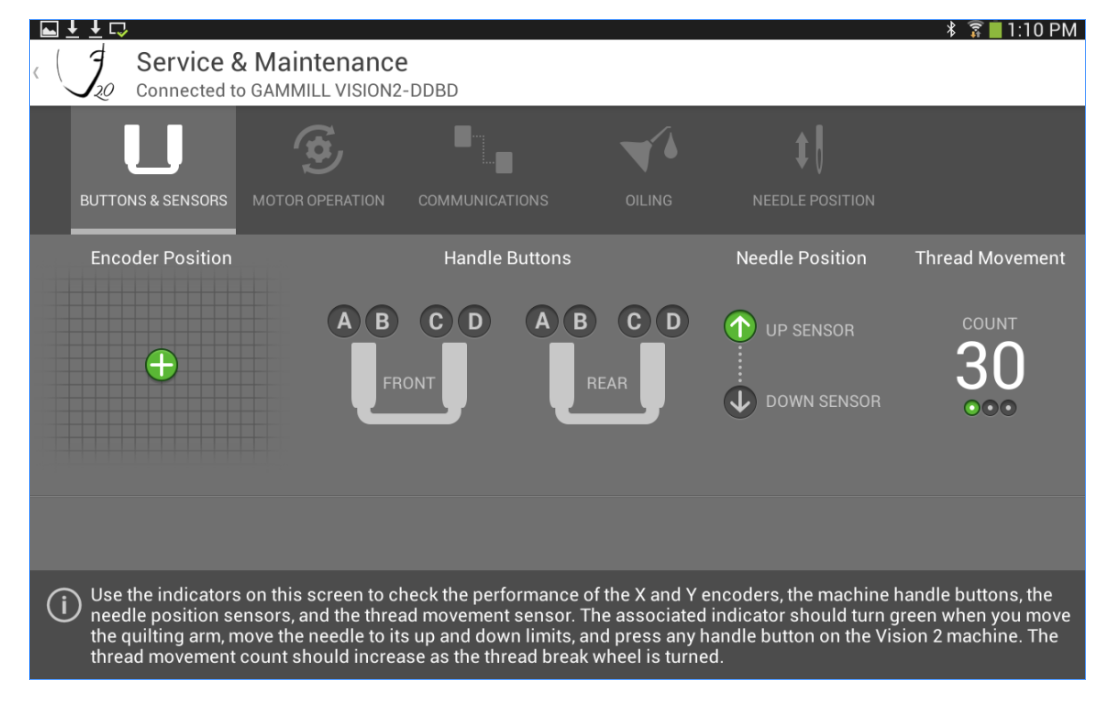
Buttons and Sensors The Buttons and Sensors tab allows you to identify issues with the various sensors and buttons on the machine. |
 |
|
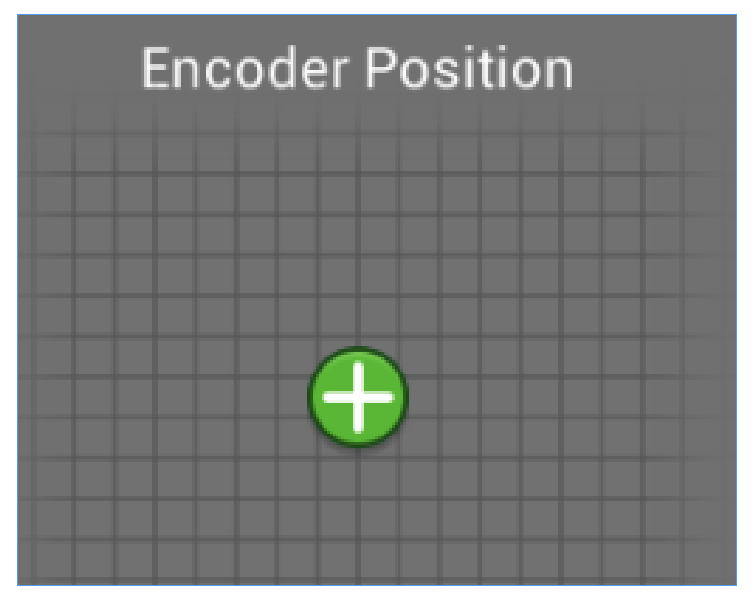
To check the Encoder Position move the machine to the left and right. Notice the green indicator on the encoder position moves left to right as you move the machine. This verifies that the X encoder is working properly. Move the machine to the front and rear. Notice the green indicator on the encoder position moves up and down. This verifies that the Y encoder is working properly. |
 |
|
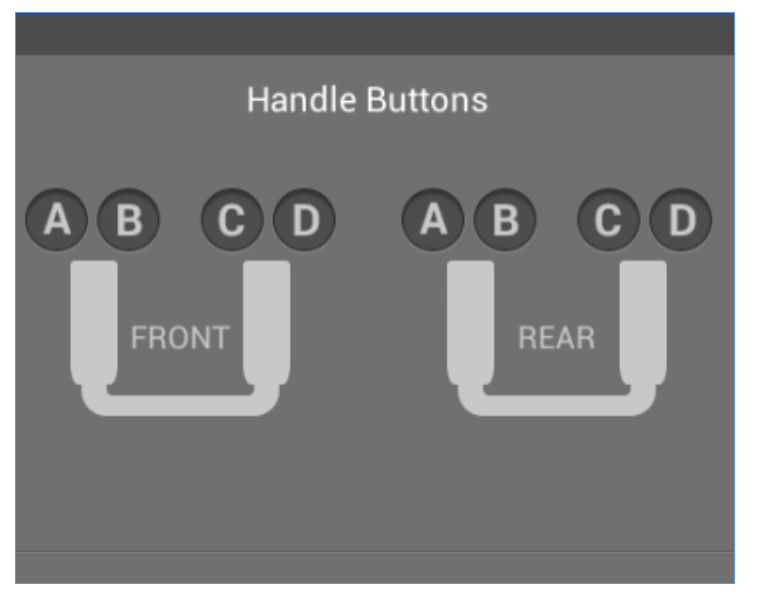
To check Handle Buttons press each handle button. Notice that as the button is pressed, the corresponding indicator turns green. This verifies that all buttons are functioning properly. |
 |
|
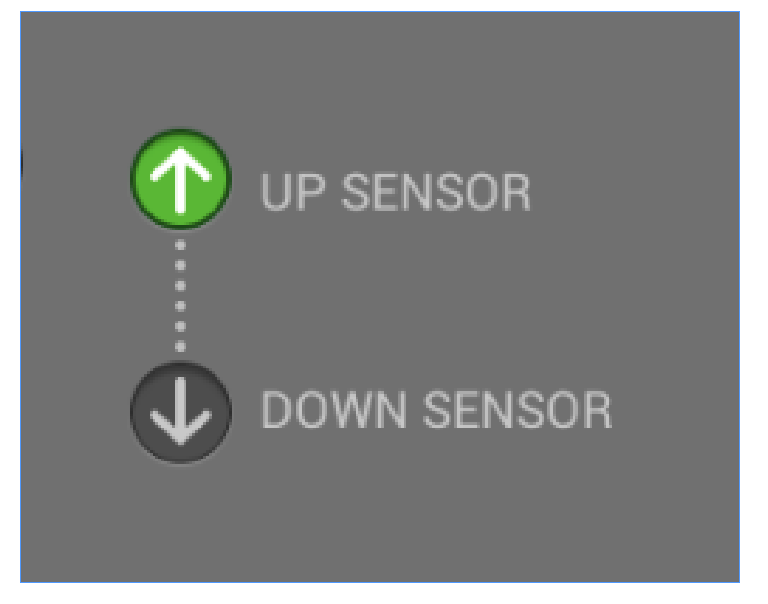
To check the Needle Position slowly turn the hand wheel by hand. Observe if the Up and Down needle position sensors turn green, and that they turn green at the correct needle positions. |
 |
|
To check Thread Movement turn the thread break wheel. The Thread Movement count will either increase or decrease (depending on direction rotated) by 11 for each rotation of the wheel. This verifies that the thread break encoder is working properly. |
 |
Motor Operation
Remove the thread and bobbin from the machine before using this screen. Failure to do this could cause damage to the machine. Moving needles can cause injury. Keep body parts and loose clothing away.
The Motor Operation tab contains the ability to manually operate the motor for troubleshooting purposes as well as initiate the motor calibration routine.
To manually run the motor:
Touch Forward or Reverse to select a direction.
Press the – (minus) or + (plus) to select the speed to run at.
Press the Start button on the screen.
When you are ready to stop running, press the Stop button.
The speed may be adjusted while running, but the motor must be stopped to change direction.

To initiate the motor calibration routine:
Press the Calibrate button on the screen.
A popup will appear, to confirm you are ready to begin calibration. If so, press Start Motor Calibration.
If not, press Cancel.
The calibration routine will run automatically, displaying results as it progresses.
If you run the Calibration and want to then run the Manual Operation, Press Reset to access the Manual Operation speed adjustments.
Communications
Use the communications tab to verify that the internal machine communications are working properly. This screen is useful to diagnose an intermittent connection problem within the machine, or a circuit board that may be failing.
Touch the box beside Z-Drive to test the Z-drive communications.
Touch the box beside Encoder board to test the encoder board.
Select both boxes to test the entire system.
Press the Scan button.
The test will automatically run showing progress and results. The messages received should be equal to the messages sent. If they are not equal, communication was lost between the device and the Bluetooth Control Board.
Touch the Reset button to retest the communication system.
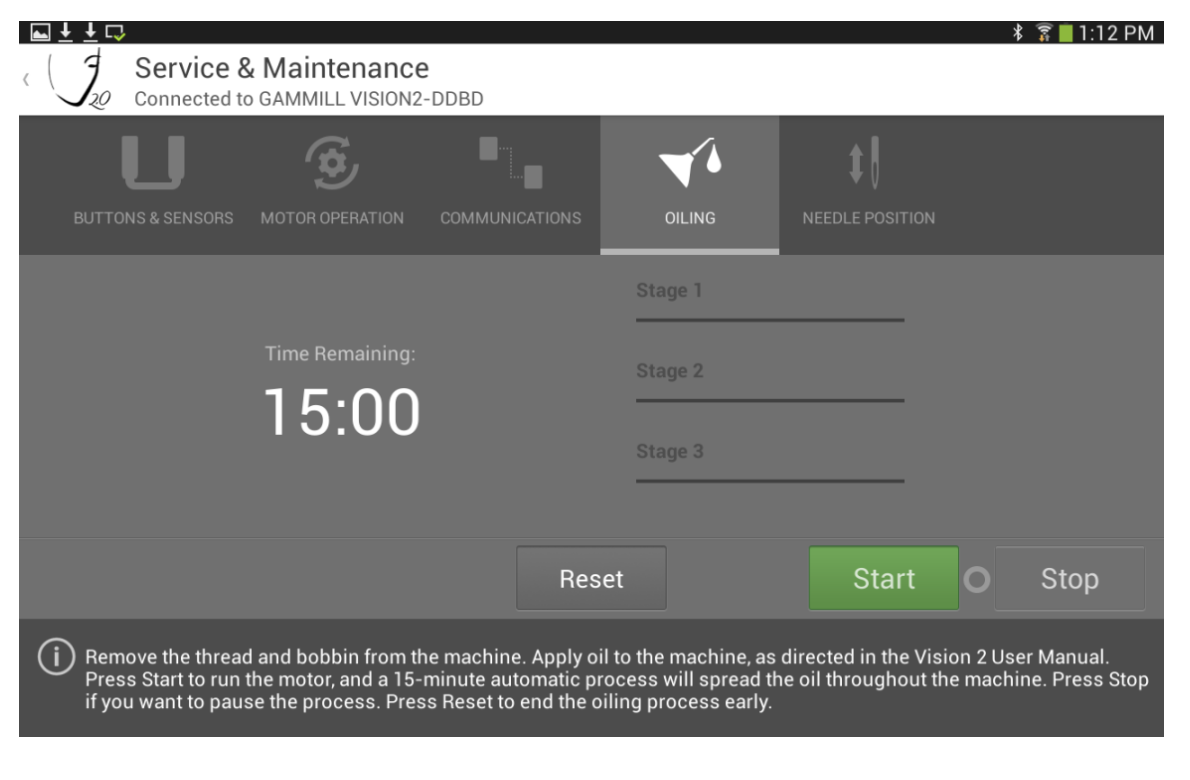
Oiling
Remove the thread and bobbin from the machine before using this screen. Failure to do this could cause damage to the machine. Moving needles can cause injury. Keep body parts and loose clothing away.
Run the Oiling Routine to exercise the machine once it has been oiled after sitting for an extended period of time. This routine helps get the oil properly distributed throughout the system.
The oiling routine is a way to run the machine through a 15-minute oiling routine. During this routine, the machine will run 5 minutes in forward, 5 minutes in reverse, and 5 minutes in forward.
To run the Oil Routine:
Fill all oiling points on the machine. See Oiling Instructions on page 11.
Touch the Start button.
The machine will go through the routine and show the progress. When the routine is complete, the machine will automatically stop running.
To Stop and Resume the Oiling Routine:
Touch the Stop button to stop the oiling routine.
Touch the Reset button to begin from the beginning of the oiling routine.
To exit and return to the main screen, press the left arrow at the top left of the screen.
Stage 1 runs the machine forward for 5 minutes. Stage 2 runs the machine reverse for 5 minutes. Stage 3 runs the machine forward for 5 minutes.
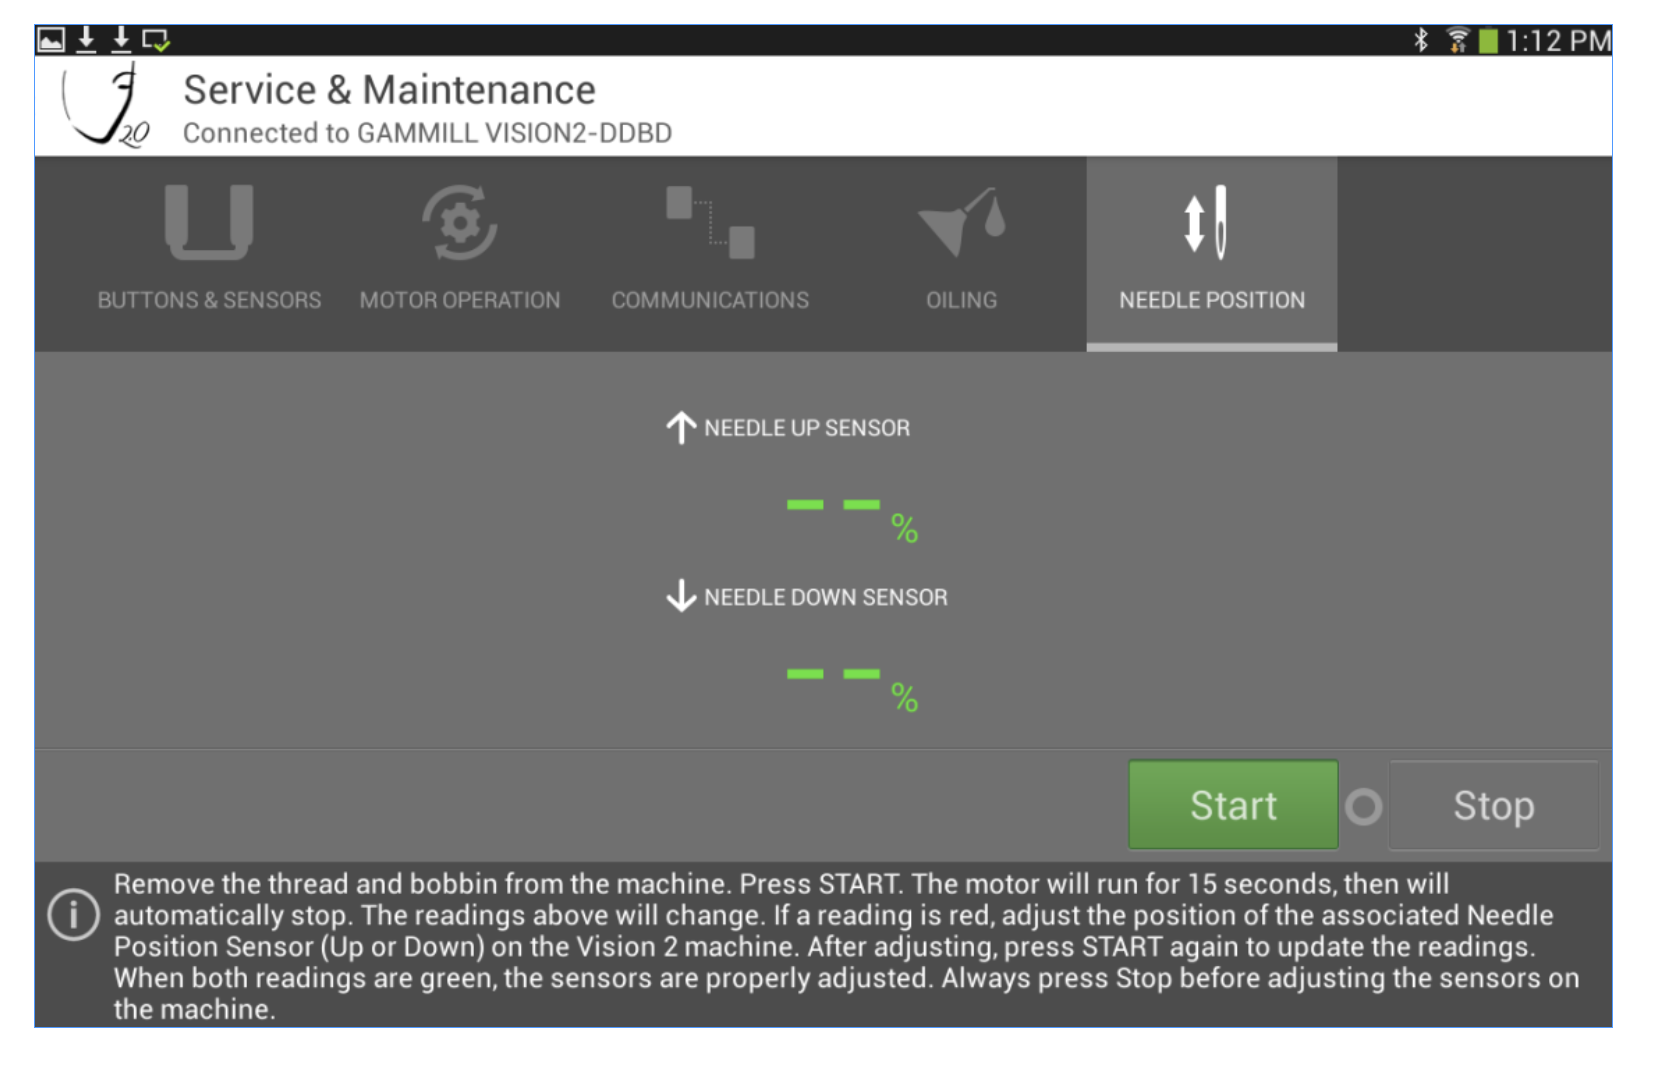
Needle Position
Remove the thread and bobbin from the machine before using this screen. Failure to do this could cause damage to the machine. Moving needles can cause injury. Keep body parts and loose clothing away.
Automatically verify that the needle position sensors are working and adjusted properly by using the Needle Position tab. To test the Needle Sensors touch the Start button
The machine will run an automated test and stop when complete. The display will show the values for the up and down sensors as well as color and symbols to show if the values are acceptable or not.
If the value is green, and followed by a checkmark, the test has passed. If the value is red and followed by an X, the test has failed. In the event of a failure, consult the Vision 2 Service Manual for further steps.
 .
.