
VIDEO | Set Sew Order
Set Sew Order is used most often to check the sewing sequence since other features (like Order Join) will resequence patterns automatically. Initially, the sew order is determined by the order the patterns are placed on the screen.
Initiating Set Sew Order
 |
 |
 |
| Use the icon on the tool strip to Set Sew Order | Select Set Sew Order from the dropdown Pattern menu | Use the F4 key to Set Sew Order. |
Set Sew Order is an easy way to visually check a group of patterns for stitching order and direction. For example, if two patterns should connect and stitch continuously, but they have arrows pointing to each other, one of the patterns needs to change direction.

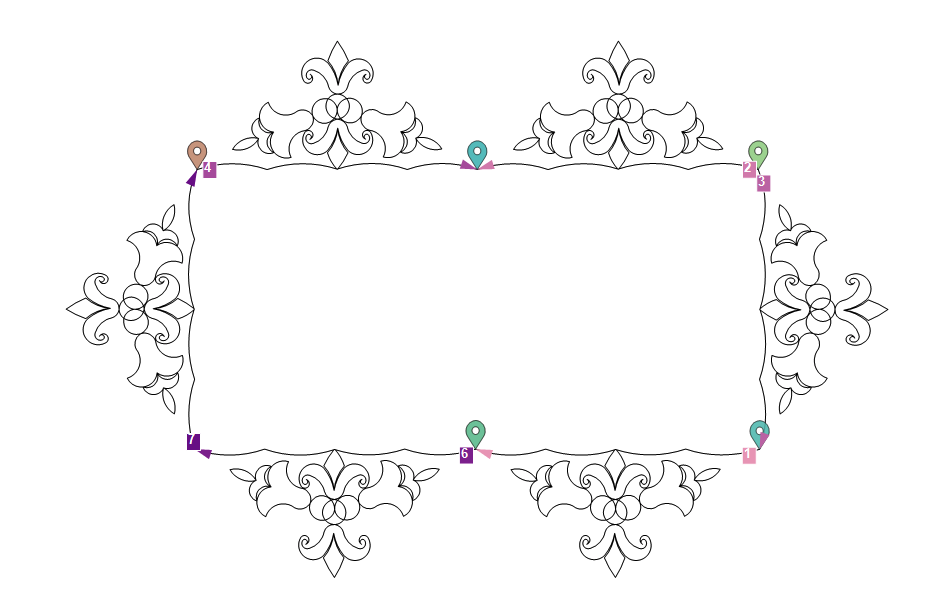
Colored boxes are used to differentiate patterns. The start of a pattern always has a number, in a colored square box. The end of that pattern always has an arrow of the same color, showing the stitching direction. Click on the arrow to change the stitching direction; the color does not change. Click on the pattern sequence number (the numbered box), and the color does change (arrow and number box) to royal blue, and a new sequence number is assigned. To set the stitching order, click each pattern's sew order box in the order you want them to stitch. Right-click to end the numbering process. Press Escape on the keyboard to exit without saving your changes.
| In this example, we can see the patterns were not placed in order because of the Start, End and Jump Stitch markers. | 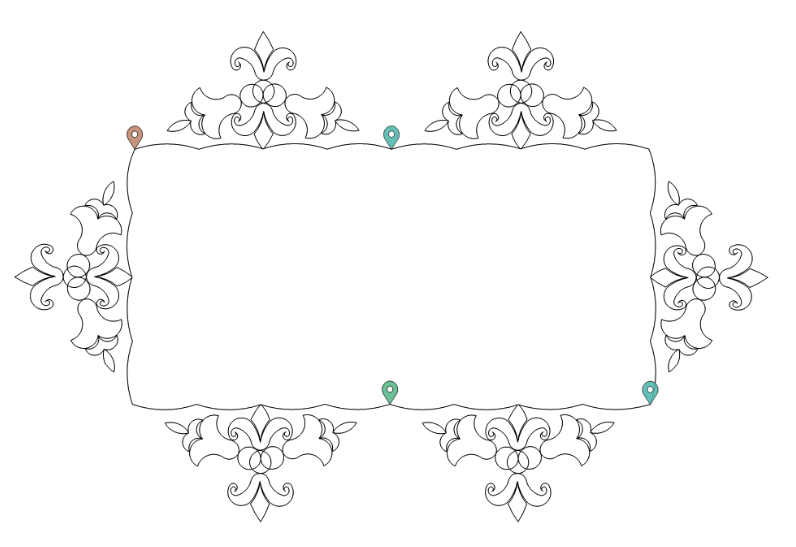 |
|
Turn Set Sew Order on to double-check and see the numbers are out of order and the arrows, which indicate the stitching direction, show that the patterns are stitching toward each other. |
 |
| In this example, we want to start stitching in the upper left corner with the pattern that is currently set as stitch order of 4. | 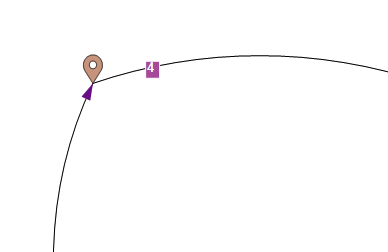 |
| Click the sew order box and it turns to translucent with the number 0, which indicates we have changed it to the first stitch point. | 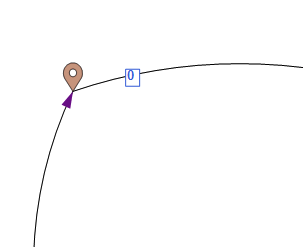 |
| We will click the next stitch point but in this case, we have a problem. There is not a number but rather a jump stitch in the middle because the arrows show the patterns are stitching into each other. | 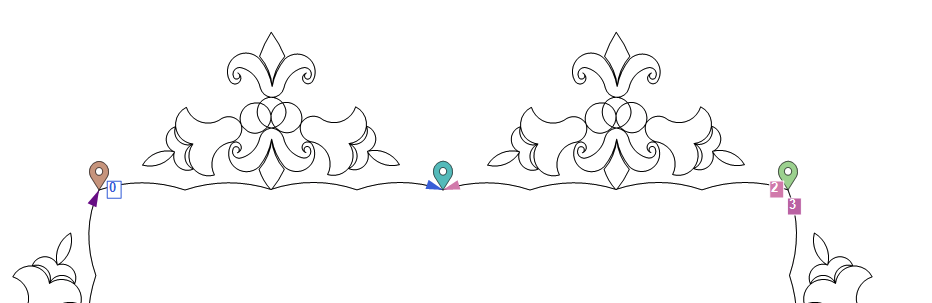 |
| Click the pink arrow to change that pattern's stitching direction and a pink 2 appears. | 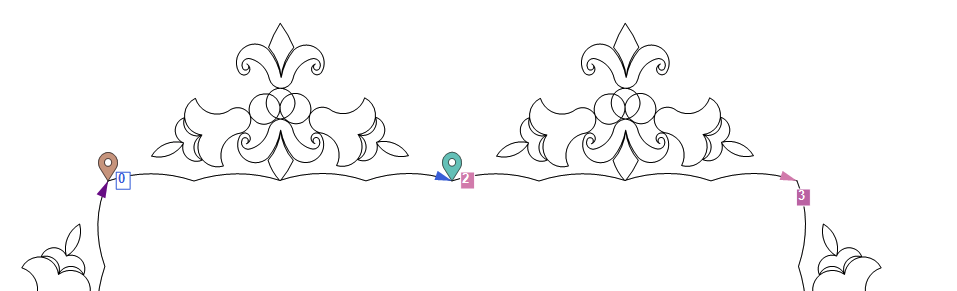 |
| Next, we click the 2, which changes it to a translucent and blue 1 since it is our second number to select after first setting the 0 start point. | 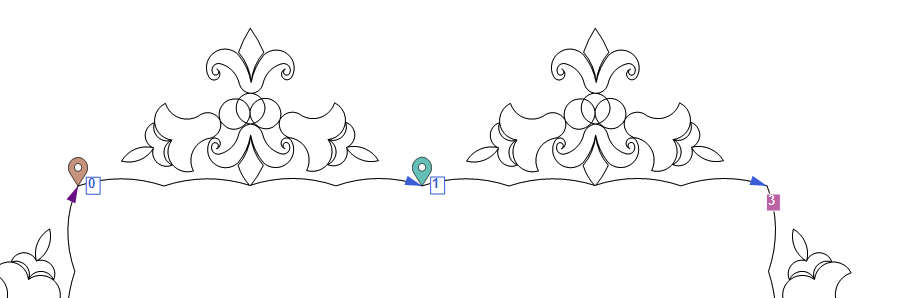 |
| We continue clicking the beginning of each pattern and now our patterns are in the correct sew order. | 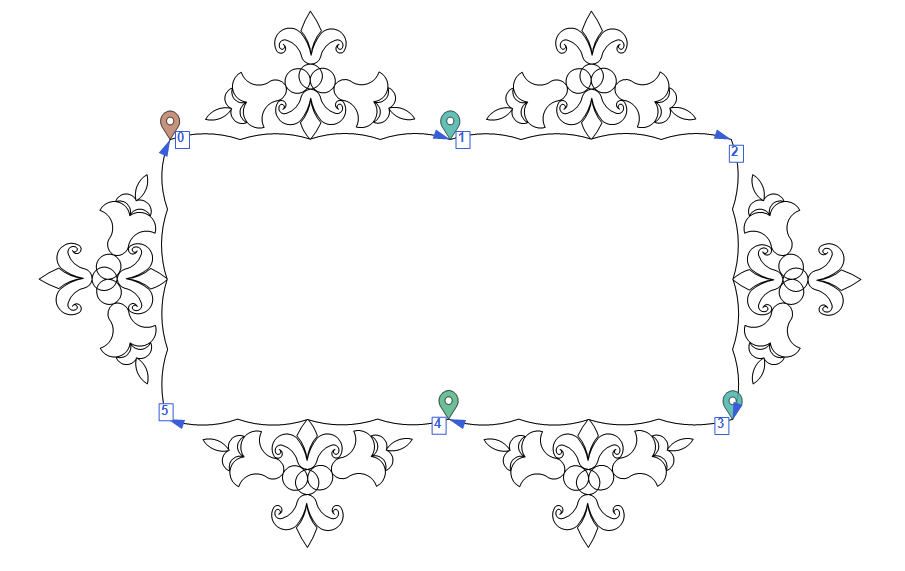 |
.