
Constant Mode
Constant Mode stitches at an unchanging speed. The rate the needle moves up and down to stitch does not increase or decrease with the movement of the head, but rather stays constant.
To engage Constant Mode:
Tap the Constant icon in the top ribbon.
Notice the stitching mode is indicated in the mode section in the middle of the screen.
To set Constant Mode speed:
Adjust the speed up or down by tapping the plus or minus sign in the mode section.
Speed can be set from 0 to 100.
To adjust Constant Mode speed:
Tap the plus or minus sign to increase or decrease speed while stitching, or
Set the My Stitch™ Buttons to adjust setting up and/or adjust setting down. Then you may use the handle buttons to adjust the speed while stitching.

Regulate Mode
Regulate Mode controls the length of the stitch regardless of the movement of the machine. Whether the head moves slowly or quickly, the stitch length remains the same.
To engage Regulate Mode:
Tap the Regulate icon in the top ribbon.
Notice the stitching mode is indicated in the mode section in the middle of the screen.
To set Regulate Mode speed:
Adjust the stitch length up or down by tapping the plus or minus sign in the mode section.
Stitch length can be set from 8 to 24 stitches per inch.
To adjust Regulate Mode speed:
Tap the plus or minus sign to increase or decrease the stitch length while stitching, or
Set the My Stitch™ Buttons to adjust setting up and/or adjust setting down. Then you may use the handle buttons to adjust the speed while stitching.
Note: Because the machine is maintaining a set number of stitches per inch, when the head stops, moving stitching pauses. Moving the head will cause it to resume stitching. If the head is not moved for 10 seconds, the machine will stop stitching. Press the Start button to resume.

Alert Over Speed 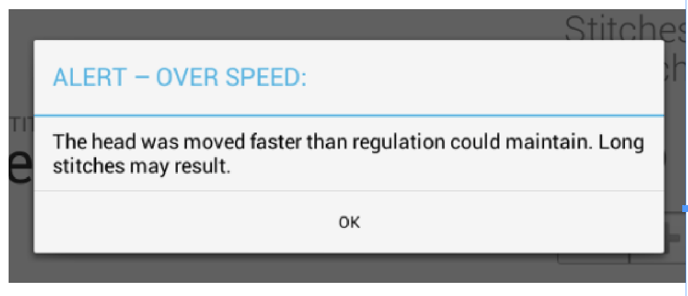
When the stitches per inch are set at a high number, and the head is moved quickly, it is possible that the required motor speed would be higher than can be maintained for an even stitch. If this situation occurs, an alert message: Over Speed will appear on the screen. If this appears, long stitches could result. Setting a lower stitches per inch setting, slowing movements, or both will prevent this. If the message continues to occur, further troubleshooting instructions are available in the Vision 2.0 Service Manual.
Coast Regulate Mode
Coast Regulate Mode offers graceful transitions between large sweeping patterns and fill work. By fluctuating between stitch regulation and constant speed, the machine adjusts to the rate the head is moved providing the best of both worlds.
To engage Coast Regulate Mode:
Tap the Regulate icon in the top ribbon.
Notice the stitching mode is indicated in the mode section in the middle of the screen.
To set Coast Regulate Mode speed:
Adjust the stitches per inch up or down by tapping the plus or minus sign in the mode section.
Next, adjust the speed up or down by tapping the plus or minus sign.
To adjust Coast Regulate Mode speed:
Tap the plus or minus sign to increase or decrease speed while stitching or stitches per inch, or
Set the My Stitch™ Buttons to adjust setting up and/or adjust setting down. Then you may use the handle buttons to adjust the speed while stitching.

How Coast Regulate Works
Coast Regulate Mode fluctuates automatically between Constant and Regulate modes. The set speed and stitch per inch is used to decide which mode the machine will stitch in. As the head is moved, the machine continually looks at the motor speed required to maintain the stitches per inch. If this rate of movement is above the set speed, the machine operates in a regulated mode and maintains the set stitches per inch. If the speed is below the set speed, then the machine runs at a constant mode at the speed setting. As an advanced feature, the point at which the machine switches from Regulate to Constant can be selected independently from the Constant speed.
To enable the Coast Regulate Switch Point:
Tap the Change Switch Point (advanced) button located below the words “Coast Regulate” in the Stitching Mode indicator in the white mode section.
The switch point appears in the mode section.
To set the Coast Regulate Switch Point:
Adjust the switch point up or down by tapping the plus or minus sign below the Switch Point indicator.
To disable the Coast Regulate Switch Point:
Tap the Link Switch Point to Speed (default) button located below the words “Coast Regulate” in the Stitching Mode indicator in the mode section.
Baste Mode
Baste mode functions like stitch regulation on a large scale, stitching from ¼ inch stitch up to 4 inches per stitch. This helps to stabilize the quilt.
To engage Baste Mode:
Tap the Baste icon in the top ribbon.
Notice the stitching mode is indicated in the mode section in the middle of the screen.
To set Baste Mode speed:
Adjust the stitch length up or down by tapping the plus or minus sign in the mode section.
Stitch length can be set from ¼ inch to 4 inches in ¼ inch increments.
To adjust Baste Mode speed:
Tap the plus or minus sign to increase or decrease the stitch length while stitching, or
Set the My Stitch™ Buttons to adjust setting up and/or adjust setting down. Then you may use the handle buttons to adjust the speed while stitching.
Note: Because the machine is maintaining a set number of stitches per inch, when the head stops moving, stitching pauses. Moving the head will cause it to resume stitching. If the head is not moved for 10 seconds, the machine will stop stitching. Press the Start button to resume.
