
For more information about needles, needle bar, and the needle area, visit this article.
Recommended Needles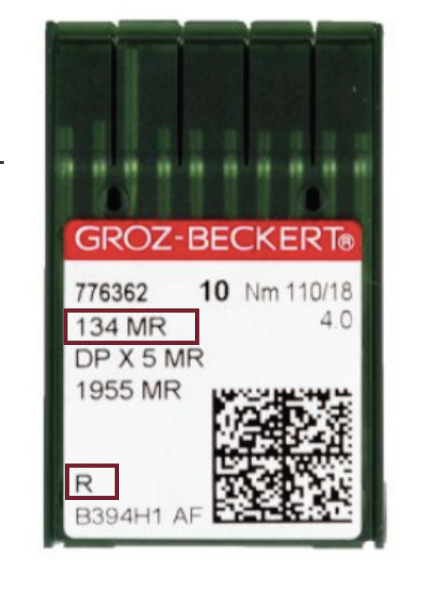
Gammill machines are designed to use standard length industrial machine needles in a variety of sizes.
At the factory, your machine is adjusted to sew with a 4.0 needle. The clearance to the hook tip varies with needle size, so the machines stitch best with 3.5, 4.0, 4.5.
Use Groz-Beckert 134 MR (needle type) and R (sharp tip)
Most longarm threads use 3.5 or 4.0
Silk threads use 3.0 or 3.5
Metallics use 4.5 or 5.0
A higher numbered needed has a thicker shaft, which will more easily penetrate thicker fabrics with less thread breaks.
Tip: It is recommended that the needle be changed after each quilt. The points become blunt with use and may cause damage to the fabric or result in poor stitch quality.
Parts of a Needle
The picture shows a properly inserted needle. The 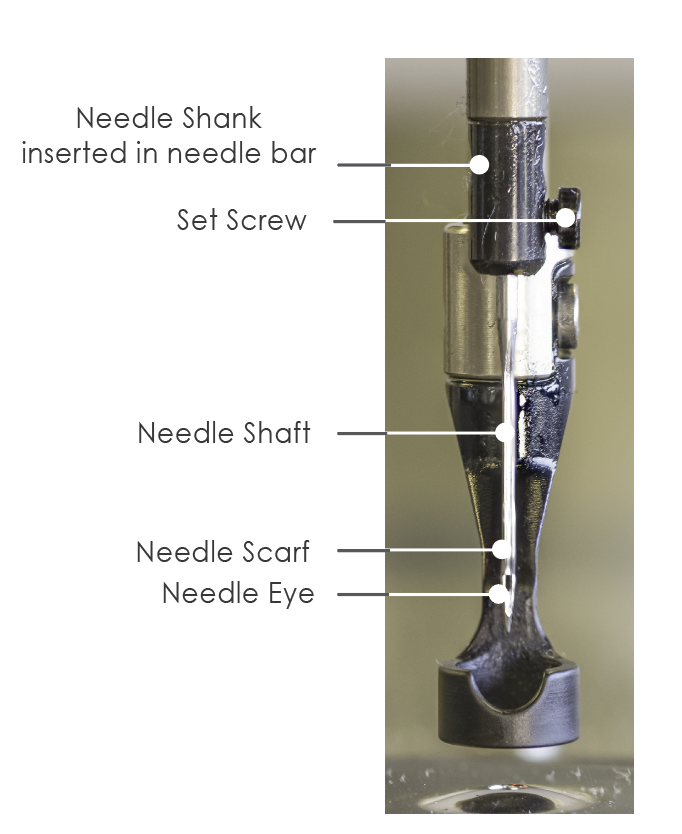 top part of the needle is called the shank. The shank is inserted into the needle bar and a set screw holds it in place. The area of the needle between the shank and the eye is called the shaft. There is a groove at the front of the needle that runs the length of the shaft and faces away from the machine. The grove provides a space for the thread on its way into the fabric layers. Without the groove, the thread would break as it enters the fabric. So, in addition to having the eye face toward the front of the machine, make sure the side with the groove is facing you, not the machine. The concave area in the back of the needle is called the scarf. The scarf faces the throat of the machine and provides a place for the thread to form a tiny loop as the needle is raised out of the fabric. The hook on the bobbin race takes this loop of top thread and loops it around the entire bobbin case to form the stitch.
Video | Replacing the Needle
|
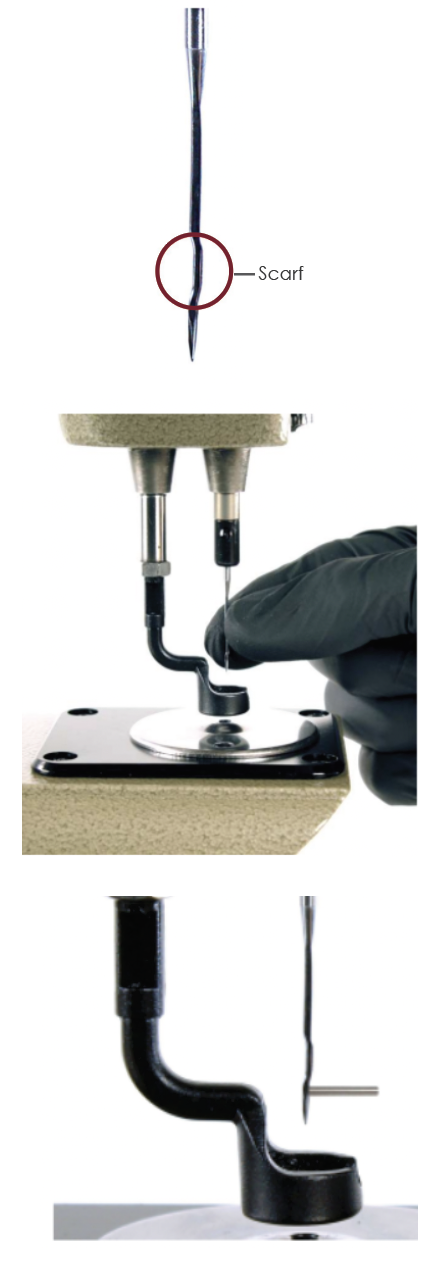
Replacing the Needle Unlike home sewing machine needles, the shank of an industrial needle is round. There is no flat edge to ensure proper installation of the needle in the needle bar. Instead, you must check that the eye of the needle is facing straight toward the front of the machine.
Note the long groove along the FRONT of the needle.
Note the scarf (bump out) on the FRONT of the needle.
Loosen the needle set screw and remove the old needle. Clean all lint out of the hole at the top of the needle. You can use canned air to blow lint out or insert the sharp end of the old needle to clean out the needle bar.
Insert the needle shank into the needle bar making sure the needle is inserted as far as it can go.
Rotate the needle so that the long thread groove is facing directly out to the front of the machine. A needle bar magnet can aid you. In most cases the best angle for your needle is such that your needle eye points at the onboard bobbin winder thread cone holder at the back of your machine.
Carefully position the needle at an angle that you’ve chosen on purpose. Tighten the set screw.
Tip: You don’t want the needle to be nearly or exactly the same angle as any line in your quilting pattern. A needle alignment magnet helps to get perfect stitches. |
 |