
Rocking Finger Purpose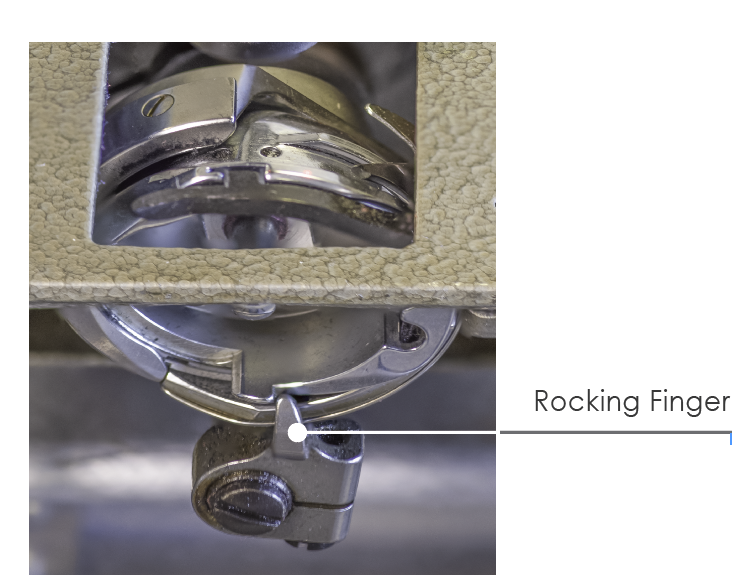
With Gammill’s exclusive Rocking Finger there’s always a gap for the upper thread, regardless of environmental factors.
This gives a much more stable tension that allows more confidence in stitches on the back of the quilt.
Only Gammill machines that are 22, 26, and 30 inches have the Rocking Finger.
The Rocking Finger stabilizes your machine’s tension by forcing a gap for the upper thread to return back up from the bobbin area regardless of environmental factors such as:
- Lubrication
- Room temperature
- Speed of stitching
- Type of thread
- Humidity
Checking and Adjusting the Rocking Finger Position
|
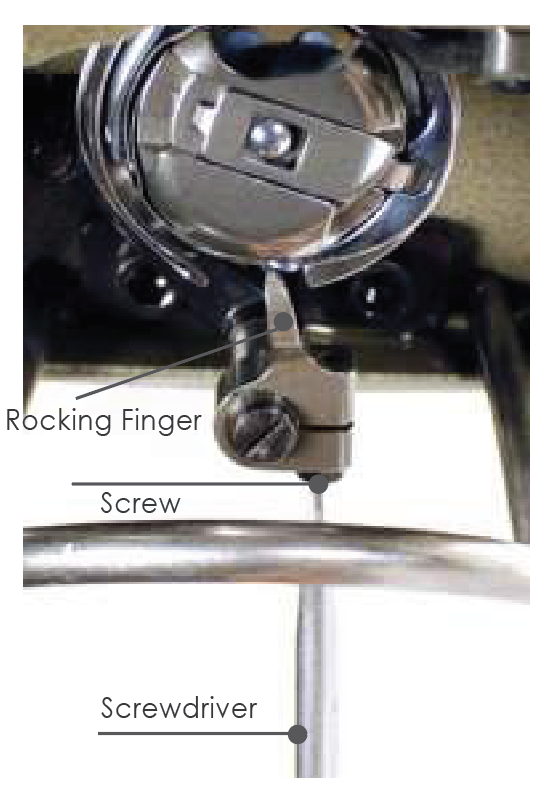
The finger needs to be positioned so there’s a gap that allows the upper thread to pass through when the thread is coming past it. It moves front to back AND side to side when the screw is loosened. Do not overtighten the screw (pointed down at the floor) that clamps the finger. This will bind up the machine. |
 |
|
The Rocking Finger functions to open the gap around the Hook Retainer Bracket so that, at the finger’s maximum travel to the left, the gap around the black bar is even on the left and right sides. |
 |
Video | How to adjust the rocking finger.
Adjusting the Rocking Finger Timing 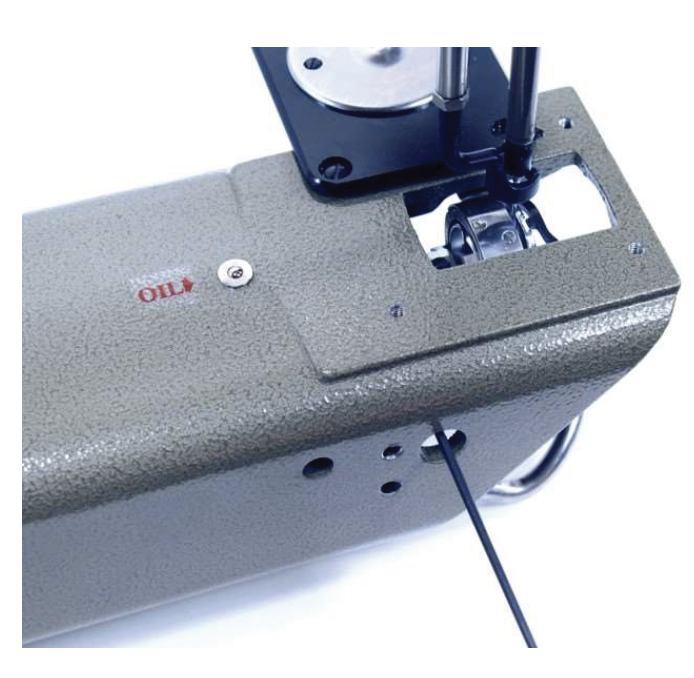
First, it is important that the hook timing is correct before adjusting the rocking finger.
Lower the needle fully. Using the timing tool for hook timing, raise the needle from the bottom 3/32” and the hook point should be behind the needle.
Now, remove the timing tool and without touching the handwheel, reset and install the timing tool again and raise the needle bar an additional time (now it is 3/16” up).
If the timing for the Rocking Finger is correct, one of the Rocking Finger cam screws will now be facing the floor, and the second one will be lined up perfectly with the hole on the left side of your machine as shown here.