
VIDEO | Right-Click CAD Preview
When you right-click on the CAD screen, a boundary, or trim, with no patterns selected, you'll see a menu of options to open features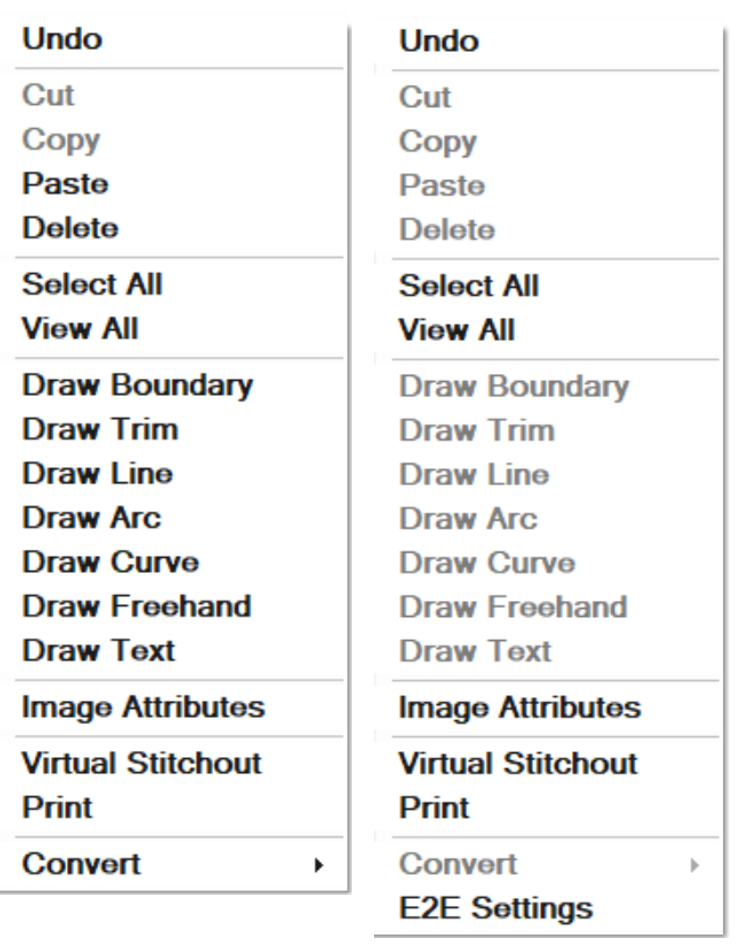 or adjust or view settings in CreativeStudio. Some actions may be grayed out if they are not currently available based on whether a trim or boundary is selected, if its an E2E quilt group, or other factors.
If you right-click on the empty CAD screen of an E2E or Repeat Patterns E2E quilt group, or on a boundary or a trim within an E2E or Repeat Patterns E2E quilt group (with no patterns selected), you will see an additional option (E2E Settings) at the bottom of the menu.
The available actions are listed below. Many of these options are detailed in other articles. Links to more detailed information are provided.
Undo
This option will reverse the last action taken on the CAD screen. Other ways to access Undo include the keyboard shortcut of Ctrl + Z or the Undo icon or Edit dropdown menu item.
Cut
This option will remove the selected object from the CAD, while retaining a copy of it on the clipboard so it can be pasted somewhere else. (Shortcut is Ctrl+X).
Copy
This option will make a copy of the selected pattern or patterns, ready to paste it elsewhere as needed. CS now allows patterns to be copied from one quilt group, and pasted into another quilt group, or even into another project. (Shortcut is Ctrl+C).
Paste
This option will allow a cut (or copied) pattern to be positioned and placed multiple times if needed. If multiple patterns were selected (with cut or copy) the pasted version will have combined them into one pattern. When Paste is initiated, the cut (or copied) patterns appear to be attached to the mouse pointer. Move the pointer (and patterns) to the desired location and left-click to place them. Repeat as often as needed.
When done, right-click to end the paste process. (Shortcut is Ctrl+V).
Delete
This option will delete the selected trim or boundary. (Keyboard shortcut is the Delete key).
Select All
This option will select (highlight) all the patterns in the quilt group. (Keyboard shortcut is Ctrl + A).
View All
Changes the Zoom perspective so all patterns and/or boundaries in the current quilt group are visible.
Draw Boundary
This action will open the draw feature for creating boundaries with the mouse or machine head.
More information can be found in the Draw Boundary article.
Draw Trim
This action will open the draw feature for creating trims with the mouse or machine head.
More information can be found in the Draw Trim article.
Draw Line
This action will open the draw feature for creating line patterns with the mouse or machine head.
More information can be found in the Draw Line article.
Draw Arc
This action will open the draw feature for creating sewable three-point arcs with the mouse or machine head.
More information can be found in the Draw Arc article.
Draw Curve
This action will open the draw feature for creating sewable curves with the mouse or machine head.
More information can be found in the Draw Curve article.
Draw Freehand
This action will open the draw feature for creating freehand patterns in CreativeStudio.
More information can be found in the Draw Freehand article.
Draw Text
This action will open the draw feature for creating stitchable text in CreativeStudio.
More information can be found in the Draw Text article.
Image Attributes
This action will open a form that allows you to adjust the coloring and intensity of images or the line thickness of patterns and boundaries in a quilt group.

More information can be found in the File Commands - Images article.
Virtual Stitchout
This action will initiate a virtual stitchout where a blue dot will appear and begin tracing the stitch path of the unsewn patterns on your screen.
More information can be found in the Virtual Stitchout article.
This action will create a screen print of the CAD screen that can be saved or printed.
Convert
This action will change a pattern, trim, or boundary to a different format. This right-click menu item has additional options that you can see when you slide the mouse over the carat (black triangle).

More information can be found in the Convert article.
E2E Settings
This action will open a properties window showing the e2e settings. These settings can't be adjusted but instead are intended for information purposes only. In the situation that you would need to set up an identical e2e, you would know the exact repeat number and size, spacing and other settings.
